2007 Buell P3: Chassis 2-73
HOME
FRONT AND REAR ISOLATORS 2.31
FRONT ISOLATOR
Removal
1. Remove seat. See 2.28 SEAT.
2. Remove fuel tank. See 4.2 FUEL TANK COVER/FUEL
TANK.
3. Raise motorcycle until front suspension is unloaded.
4. Remove muffler, and support motor with jack. When iso-
lator is detached, powertrain may move. See 2.20
EXHAUST SYSTEM.
5. Cut horn cable strap.
6. Remove clutch cable tie.
7. See Figure 2-120. Loosen front ground strap bolt for
clearance.
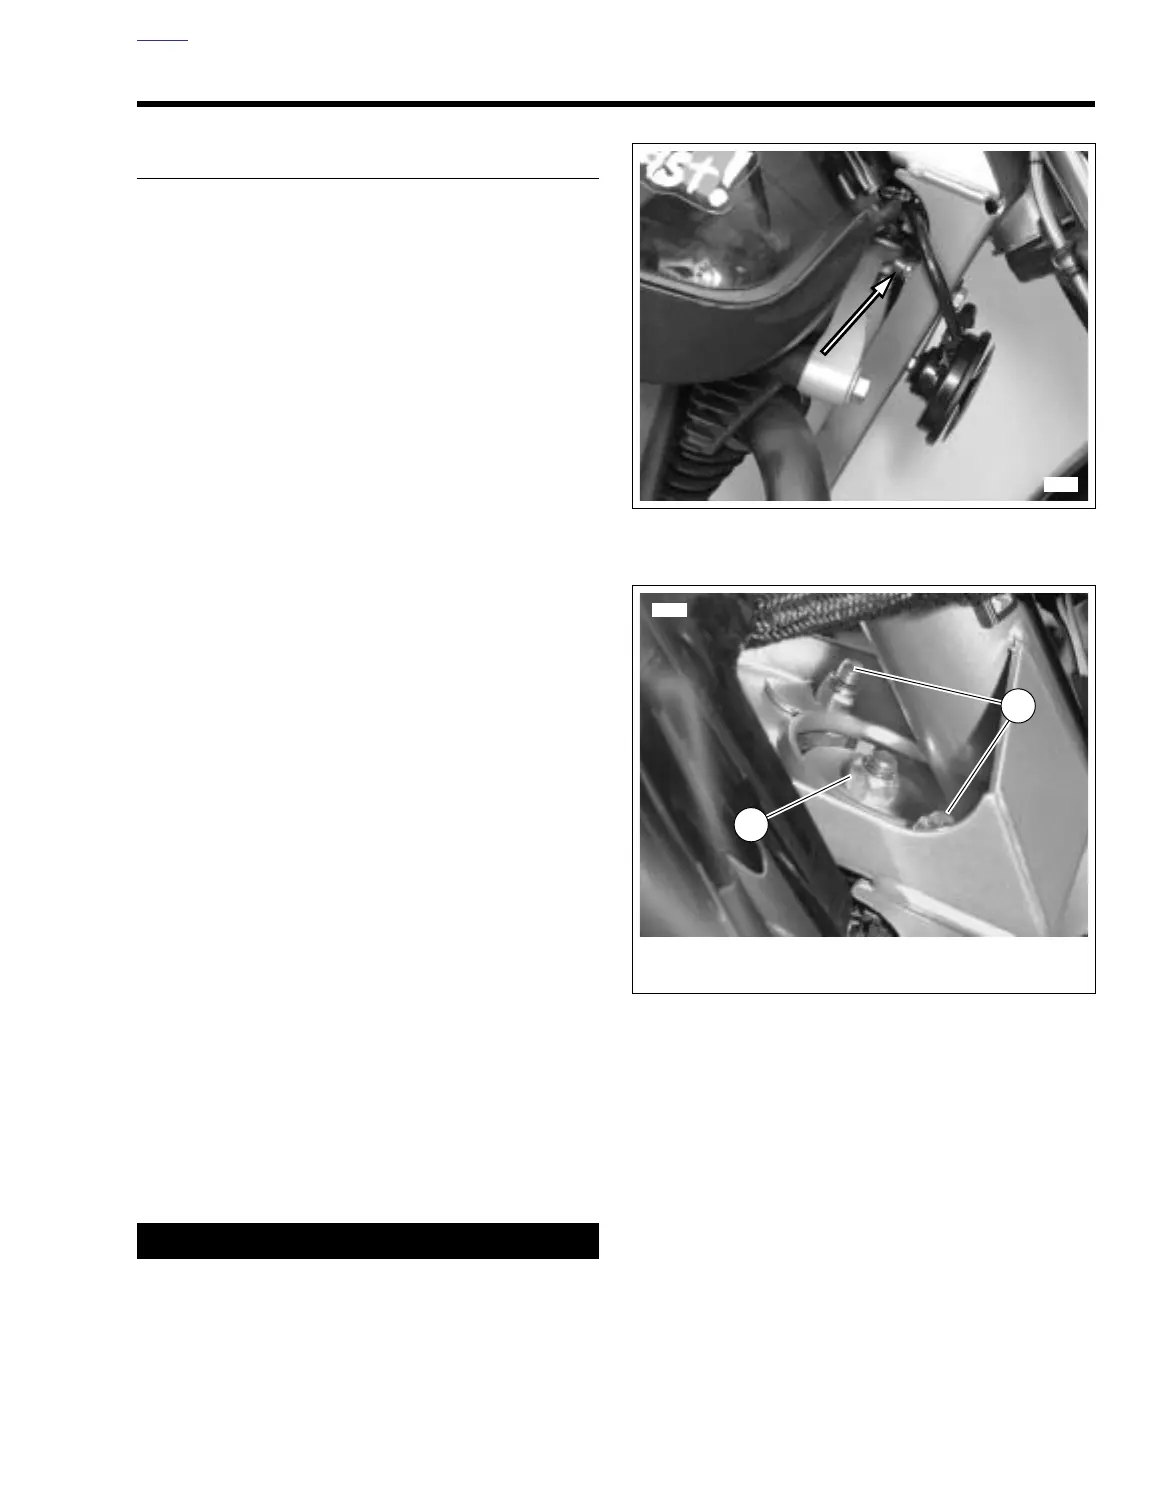
8. See Figure 2-121. Remove two outboard isolator bolts
(1).
9. Remove main isolator bolt and nut (2). Discard nut.
10. Remove isolator.
Installation
1. See Figure 2-121. Position new isolator in frame.
2. Install two outboard isolator bolts (1). Tighten 30-33 ft-lbs
(41-45 Nm).
3. Install main isolator bolt and new nut (2). Tighten main
isolator bolt to 63-70 ft-lbs (85-95 Nm).
4. Tighten front ground strap bolt to 30-33 ft-lbs (41-45
Nm).
5. Install clutch cable to clip.
6. Install horn cable strap.
7. Install fuel tank. See 4.2 FUEL TANK COVER/FUEL
TANK.
11WARNING1WARNING
After installing seat, pull upward on front of seat to be
sure it is in locked position. While riding, a loose seat can
shift causing loss of control, which could result in death
or serious injury. (00070a)
8. Install seat. See 2.28 SEAT.
Figure 2-120. Front Ground Strap Bolt
Figure 2-121. Front Isolator Bolts
7744
1. Outboard isolator bolts (2)
2. Main isolator nut
2
1