7-50 2007 Buell P3: Electrical
HOME
Headlamp
1CAUTION
Handle bulb carefully and wear eye protection. Bulb con-
tains Halogen gas under pressure, which, if not handled
carefully, could cause serious eye injury. (00062a)
1. See Figure 7-63. Connect headlamp connector (3) to
rear of headlamp (9).
NOTE
Align protrusion “A” on headlamp with slot in upper portion of
nest for proper fit. Retaining ring only fits one way. Rotate
retaining ring until all three holes align.
2. Install headlamp and retaining ring (10) to nest with three
phillips screws (11). Tighten screws to 12-14 in-lbs (1-2
Nm).
NOTE
Make sure slots on bezel are positioned so they allow access
to adjusting screws.
3. Install bezel (13) to retaining ring with three phillips
screws (12). Tighten screws to 12-14 in-lbs (1-2 Nm).
4. Install windscreen with four screws and washers. See
2.26 WINDSCREEN.
11WARNING1WARNING
Be sure that all lights and switches operate properly
before operating motorcycle. Low visibility of rider can
result in death or serious injury. (00316a)
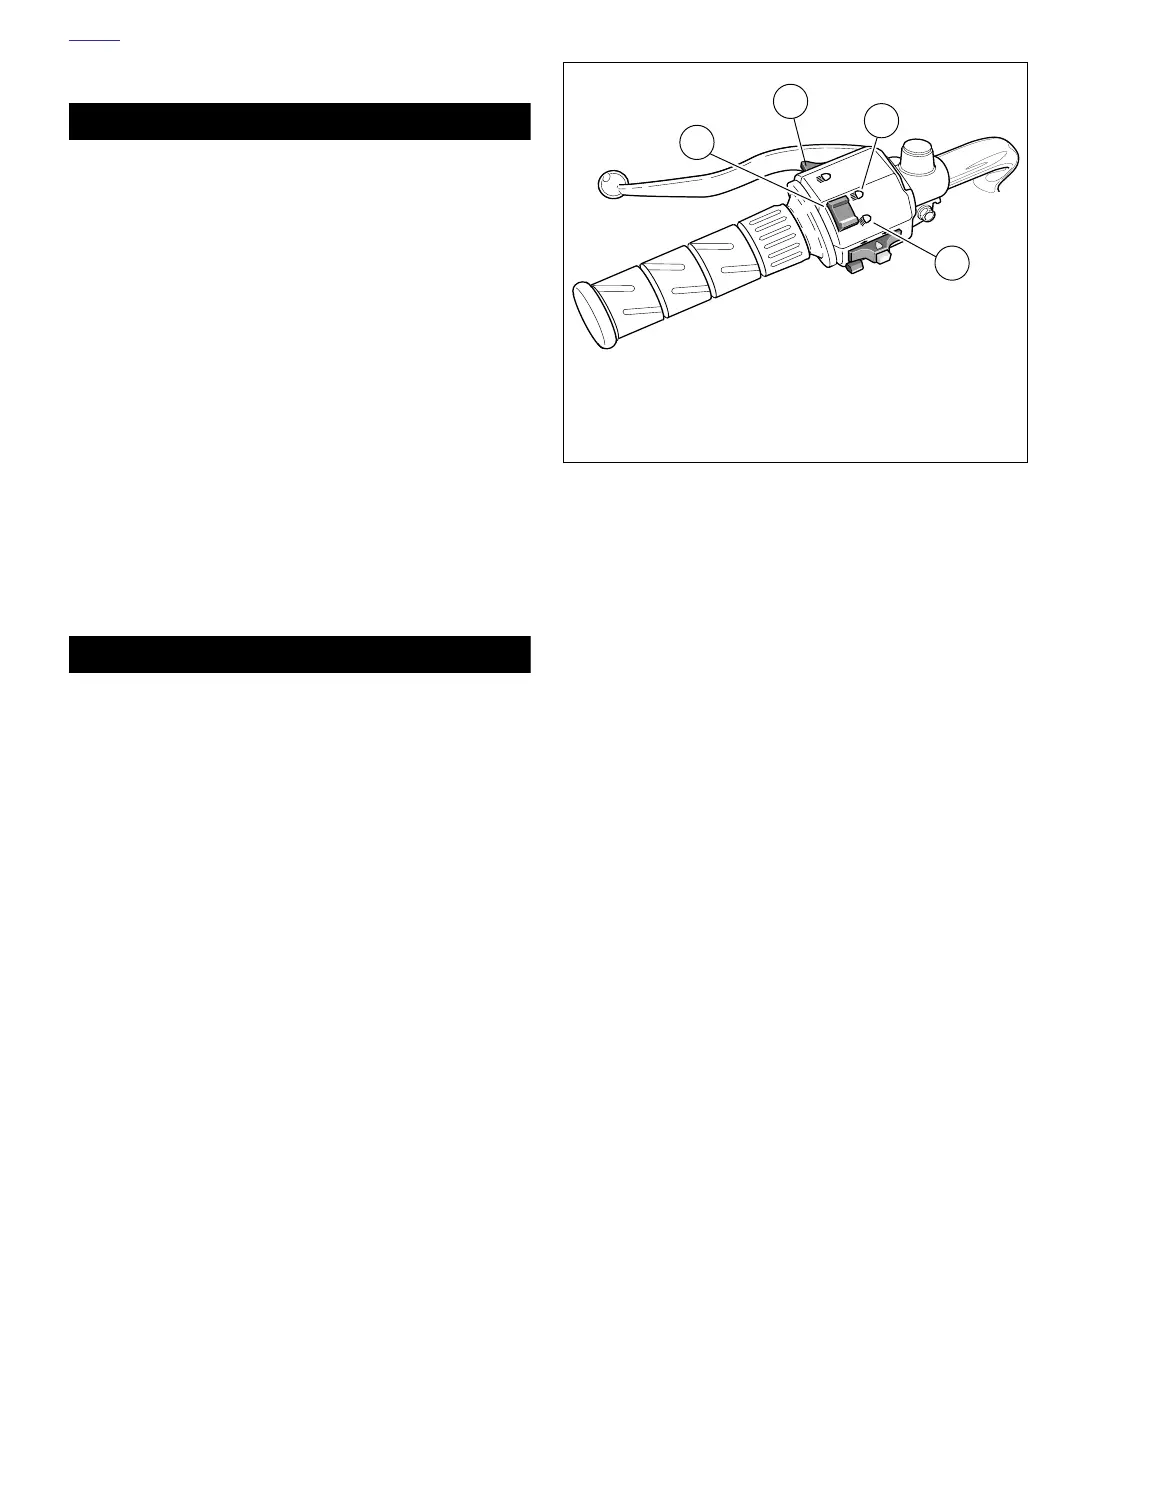
5. See Figure 7-64. Check headlamp for proper operation.
a. Turn ignition key switch to IGN.
b. Check headlamp LOW (3) and HIGH (2) beam set-
tings.
c. Set headlamp to LOW beam. Press highbeam flash
switch (4). Headlamp should flash HIGH beam for
as long as the switch is pressed.
d. Turn ignition key switch to OFF.
e. If operation fails, reread procedure and verify that all
steps were performed.
6. Align headlamp. See 1.22 HEADLAMP.
Figure 7-64. Headlamp Switch
a0252x7x
1. Headlamp switch
2. Headlamp high beam
3. Headlamp low beam
4. Highbeam flash switch
2
1
3
4