1-24 2007 Buell P3: Maintenance
HOME
NOTE
Do not place belt on sprocket teeth at this time. Alignment of
parts will be difficult. Resting belt next to teeth allows slack for
easier alignment of wheel assembly.
22. Hold left side spacer in place and slide caliper and car-
rier over rotor.
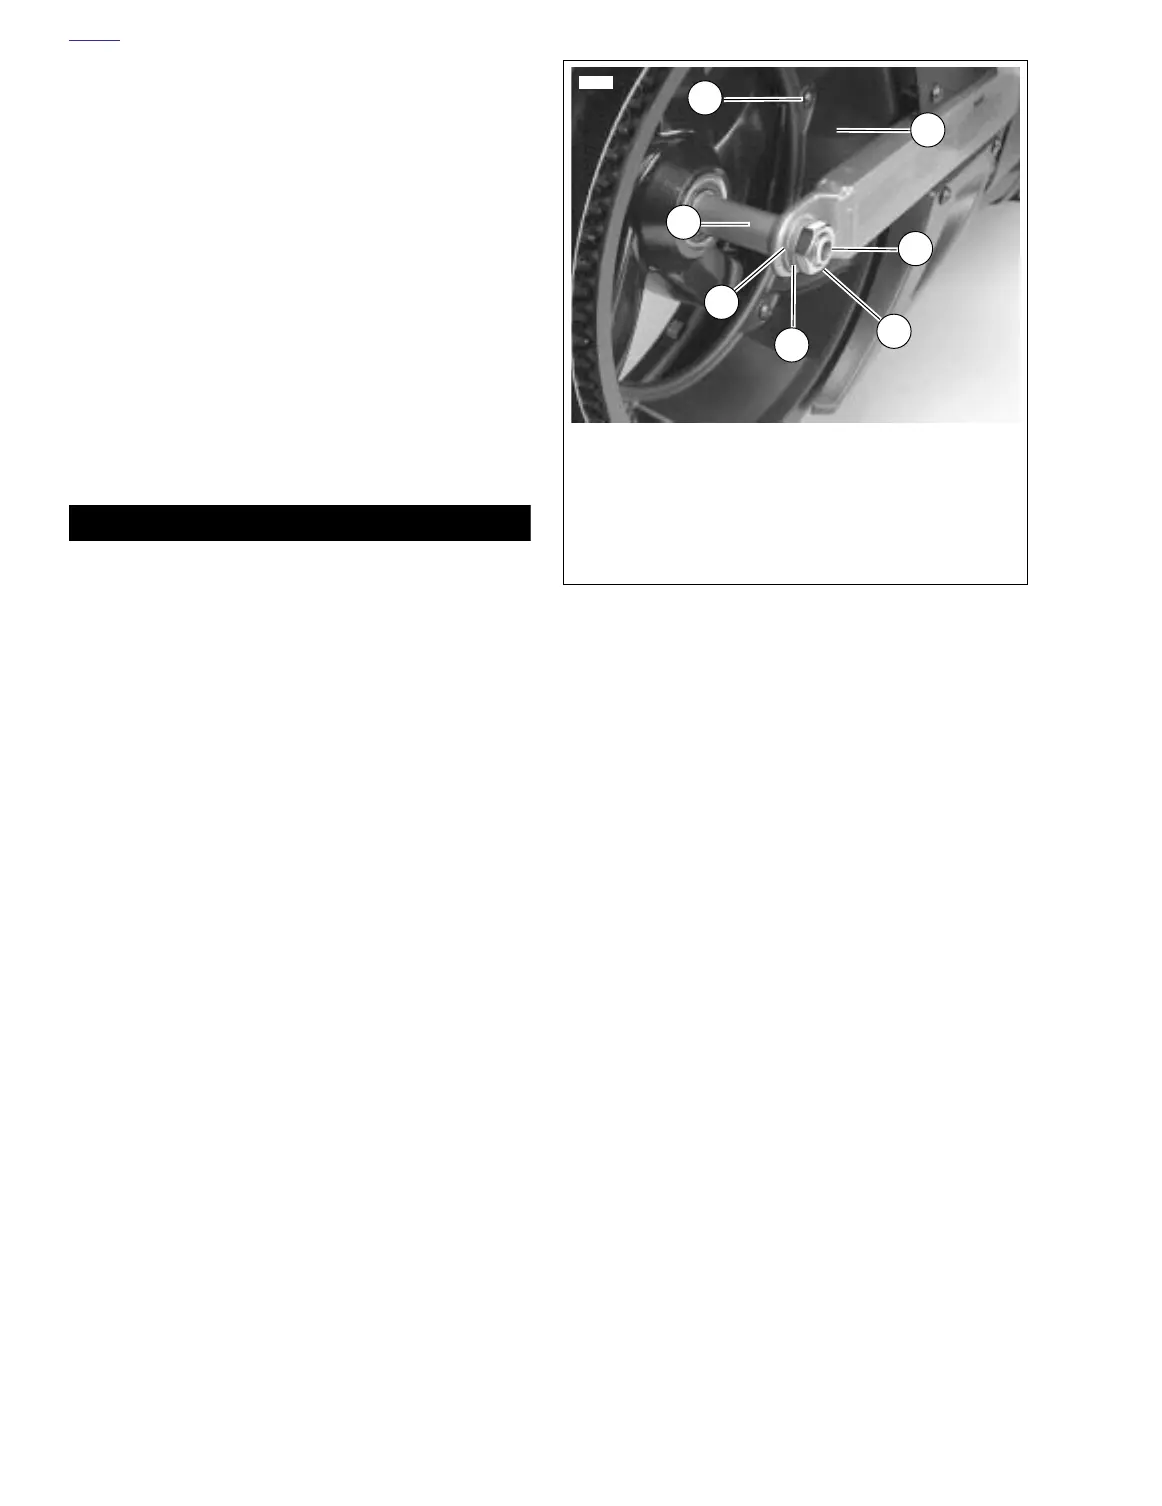
23. See Figure 1-21. Slide axle through washer, swing arm,
carrier, left side spacer and wheel assembly.
a. Hold right side spacer in place.
b. Insert axle through right side spacer and swingarm.
c. Install flat washer, lockwasher and axle nut.
24. Place screwdriver or rod through axle hole and torque
rear axle nut to 49-51 ft-lbs (67-69 Nm).
25. Slide belt on sprocket teeth by rotating wheel to “walk”
belt onto teeth.
26. Lower motorcycle rear wheel.
27. Connect negative battery cable to battery. Tighten fas-
tener to 72-96 in-lbs (8-11 Nm).
11WARNING1WARNING
After installing seat, pull upward on front of seat to be
sure it is in locked position. While riding, a loose seat can
shift causing loss of control, which could result in death
or serious injury. (00070a)
28. Install seat. See 2.28 SEAT.
Figure 1-21. Rear Axle, Right Side
3
2
1
7701
1. Axle
2. Axle nut (metric)
3. Lockwasher
4. Washer
5. Spacer
6. Sprocket bolts (5)
7. Sprocket cover
6
5
7
4