Adjusting the feed amount
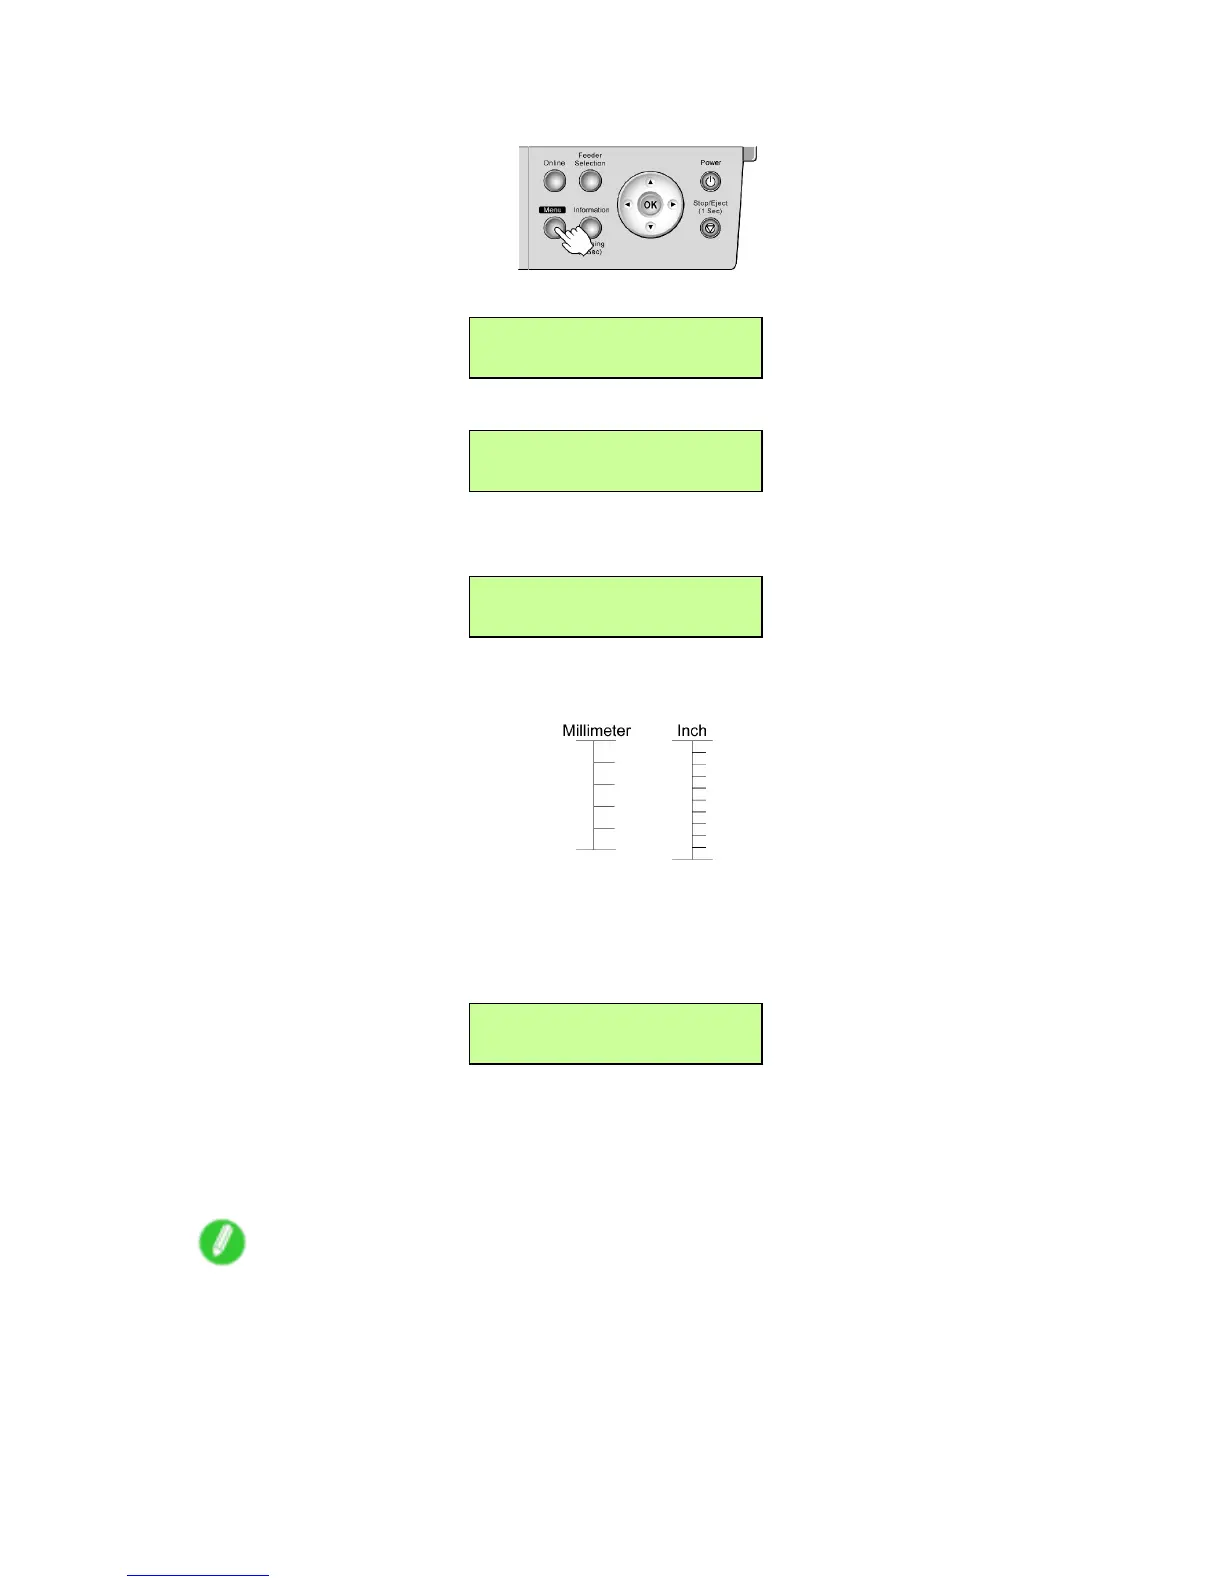
2. Press the Menu button to display MAIN MENU .
3. Press ◄ or ► to select Adjust Printer , and then press ▼ .
MAIN MENU
Adjust Printer ↓
4. Press ◄ or ► to select Adjust Length , and then press ▼ .
Adjust Printer
Adjust Length ↓
5. Press ◄ or ► to select Y es , and then press the OK button.
The setting is updated, and an equals sign “=” is displayed at left.
Adjust Length
= Y es
A test pattern is printed for adjustment based on the amount of paper stretching or shrinkage.
The scale bar shows “Millimeter” in 50 mm units and “Inch” in 1 inch units.
6. Measure the length of the adjustment pattern. Calculate the dif ference between the measured
length and actual length. Enter it as a percentage and press the OK button.
Y ou can adjust the value in 0.02% increments. Press ◄ to increase the value and ► to decrease
it.
Adjust Length
=0.02%
If the scale is printed shorter than actual size, set the value toward the positive side; if it is printed
longer , set the value toward the negative side.
The setting for the amount of paper stretching or shrinkage is relative. If you access it again
later , it will be displayed as 0.00%.
Note
• Y ou can also specify the adjustment value by selecting Adjust Length in Med.Detail Set. .
Maintenance 625
 Loading...