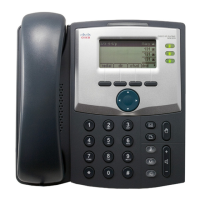
Configuring Lines and Extensions
Configuring Extensions
44 Cisco SPA and Wireless IP Phone Administration Guide
3
STEP 5 Click Submit All Changes.
For more information on LEDs, see the “Creating an LED Script” section on
page 187.
Configuring Extensions
STEP 1 Log in to the web administration interface.
STEP 2 Click Admin Login and advanced.
STEP 3 Click the Ext <number> tab for the extension you want to configure.
STEP 4 In the General section, make sure that Line Enable is set to yes.
You can configure many parameters differently for different extensions. These
parameters are grouped on the Ext <number> tab. These parameters are
explained in other sections of this document:
• NAT Settings—Chapter 5, “Configuring SIP, SPCP, and NAT.”
• Network Settings—Chapter 5, “Configuring SIP, SPCP, and NAT.”
• SIP Settings—Chapter 5, “Configuring SIP, SPCP, and NAT.”
• Call Feature Settings—Chapter 4, “Customizing Cisco SPA and Wireless
IP Phones.”
• Proxy and Registration—Chapter 5, “Configuring SIP, SPCP, and NAT.”
• Subscriber Information—Chapter 5, “Configuring SIP, SPCP, and NAT.”
Registering LED Appears when the corresponding extension tries to register
with the proxy server.
Defaults to blanks (c=r;p=s).
Call Back Active LED Indicates Call Back operation is currently active on this call.
Defaults to blank (c=r;p=s).
Parameters Description

 Loading...