User Manual: WaveLinx Lite (4.0)
54
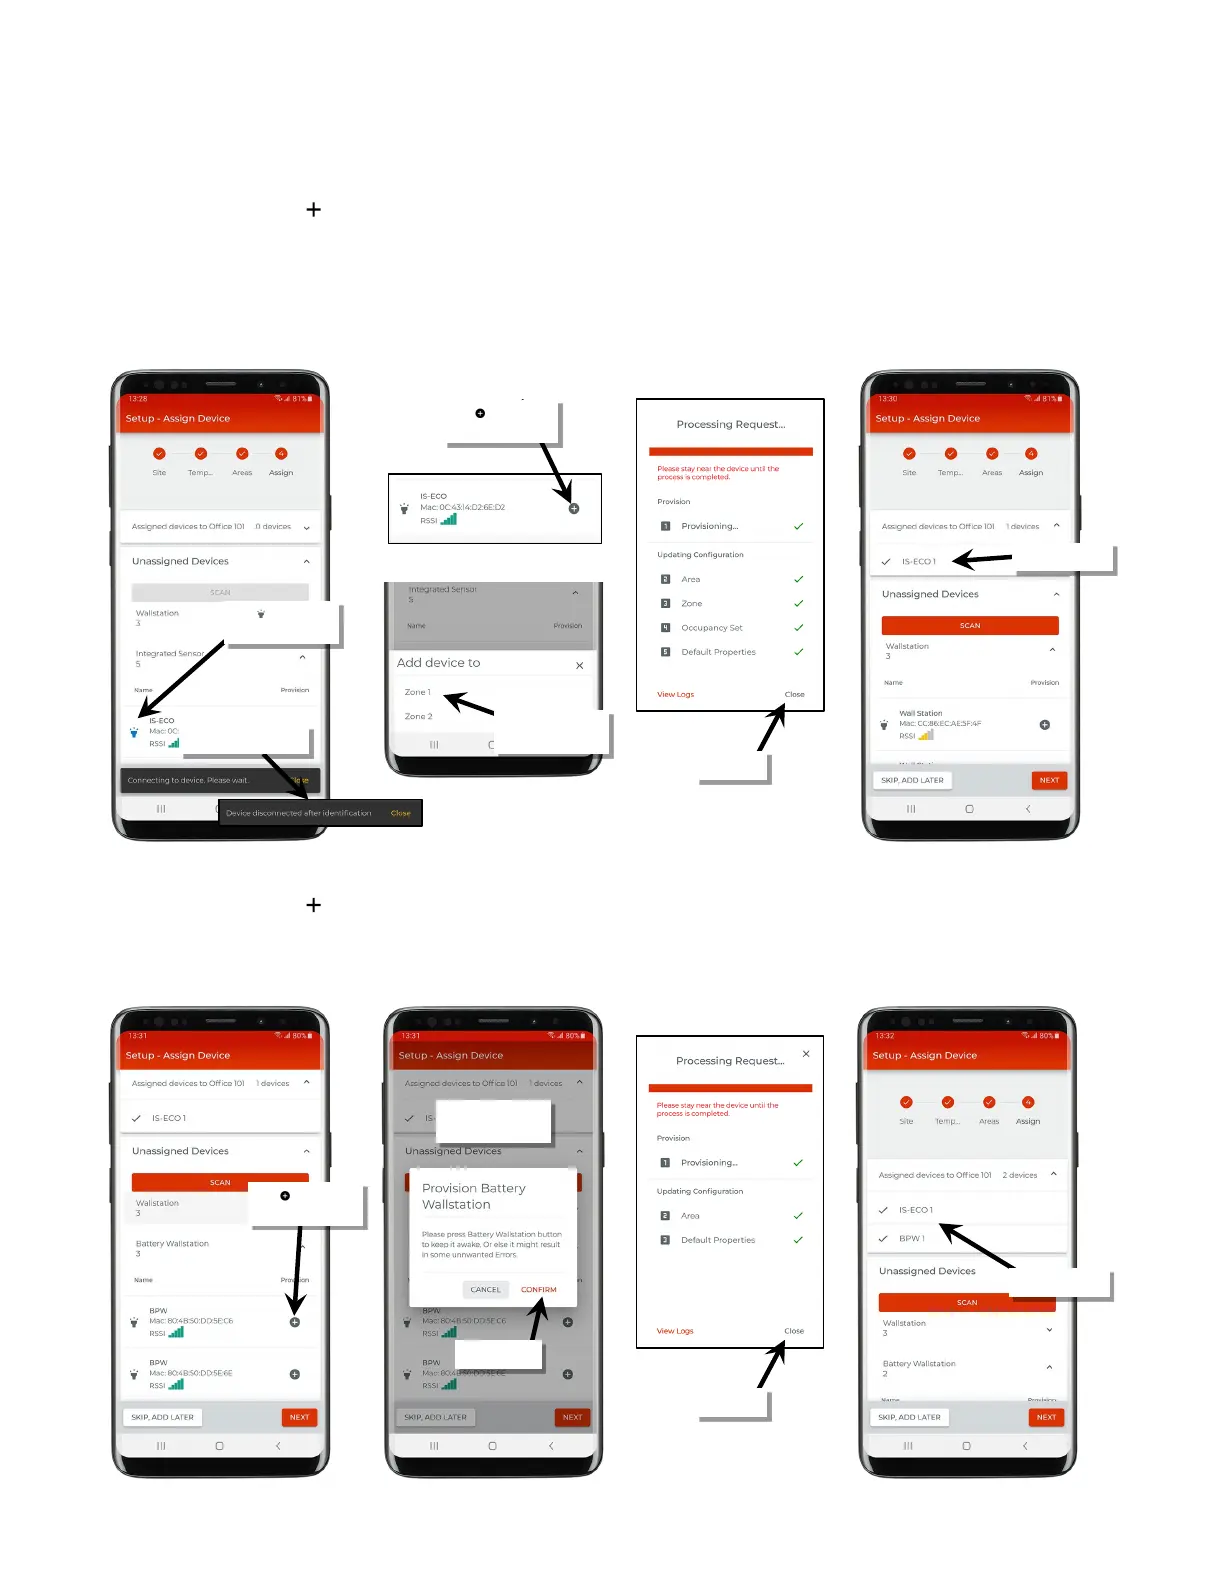
8. The next step may vary slightly depending on the type of device being provisioned.
For line voltage powered WaveLinx Lite devices:
Staying near the device, tap ‘ ’ on the identified device to begin the provisioning process.
• If the device is a line voltage powered wallstation, it will begin provisioning. Once the request is successfully processed (all checkmarks),
tap ‘Close’. The device should show assigned to the area.
• If the device is a line voltage powered fixture mount or integrated sensor, or tilemount sensor, select the zone it should operate in. If the
area has only one zone defined, it will skip this option. The device will begin provisioning. Once the request is successfully processed (all
checkmarks), tap ‘Close’. The device should show assigned to the area.
For battery powered WaveLinx Lite wallstations:
Staying near the device, tap ‘ ’ on the identified device to begin the provisioning process. When prompted, press any button on the station to
wake the station and then tap ‘Confirm’ (the station will stay in a ready state for 30 seconds, waiting for connection to the mobile app). The
device will begin provisioning. Once the request is successfully processed (all checkmarks), tap ‘Close’. The device should show assigned to
the area.
Tap ‘ ’ to assign/
provision device
the assigned zone
Tap ‘ ’ to identify
the device
the wallstation
provision device
 Loading...