RS20iInstallationandOperatingGuide
Page 24
RS20i Installation & Operating Guide Document # 9301H52900 Ver. 1.02
• Circuit Overloading – Consideration should be given to the connection of the equipment to the
supply circuit and the effect that overloading of the circuits might have on over-current protection
and supply wiring. Appropriate consideration of equipment nameplate ratings should be used when
addressing this concern.
• Reliable Earthing – Maintain reliable grounding of the equipment. Give particular attention to
supply connections when connecting to power strips, rather than direct connections to the branch
circuit.
• Surge Protection – Using a properly functioning quality surge protector is required to protect the
unit. Using an uninterruptible power supply is also recommended.
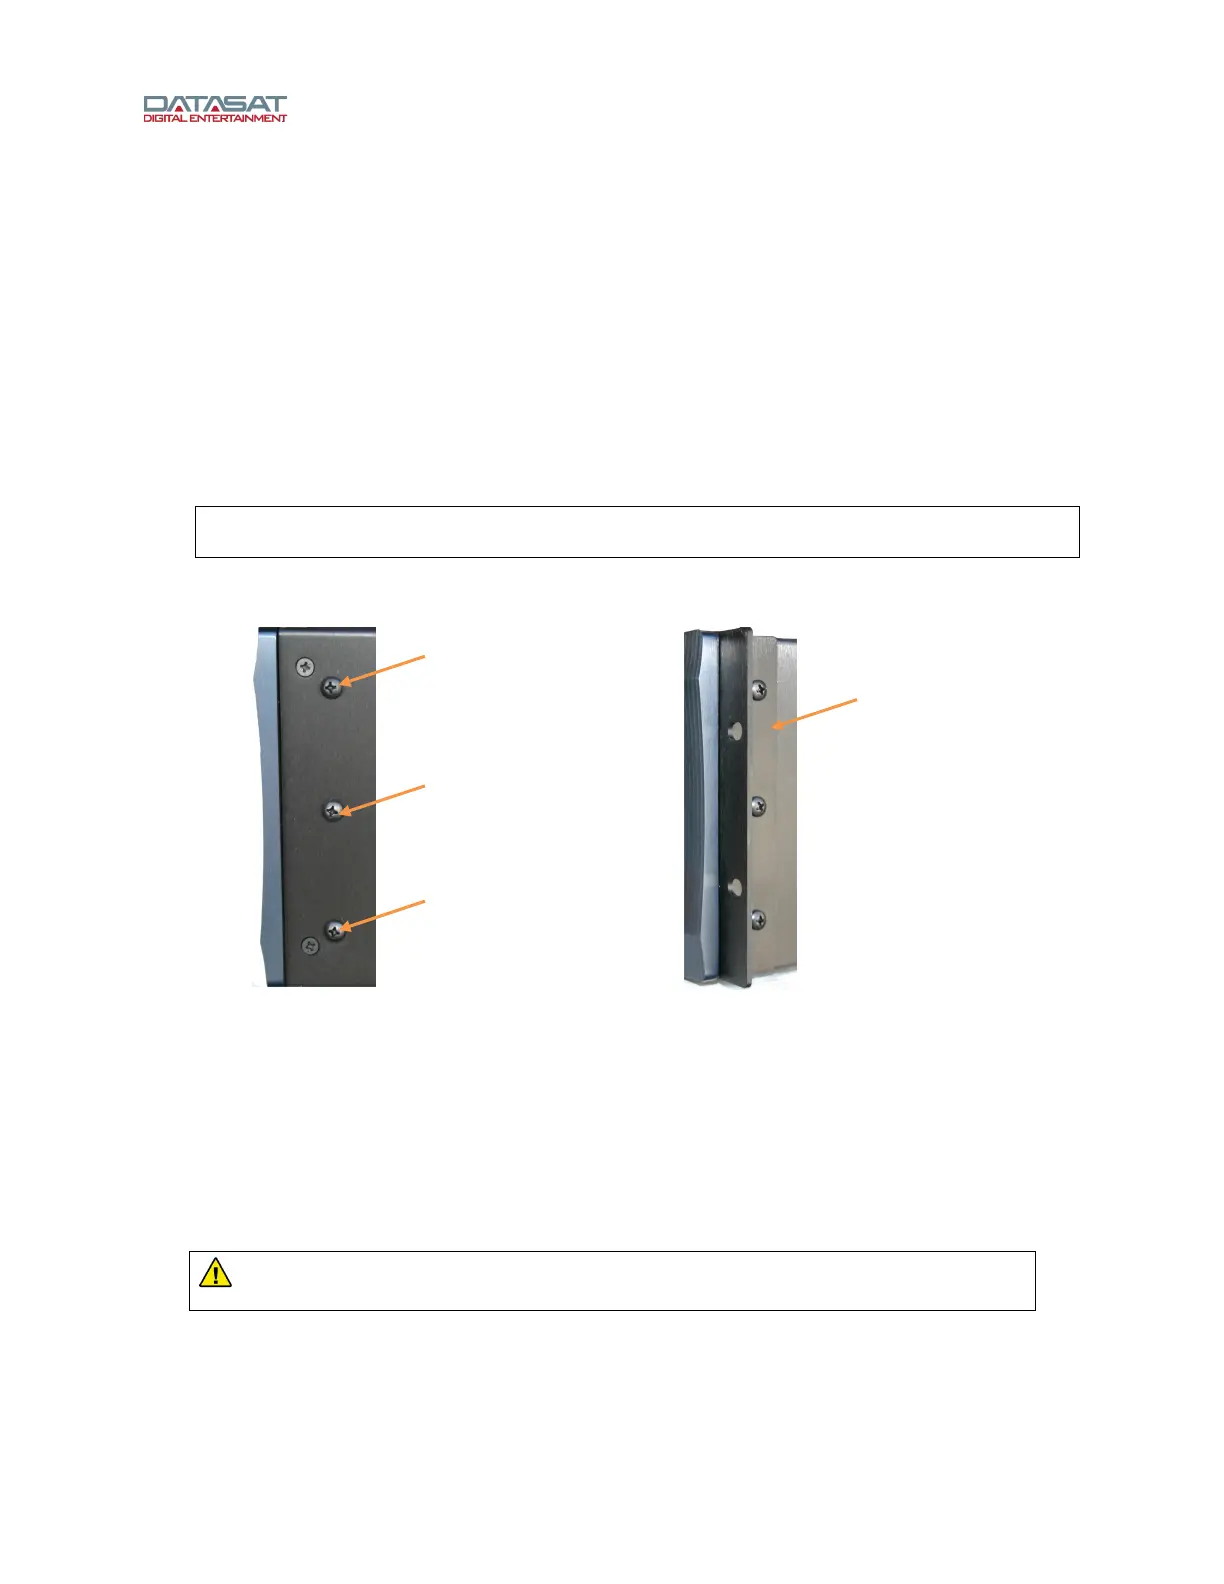
2.4.2 Rack Mount Installation
The RS20i requires 3U of standard rack space for proper mounting.
Note: The RS20i ships with feet installed. Remove these if necessary for rack space
clearance
Install the rack ears onto the RS20i by removing three 8-32 screws on each side of the RS20i and using
them to attach the rack ears.
Figure 10. Rack Ear Installation
Mount the RS20i into the rack securing it properly with 4 rack screws. 10-32 Rack screws and washers
are provided in the packing kit.
2.4.3 Installing/Removing Feet
The RS20i is shipped with feet already installed, for placing on a desktop or shelf. When rack mounting,
the feet may need to be removed for clearance. To remove the feet, simply twist by hand counter-
clockwise.
To replace feet, screw them onto the bottom of the RS20i and hand-tighten.
WARNING: Use only the feet provided with the RS20i, which have the correct screw
length to prevent internal damage to the RS20i circuitry.
Remove (3) screws
to mount rack ear
Rack ear
installed