RS20iInstallationandOperatingGuide
Page 27
RS20i Installation & Operating Guide Document # 9301H52900 Ver. 1.02
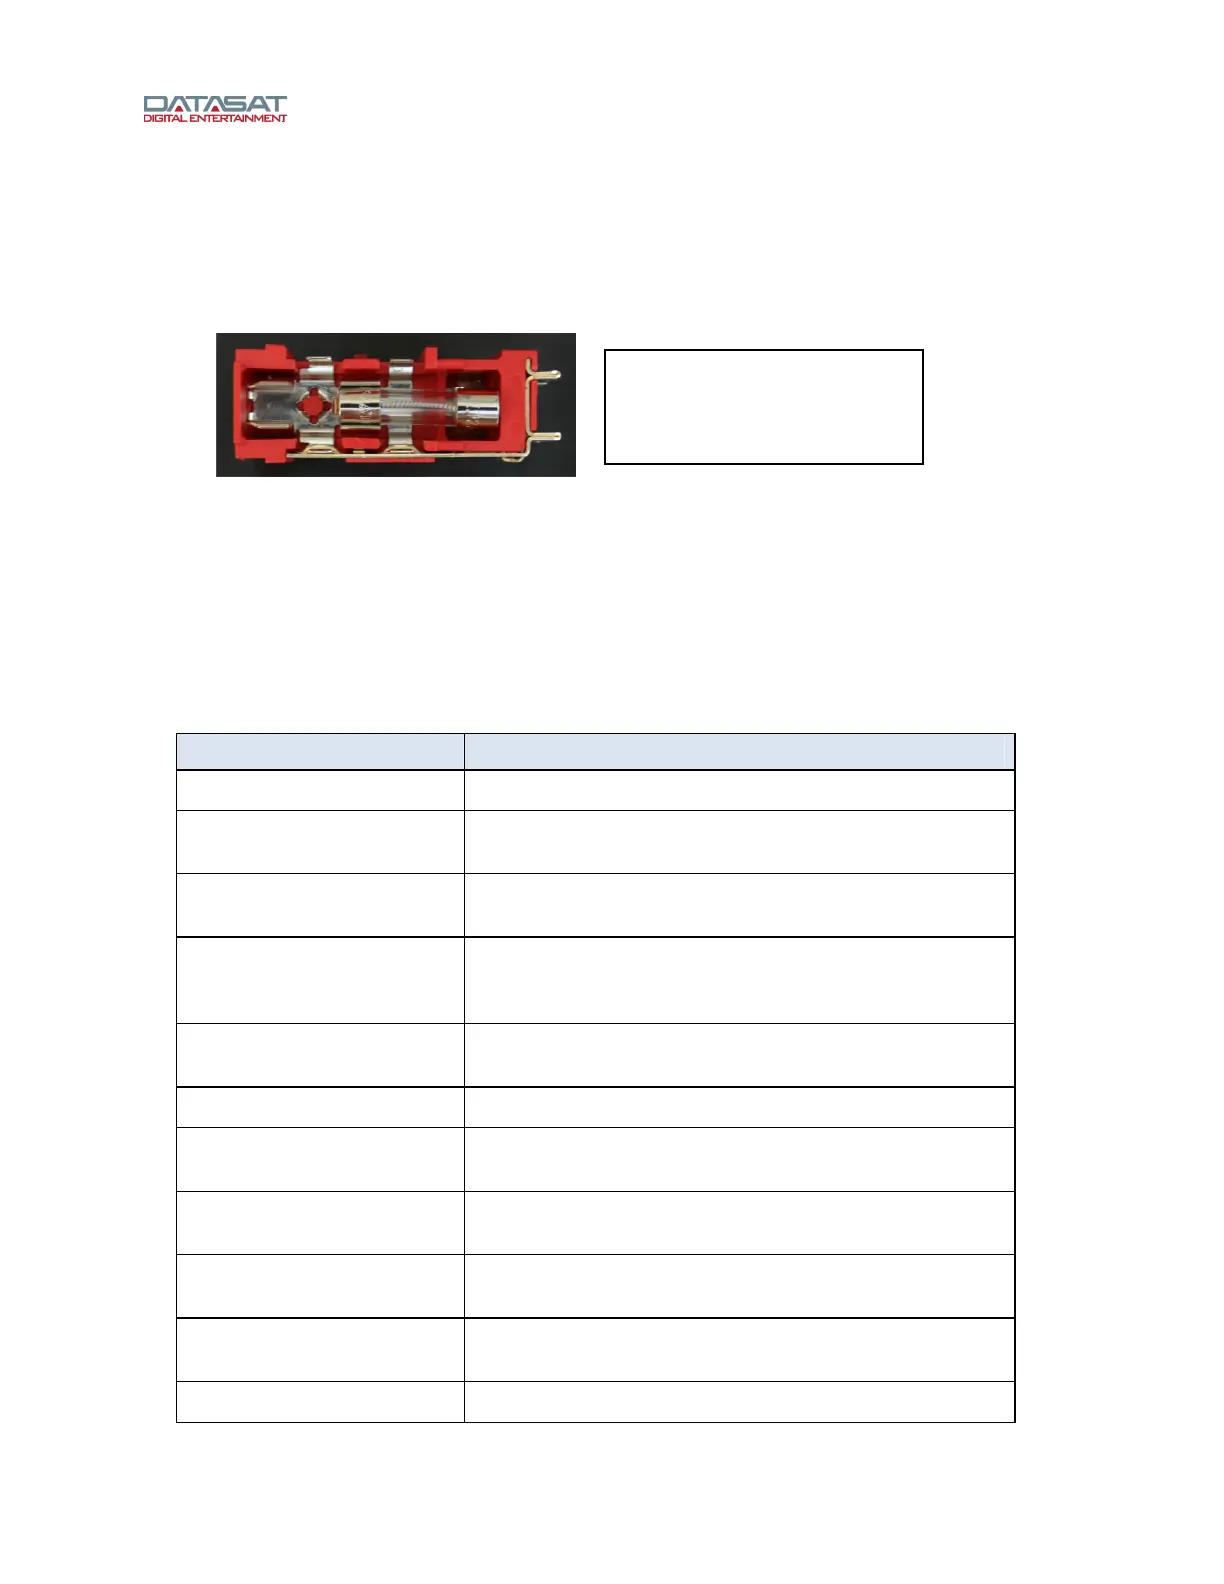
Remove the fuse block and install correct fuses. The RS20i uses two 5x20 mm fuses (one on each side
of the fuse block):
For 115V operation, use two 2A, T fuses.
For 230V operation, use two 1A, T fuses.
Insert the fuses into the fuse block, as shown in Figure 15 below.
Figure 15. Fuse Correctly Positioned in Fuse Block
Replace the fuse block in the power entry module and verify that the correct voltage setting is shown (see
Figure 12).
3.0 How-To Procedures for Setup
This table provides a list of setup activities and provides instructions or a link to instructions elsewhere in
this manual.
Table 4. Setup Procedures
Activity Instructions
Assign an Input button See 4.3.2 Input Button Assignments, page 42.
Unassign / delete an Input
button
See 4.3.2 Input Button Assignments, page 42 – select the
button and assign a “blank” input to it.
Configure power-on Input
(Startup Input)
See Startup Preset Input, page 40.
Create an Input See 3.1 Example: Creating an Input, below.
For detailed information about Inputs, see 4.2.1 About
Input Presets, page 36.
Assign Channel Names and
Vu meters
See 4.5.2 Channel Names, page 68.
USB Save / Restore / Load See 4.8.2 USB Save/Restore, page 89.
Load a personalized screen
saver
To set screensaver time and mode, see 4.8 System Setup,
page 86.
Set up Global Audio Delay
for an input
See 4.3.5.1 Global Delay and Surround Offset, page 46.
Set up Digital Cinema option For digital cinema input, see 4.3.7 Digital Cinema Options,
page 52
View RS20i System
information
See 4.8.4 System Info, page 92.
Update RS20i software See 4.8.1 Update System Software, page 87.
Note: When 5x20mm fuse is
used, make sure it is inserted
at the “live” end of the fuse
block, as shown.