RS20iInstallationandOperatingGuide
Page 89
RS20i Installation & Operating Guide Document # 9301H52900 Ver. 1.02
3. Insert the USB drive into the USB slot on the front panel of the RS20i, choose Select Update
Source > USB, then select the update file and press the Start Update button.
Note: If you select an older version of software than is currently loaded on the RS20i,
you will receive a warning message and be asked to verify that you wish to
continue.
4.8.2 USB Save/Restore
A Configuration file includes all configurations (3rd octave EQ, Dirac coefficients, input and output
presets, automation, and global configurations) set in the RS20i.
You can save and restore standard configurations and master configurations to a USB Flash drive
(memory stick). You can also save Diagnostic information (the system log file) for use in troubleshooting
the system.
A master configuration is intended to be a template used to configure similar RS20i processors. It may
be used as the first step in the configuration of additional installed units. Use the RS20i GUI to save the
Master configuration from one RS20i to a USB memory device, then move the USB memory device to a
separate RS20i and select Load from USB to copy that configuration file.
Note: Always be careful, because any existing Master Configuration file on the USB
will be overwritten when you save another one.
The RS20i Configuration is specific to one RS20i. The configuration file saved on the USB is given the
name “rs20_nnnn.tgz” where “nnnn” is the serial number of the unit. The standard configuration file can
only be loaded back onto the same RS20i.
You can also load a screensaver of your choice via the USB port.
To set any of these options, insert the USB Flash drive into the front panel and then press the USB
Save/Restore button on the System Setup screen. (If no Flash drive is present, a message will appear
prompting you to insert a USB device.)
Setup > USB
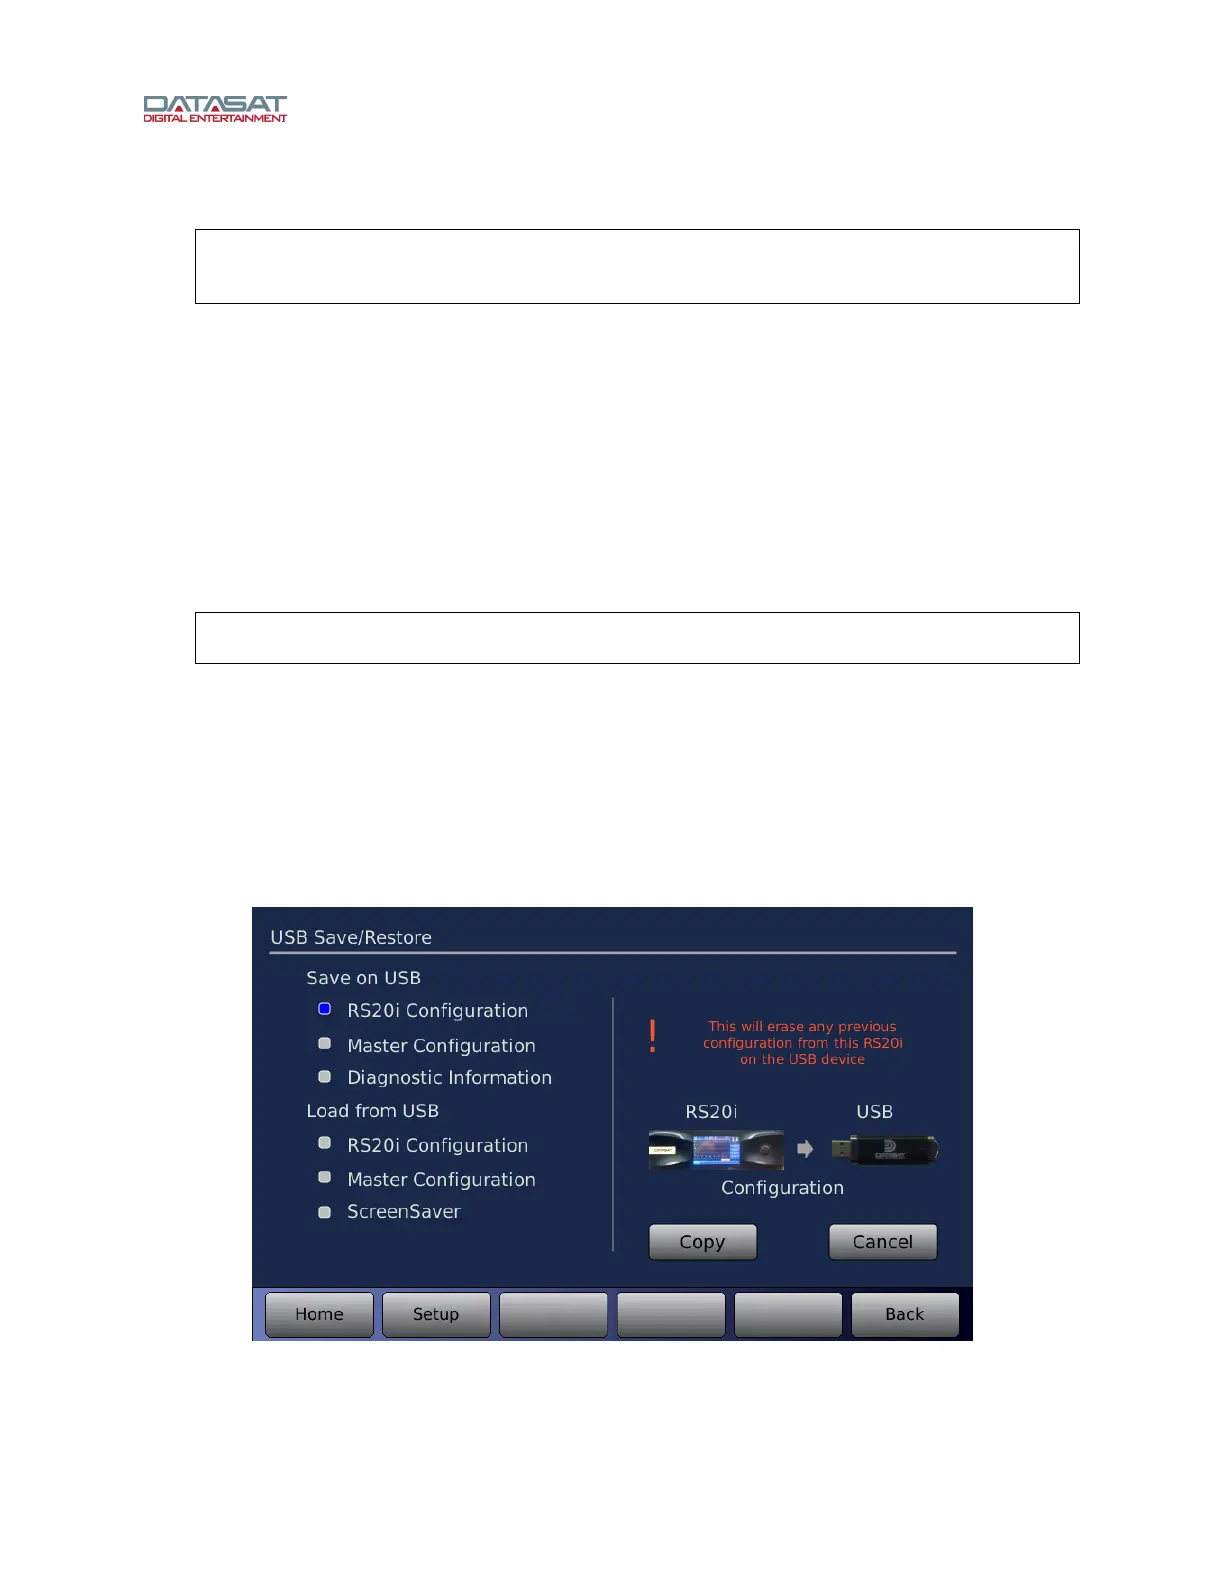
Figure 57. USB Save/Restore Screen
Select an activity on the left, then touch Copy on the right.
The options described in the table below are available when using a USB Flash drive.