INSTALLATION
(1) Install the piston rings. (Refer to 9 - ENGINE/
ENGINE BLOCK/PISTON RINGS - INSTALLA-
TION)
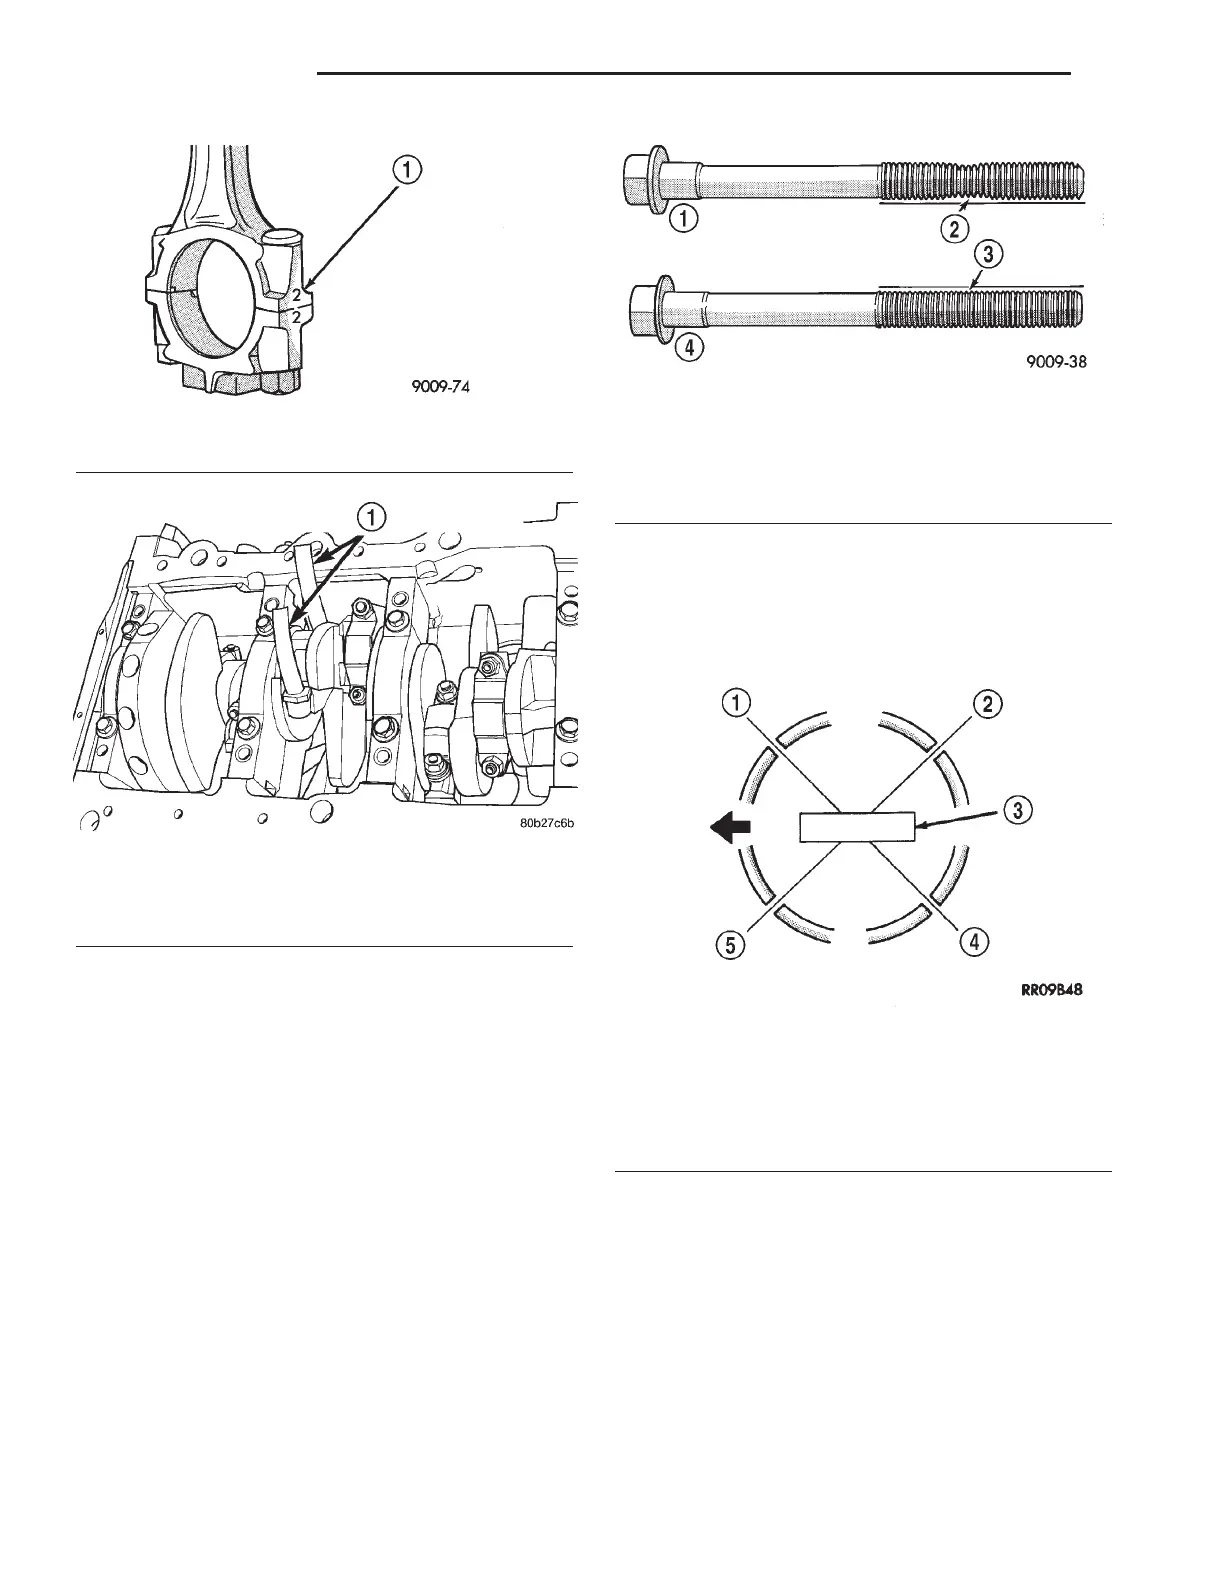
NOTE: The connecting rod bearing cap bolts must
be examined before reuse. If the threads are necked
down, the bolts must be replaced.
(2) Check connecting rod bolts for necking by hold-
ing a scale or straight edge against the threads. If all
threads do not contact the scale, the bolt must be
replaced (Fig. 83).
(3) Before installing pistons and connecting rod
assemblies into the bore, ensure that compression
ring gaps are staggered so that neither is in line with
oil ring rail gap (Fig. 84).
Fig. 81 Connecting Rod to Cylinder Identification
1 - CYLINDER NUMBER
Fig. 82 Connecting Rod Guides and Crankshaft
Protectors
1 - COVER ROD BOLTS WITH A SUITABLE COVERING WHEN
REMOVING OR INSTALLING PISTON ASSEMBLY
Fig. 83 Check for Stretched Bolts
1 - STRETCHED BOLT
2 - THREADS ARE NOT STRAIGHT ON LINE
3 - THREADS ARE STRAIGHT ON LINE
4 - UNSTRETCHED BOLT
Fig. 84 Piston Ring End Gap Position
1 - SIDE RAIL UPPER
2 - NO. 1 RING GAP
3 - PISTON PIN
4 - SIDE RAIL LOWER
5 - NO. 2 RING GAP AND SPACER EXPANDER GAP
9 - 140 ENGINE 3.5L LH
PISTON & CONNECTING ROD (Continued)