The following buttons appear under the table:
• Modify: This can be used to configure the photo sensor highlighted in the table.
• CSV: This can be used to export the photo sensors table to a “.csv” file, which can be opened with a
spreadsheet.
• PDF: This can be used to export the photo sensor table to a PDF file.
The < and > buttons at the bottom right are used to navigate between the pages of the photo sensors, if
their number is greater than the number that can be displayed in a single screen.
5.28 ZigBee Video Detectors
This can be used to view the motion sensor with ZigBee camera of the system.
It is accessed through the PROGRAMMATION → Zigbee Peripheral → Detectors with Video Camera
menu.
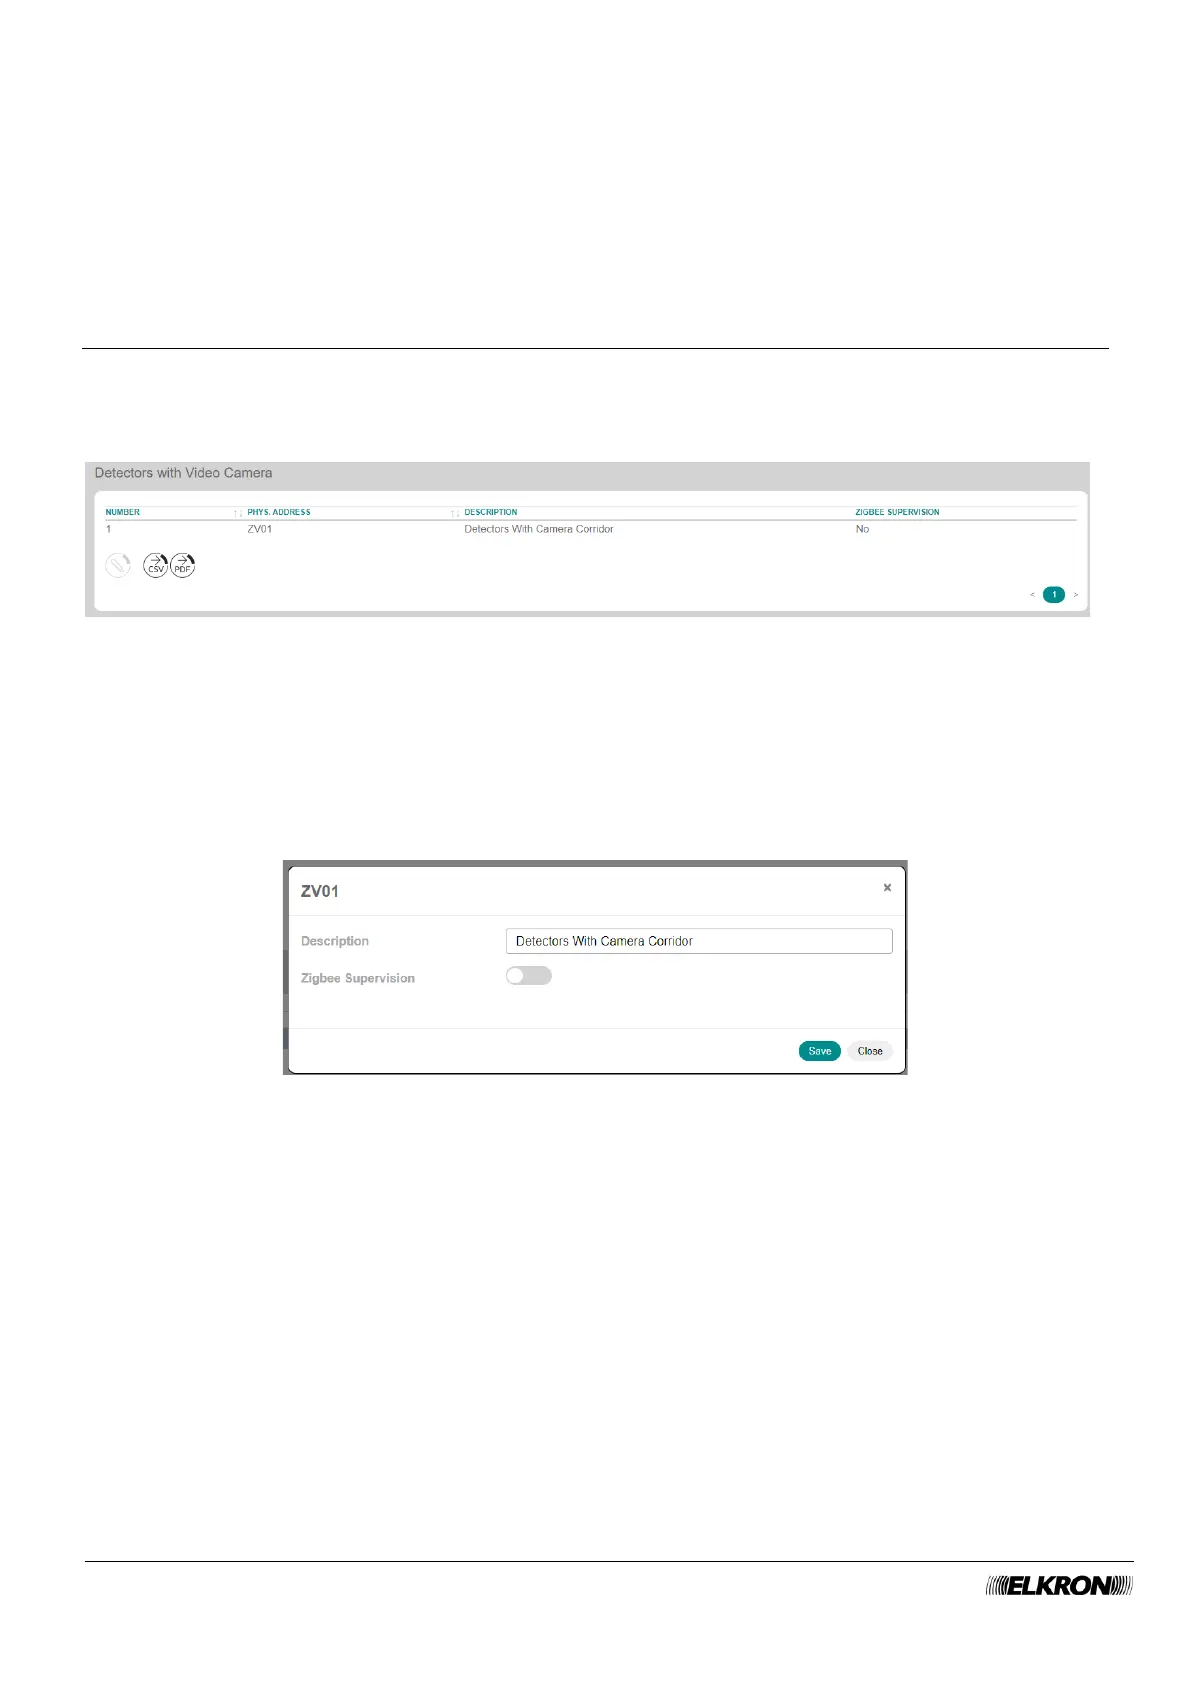
Figure 101 - ZigBee video sensor
The table shows:
• NUMBER: This is the sequential number of acquisition of the video sensor.
• PHYS.ADDRESS: This is the physical address of the video sensor.
• DESCRIPTION: This is the alphanumeric label used to identify the video sensor more easily.
• ZIGBEE SUPERVISION: This shows whether supervision is enabled or disabled.
Double-click on the video sensor line to open a pop-up window.
Figure 102 - ZigBee video sensor
In the pop-up window you can:
• Enter the identification label of the video sensor in Description. Use only alphabetic characters,
including accented characters, numbers, and spaces.
• Enable or disable ZigBee supervision of the video sensor.
The following buttons appear under the table:
• Modify: This can be used to configure the photo sensor highlighted in the table.
• CSV: This can be used to export the photo sensors table to a “.csv” file, which can be opened with a
spreadsheet.
• PDF: This can be used to export the photo sensor table to a PDF file.
The < and > buttons at the bottom right are used to navigate between the pages of the video sensors, if
their number is greater than the number that can be displayed in a single screen.