The table shows:
• NUMBER: This is the sequential number of acquisition of the wireless siren.
• PHYS.ADDRESS: This is the physical address of the wireless siren
• DESCRIPTION: This is the alphanumeric label used to identify the wireless siren more easily.
• RADIO SUPERVISON: This shows whether the function is enabled or disabled.
Double-click on the wireless siren line to open a pop-up window.
• Enter the identification label of the wireless siren in Description. Use only alphabetic characters,
including accented characters, numbers, and spaces.
• Enable or disable the wireless siren wireless supervision.
The following buttons appear under the table:
• Modify: This can be used to configure the wireless siren highlighted in the table.
• CSV: This can be used to export the radio sirens table to a “.csv” file, which can be opened with a
spreadsheet.
• PDF: This can be used to export the wireless sirens table to a PDF file.
It is possible to activate system status signalling on radio sirens. Under Signal Type select the option from
Nothing, Optical and Optical and Acoustic.
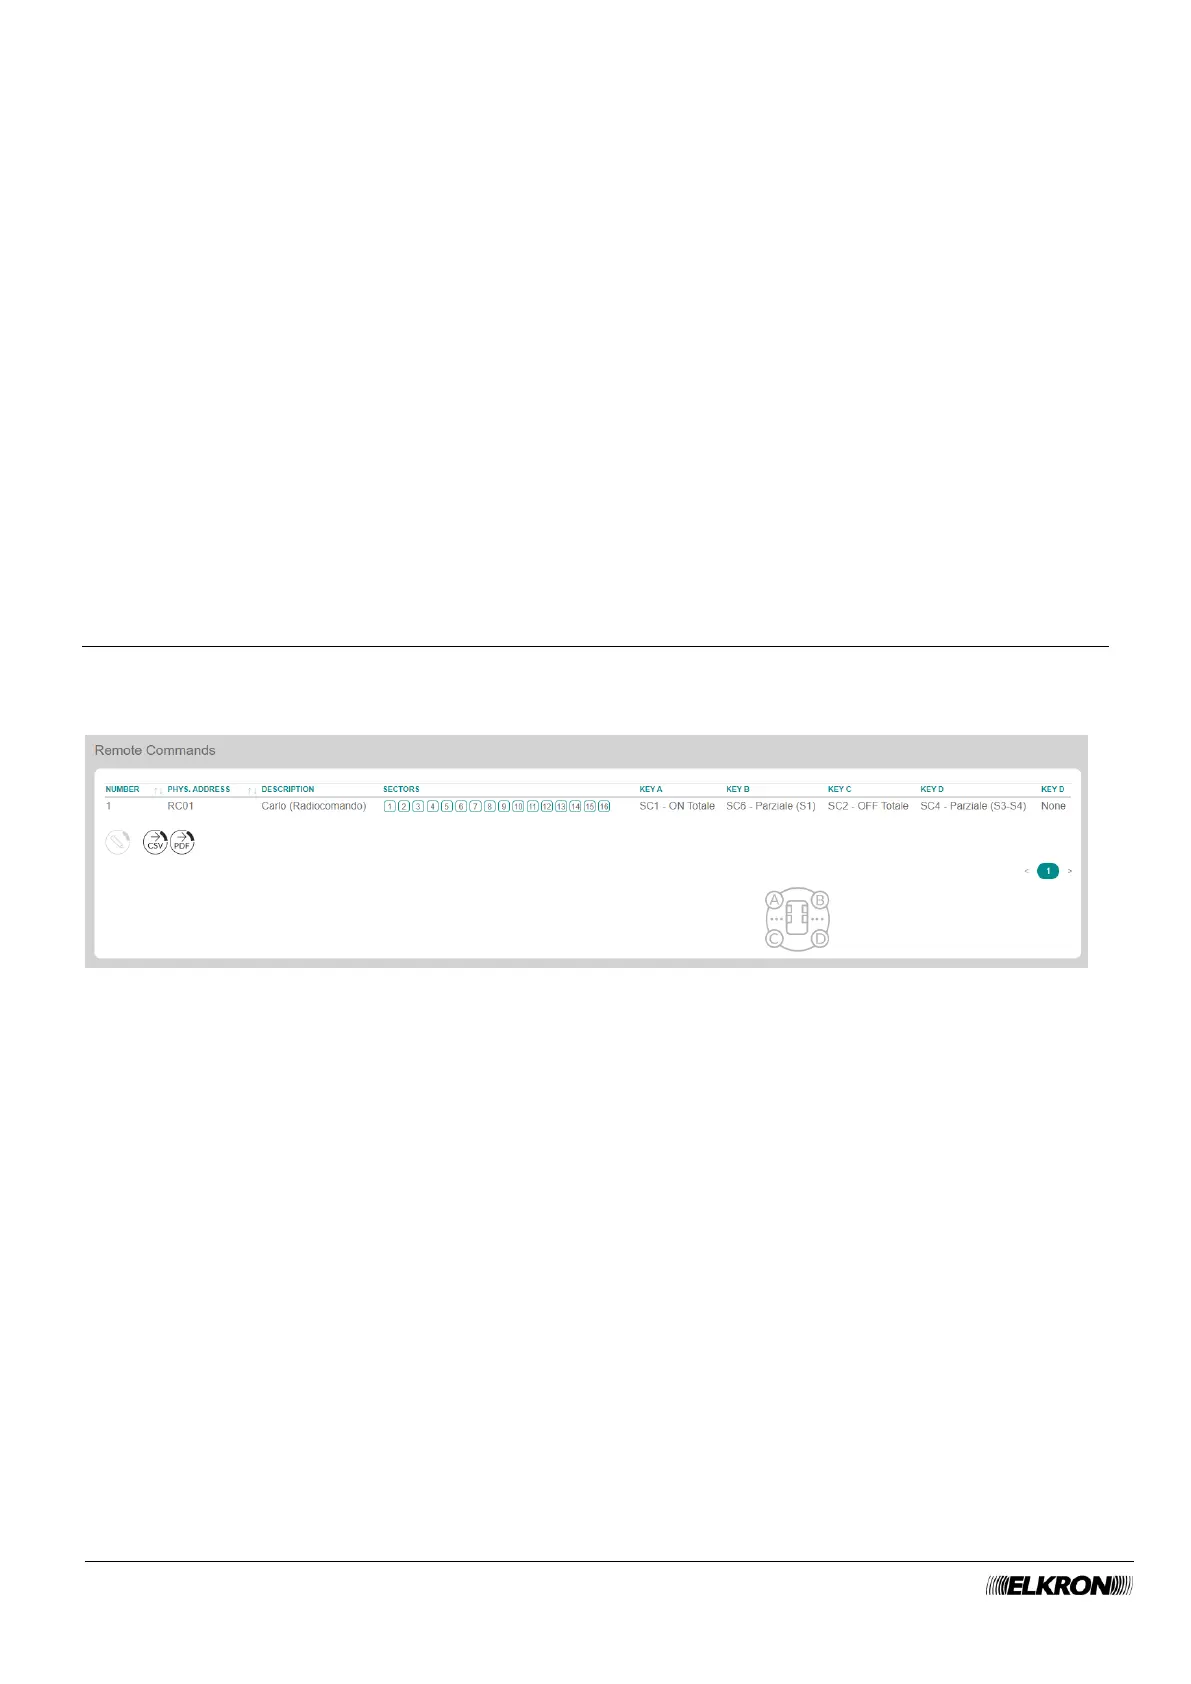
5.21 Remote controls
This can be used to view the remote controls of the system.
It is accessed through the PROGRAMMATION → Radio Peripheral → Remote Command menu.
Figure 89 - Remote controls
The table shows:
• NUMBER: This is the sequential number of acquisition of the remote control.
• PHYS.ADDRESS: This is the physical address of the remote control.
• DESCRIPTION: This is the alphanumeric label used to identify the remote control more easily.
• SECTORS: This shows the sectors paired to the remote control.
• KEY A: This shows the scenario associated with the button.
• KEY B: This shows the scenario associated with the button.
• KEY C: This shows the scenario associated with the button.
• KEY D: This shows the scenario associated with the button.
• KEY D (ACTION): This shows the scenario associated with the button.
The icon at the bottom indicates the numbering and position of the remote control.