Section 8 — Understanding Programs TS-10 Musician’s Manual
24
As mentioned earlier, whenever you create a custom pitch-table, the TS-10 will delete voices 5
and 6, and use the memory normally occupied by those parameters to store the pitch-table.
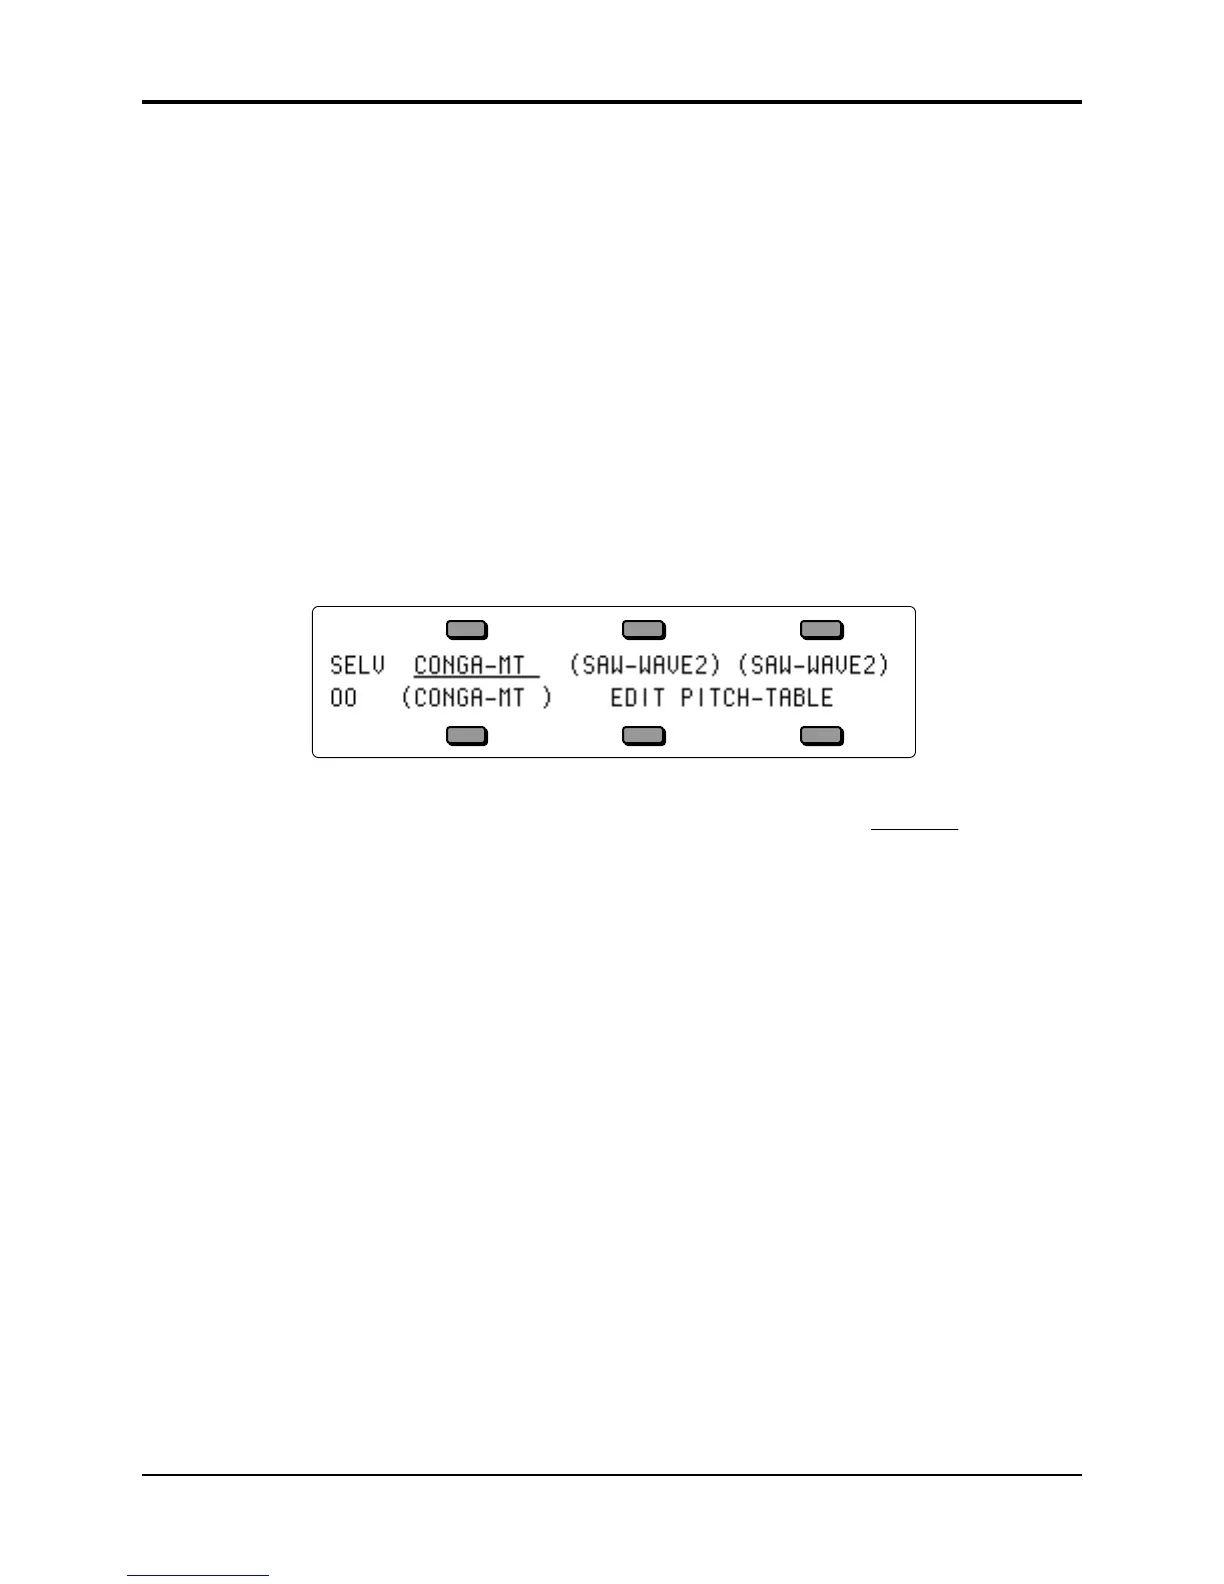
• Press the soft button underneath PITCH-TABLE to REPLACE VOICES 5+6. This takes you to
the Select Voice page, which now shows the words EDIT PITCH-TABLE where voices 5 and 6
once were.
We have just created a custom pitch-table with variable pitch values for each key. Keep in mind
that the custom pitch-table will sound the same as the System pitch-table until you edit it. We
will do this a bit later.
When you create a pitch-table and start editing it, you are in the edit buffer (the Compare light is
on), and all edits will affect the data in the edit buffer, and not the program’s memory. If you use
the copy function while the compare light is on, the TS-10 will copy the data in the edit buffer,
and not the program’s memory.
First, we need to select which of the four voices will use the custom pitch-table:
• Double-click its soft button to solo the first voice on the Select Voice page:
• Press Pitch Mods. This takes us to the Pitch Mods page.
• Select the pitch-table parameter in the display and set it to PITCHTBL=
CUSTOM
.
Voice #1 is now set to play the custom pitch-table. This will enable you to hear any edits you
make to the custom pitch-table.
Each voice in a program can be assigned to play either the System, no-pitch, or custom pitch-
table. For example, Voice #1 can play the System pitch-table; Voice #2, a custom pitch-table;
voices 3 and 4, No-pitch (C notes across the keyboard).
Editing a Custom Pitch-Table
As mentioned earlier, until you edit the custom pitch-table — change the default note
assignments — the custom pitch-table will sound the same as the system pitch-table. To edit a
custom pitch-table:
• On the Select Voice page, press either of the soft buttons beneath EDIT PITCH-TABLE. This
takes us to the EDIT PITCH-TABLE page.
 Loading...