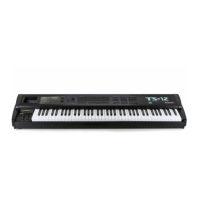
Section 1 — Controls and Basic Functions TS-10 Musician’s Manual
10
Layering (Stacking) a Sound with the Selected Sound
To layer (or stack) any sound with the currently selected sound, double-click the soft button
corresponding to the sound name on the display. The underline beneath the name of the layered
sound will flash and you will hear both sounds playing together.
Up to three sounds (one selected and two layered with it) can be active at once. To de-select a
layered sound, press its soft button again and the flashing underline will disappear. If you
already have two sounds layered with the primary sound, and you double-click on a fourth
sound, that sound will replace the most recently layered sound in the stack.
If two tracks are layered, selecting a new primary track that has a KEY ZONE that does not
overlap the layered track will not de-select the layered track. You can layer any combination of
User RAM, ROM, or Sampled Sounds. Also, the sounds that are layered do not have to be in the
same BankSet or bank.
Primary Sound vs. Layered Sounds
We refer to the sound which is currently selected (solidly underlined on the display) as the
primary sound. Any other sounds that you double-click are considered to be layered with the
primary sound. Only one sound is ever selected at a time. Whenever you select a new sound it
becomes the primary sound.
This is an important concept, because the primary sound determines which Effects set-up will be
used for layers and presets. Whenever you select a new primary sound in Sounds mode, a new
effects algorithm is loaded along with it (unless the new sound has the same effect and settings as
the previous one). Note however that layering a sound or selecting a different sound in Presets
mode does not change the current effects set-up.
The SoundFinder™ Feature
When you press the Replace Track Sound button (its LED is lit), you can press the Up or Down
Arrow buttons to scroll through Programs that have the same defined Program Type (as defined
on the Program Control page). This is a great way to hear all available variations of a particular
type of sound, and it is very useful in auditioning similar sounds for a sequence or song track.
Note that you can audition the sounds as the sequencer plays, but to make the changes
permanent, you must first stop the sequencer.
Note: Because a Sampled Sound cannot be assigned a Program Type, the SoundFinder feature will not
work with Sampled Sounds or Sample Edits.
Note: You must load the 120-PROGRAMS file called USER BANKS from a Rev. E or higher version of
the TSD-100 disk in order for this feature to work properly with the User RAM Programs (the
version is printed on the bottom of the disk following the ten-digit part number).
Tip: By double-clicking the Replace Track Sound button (LED flashing), you can use the Up/Down
Arrow buttons to select Programs by type along with their effect settings, just as you would in
Sounds mode.
Tip: On the Program Control page, the TYPE=CUSTOM setting can be used to define your own
special purpose sound type to help you quickly find your own sounds with SoundFinder.
ENSONIQ sounds will never be released with TYPE=CUSTOM. For more information about the
Program TYPE parameter, see Section 9 — Program Parameters.
 Loading...