TS-10 Musician’s Manual Section 14 — Understanding Sampled Sounds
5
Here you can select which BankSet you want to load your Sampled Sound into (BankSet 9 is
only available with expansion SIMMs installed) by using the data entry controls. The bottom
left corner of the display shows the amount of free (unused) blocks available in DRAM for the
currently displayed BankSet. As it comes from the factory, the TS-10 has 4018 blocks of free
DRAM memory. With expansion SIMMs installed, the TS-10 will offer 8114 blocks of DRAM
memory in BankSet S8, and 8191 in BankSet S9.
8) Press any Bank button (0-9) to load the Sampled Sound into the TS-10.
Multi-Disk Sampled Sound Display Messages
Multi-disk Sampled Sounds are loaded the same way as single-disk Sampled Sounds, with the
addition of a few extra display messages. Multi-disk EPS/EPS-16 PLUS/ASR-10 Sampled Sound
files are indicated by a flashing number next to the file name on the LOAD FILE page. After
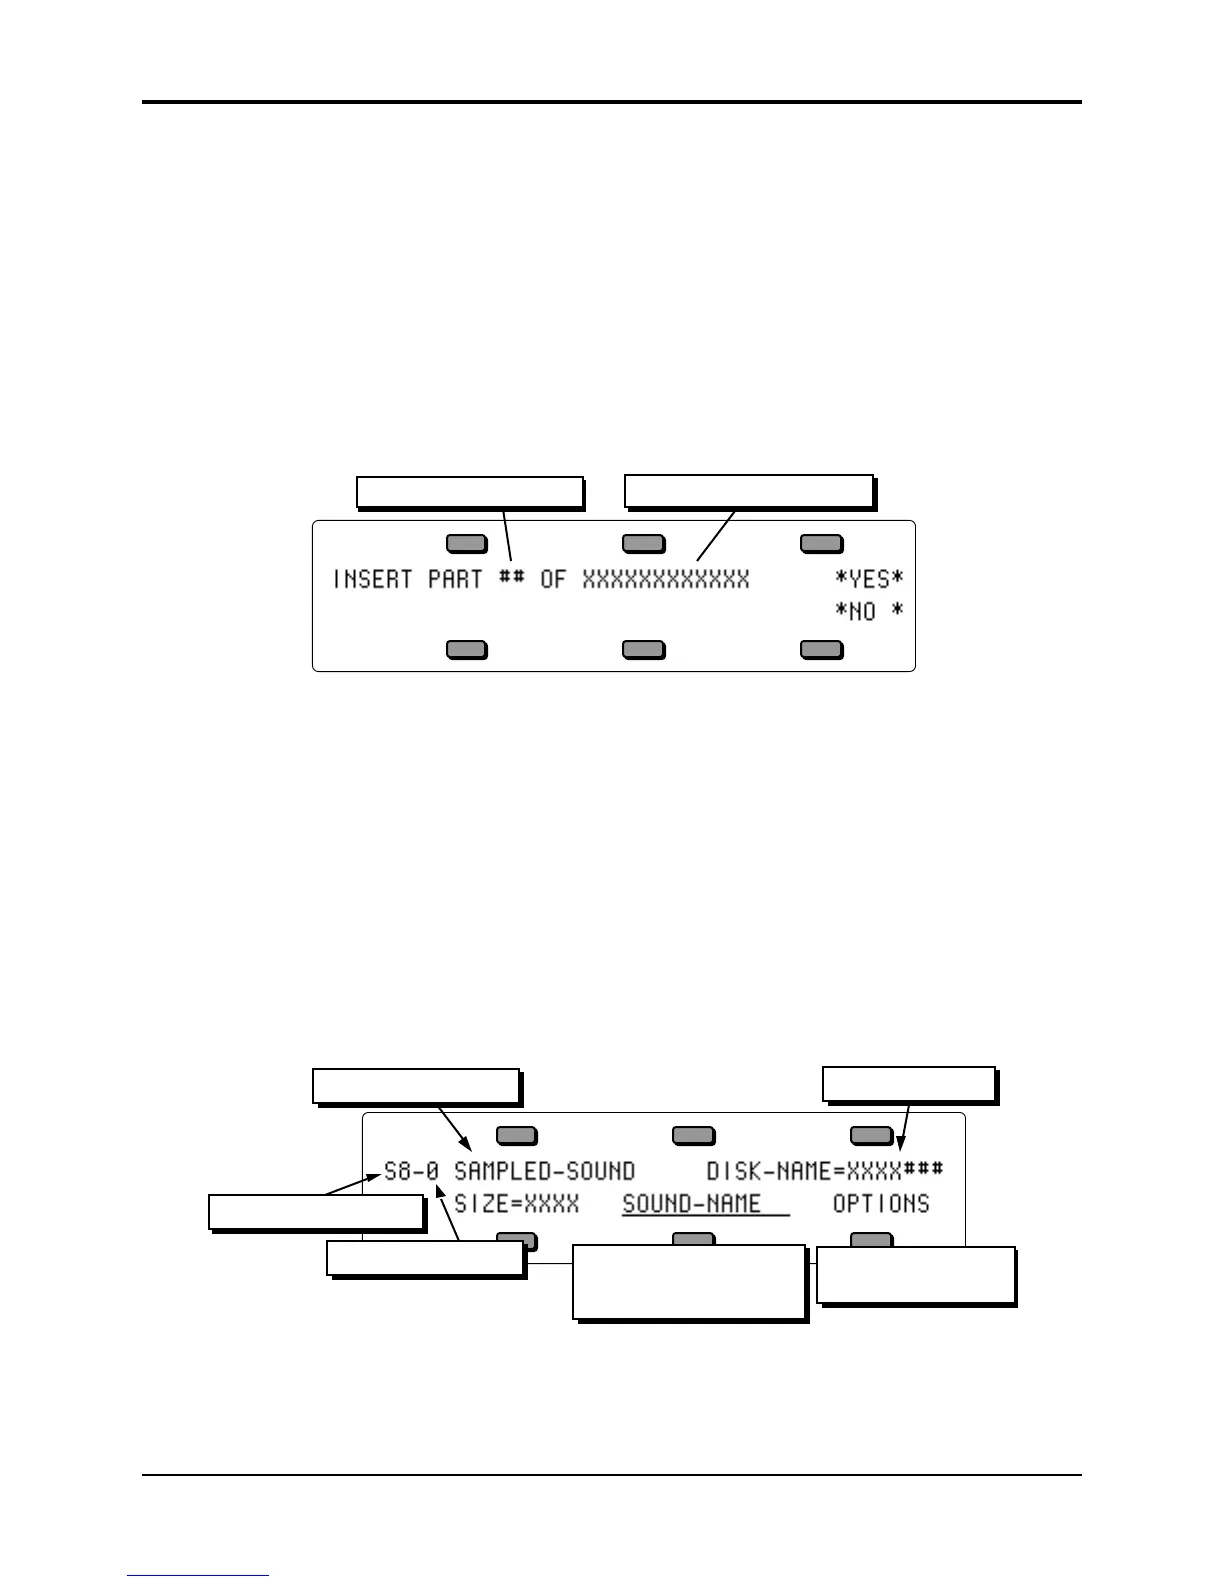
loading part of a multi-disk Sampled Sound file, the display will read:
The next higher number
Sampled Sound file name
• If you answer YES to loading the next higher part number, with a disk containing the wrong
part number in the drive, the display will show DISK CONTAINS WRONG PART. This
message will last for a few seconds, and then return to the previous display.
• If you answer NO to loading the next higher part number, the display will momentarily show:
MULTI-DISK LOAD NOT COMPLETED.
• If you try to load part 2 without loading part 1 first, the display will momentarily show:
INVALID FILE LOAD PART 1 FIRST.
Selecting and Playing a Sampled Sound
Once the sound has finished loading, you will probably want to select it so you can play it:
• Press the Sounds button, press the BankSet button, and while holding it down, press the
Bank 8 button to select the Sampled Sound BankSet 8. You’ll find the display looks a bit
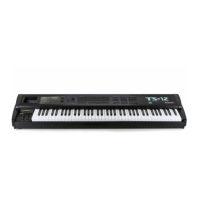
different than when you are selecting Programs:
Sampled Sound Status
Sampled Sound BankSet
Source Disk Name
Sampled Sound Bank
Sampled Sound File Name.
Press here to Select , or
double-click to Stack.
Press here to enter the
OPTIONS sub-page.
The top line of display shows the status of the Sampled Sound, and the name of the disk from
which the Sampled Sound was loaded into the TS-10. The bottom of the display also shows the
size of the Sampled Sound in blocks, the Sampled Sound name (or *EMPTY-BANK* for an empty
Sampled Sound bank location), and OPTIONS that provides access to an Options sub-page.