C4 Maintenance 6. Joint #2
86 C Series Maintenance Manual Rev.2
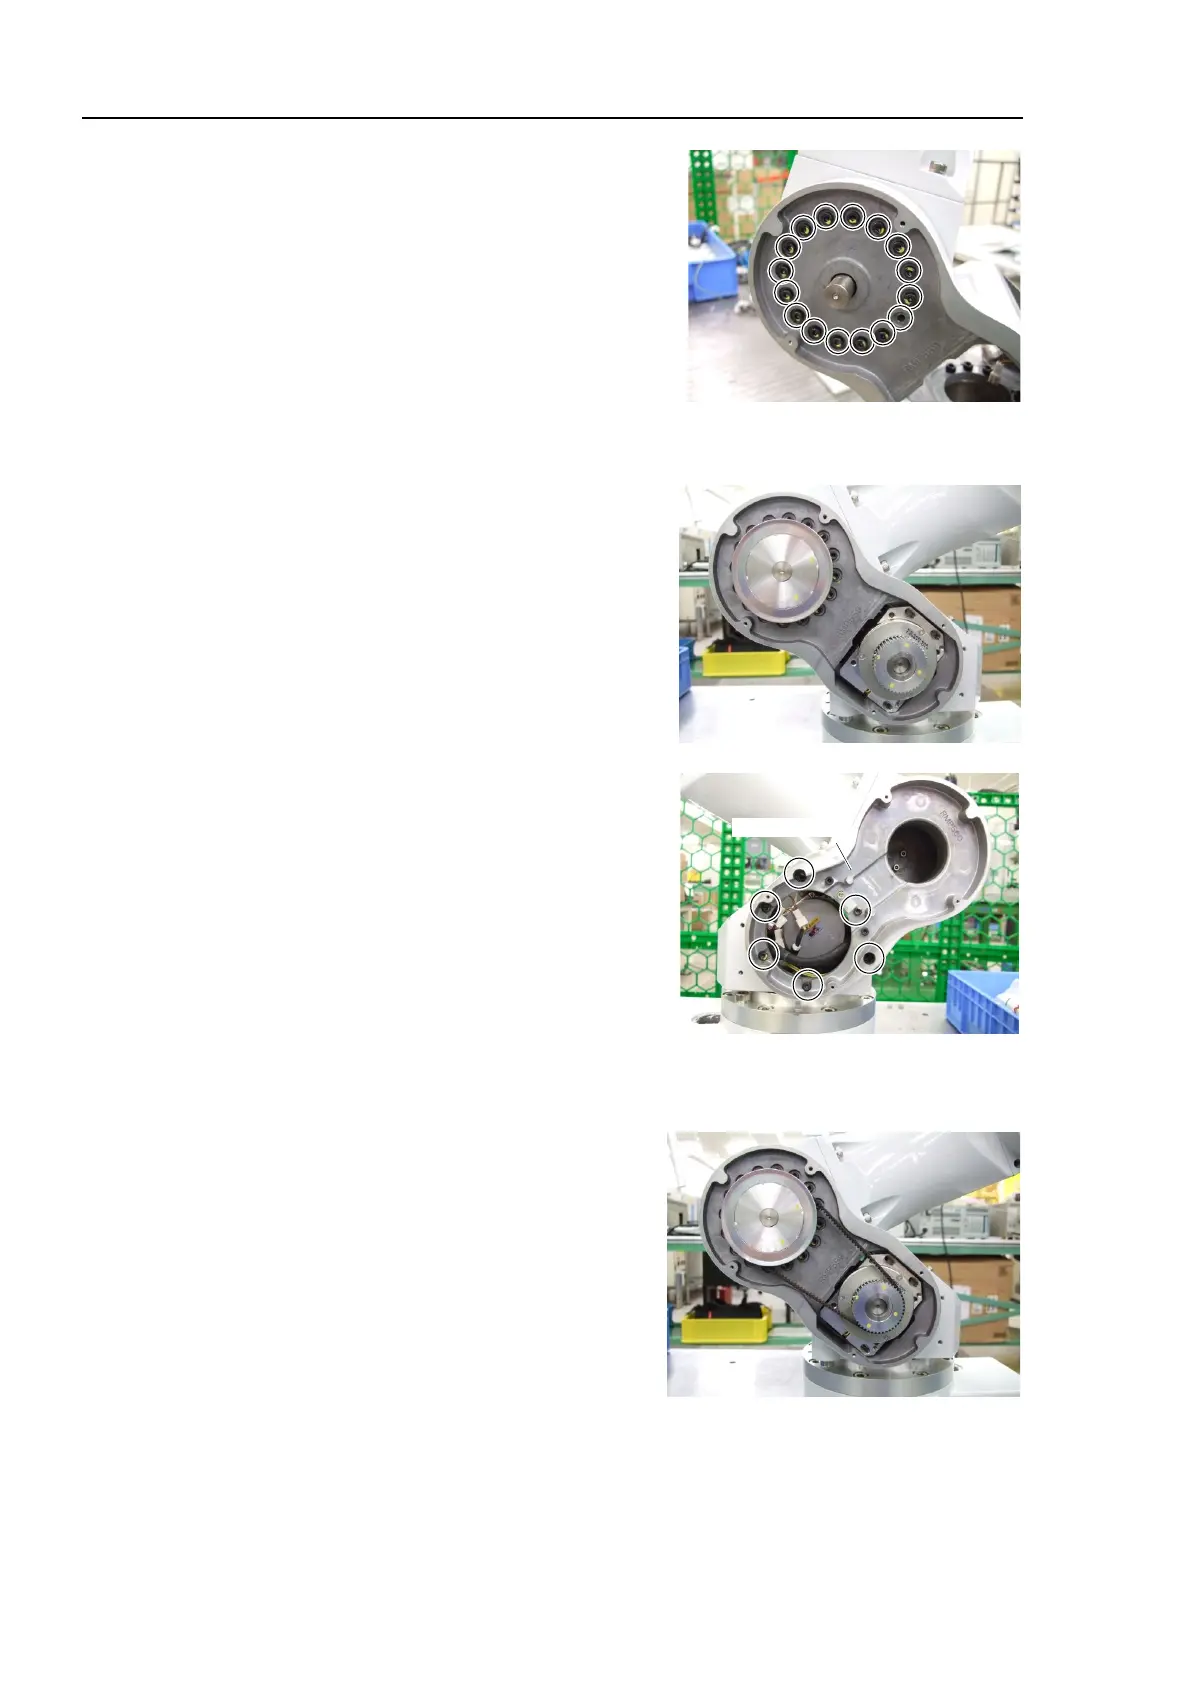
13. Install the Arm #2 and the reduction gear unit to the Arm #1.
Hexagon socket head cap bolt: 16-M4×30
Tightening torque: 4.9 N·m (50 kgf·cm)
Make sure to install after matching the screw hole positions.
Match the positions of screws (reduction gear unit×4, arm×1)
and clearance holes.
When installing the shaft to the hole of the Arm #1, be careful
not to damage the seal.
Be careful not to let the O-ring on the groove of the circular
14. Install the pulley 2.
Hexagon socket set screws: 2-M5×10 (with a brass bushing)
Tightening torque: 3.9 N·m (40 kgf·cm)
Join the end of the shaft and the side of the pulley, and then
fix them.
15. Turn the Arm to the opposite side and install the Arm #1 plate.
Hexagon socket head cap bolts: 6-M4×12
Tightening torque: 4.9 N·m (50 kgf·cm)
After installing the plate, move the arm to make sure that
there is no errors.
16. Install the cable unit.
For details, refer to C4 Maintenance: 4.1 Replacing the Cable Unit, installation steps (7) through (43)
and (62) through (64).
17. Place the Joint #2 timing belt to the pulley 1 and the pulley 2
of the Joint #2.
18. Apply tension to the Joint #2 motor unit and fix it.
For details, refer to C4 Maintenance: 6.1 Joint #2 –
Replacing the Motor, Installation steps (10) through (13).
19. Install the removed covers.
For details, refer to C4 Maintenance: 3. Covers.
20. Perform the calibration.
For details, refer to C4 Maintenance: 16. Calibration.

 Loading...


