C4 Maintenance 6. Joint #2
C Series Maintenance Manual Rev.2 77
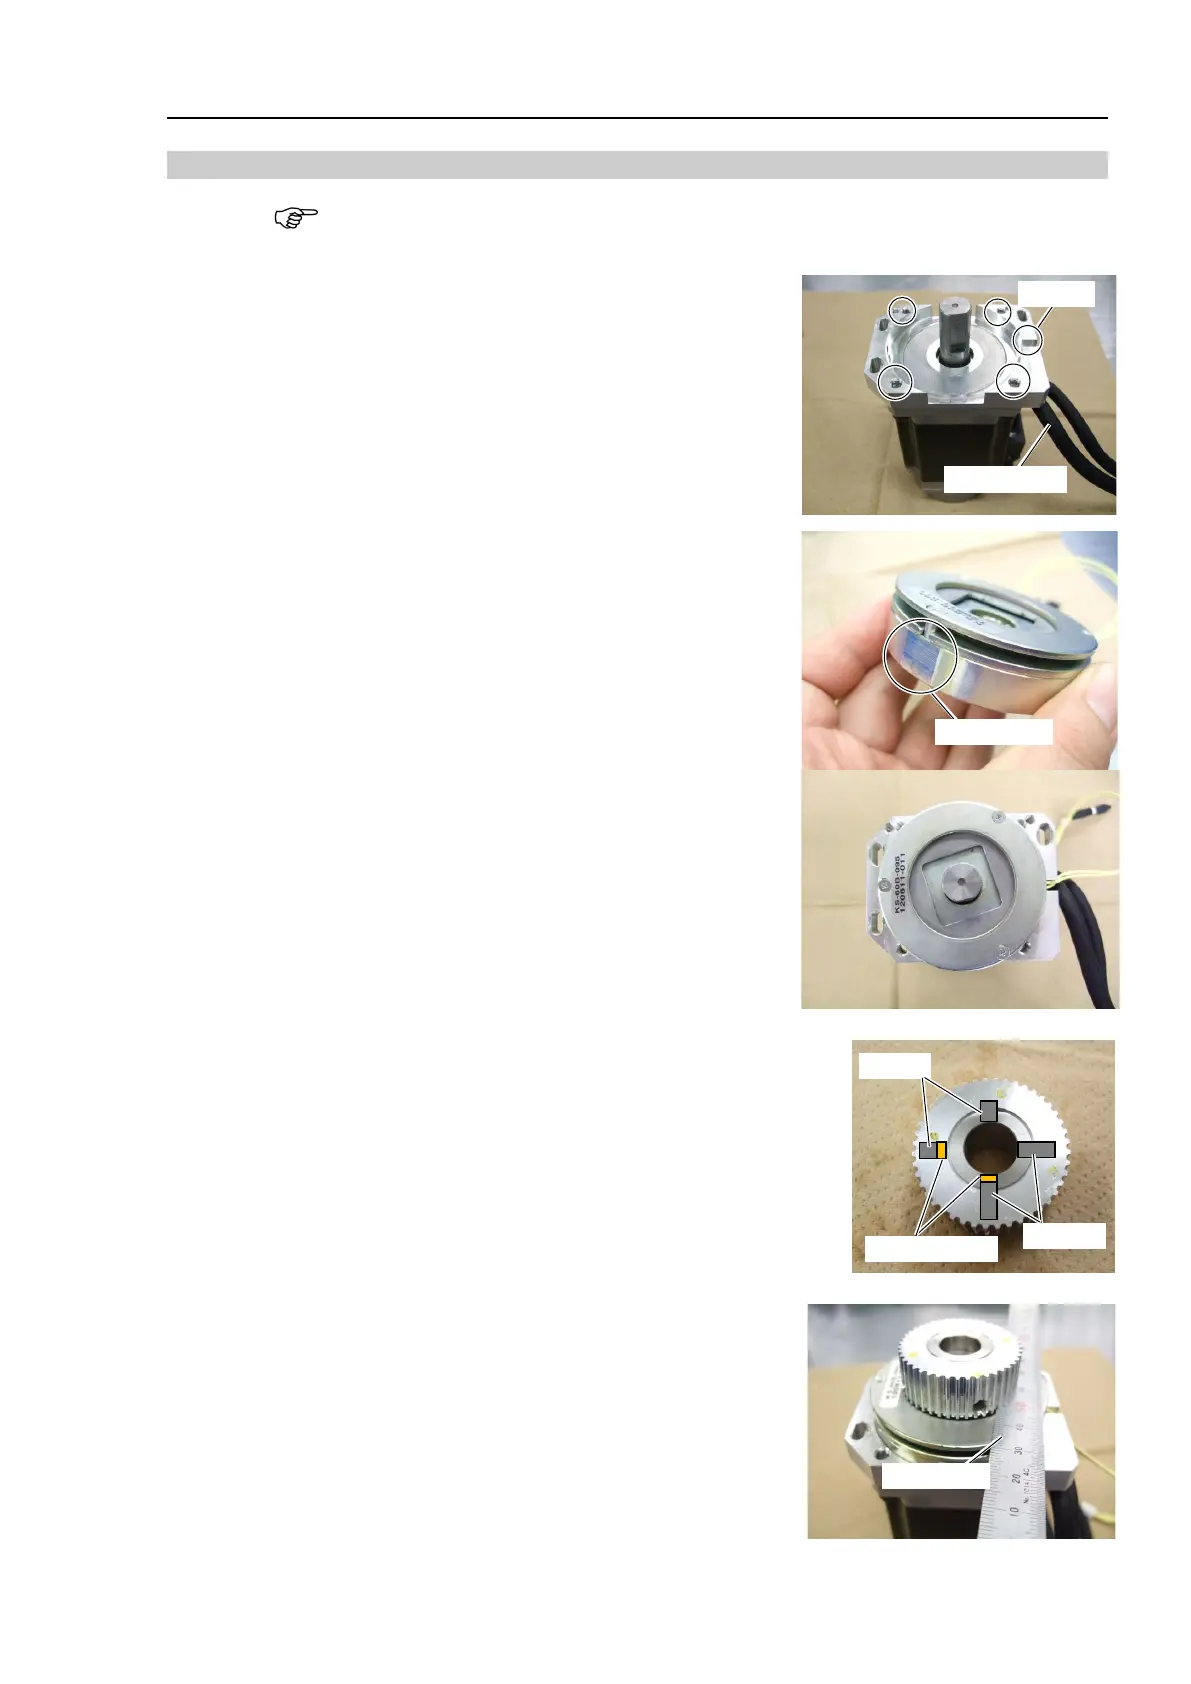
Installation: Joint #2 Motor
When tightening hexagon socket head cap bolts, refer to the 2.4 Tightening Hexagon Socket
Head Cap Bolts.
1. Install the motor plate to the Joint #2 motor.
Hexagon socket head cap bolts: 4-M5×15
Tightening torque: 9.8 N·m (100 kgf·cm)
Be careful of the direction of the motor plate. (See the photo.)
2. Mount the Joint #2 electromagnetic brake to the Joint #2 motor
unit.
Align the position of the brake wire with the groove on the motor
plate. Then, set the flat surface of the brake to the set screw side
and secure the brake. Be careful not to cut the brake wire by
getting it caught between the brake and the motor plate.
Press the brake toward the motor plate and tighten the set screw.
Hexagon socket set screw: 1-M5×8
Tightening torque: 3.9 N·m (40 kgf·cm)
3. Mount the drive boss and the pulley 1 to the Joint #2 motor unit.
Put the end faces of the brake boss and the pulley 1 together and
fix them.
Hexagon socket set screws: 2-M5×6 (with a brass bushing)
Tightening torque: 3.9 N·m (40 kgf·cm)
Set the pulley 1 and the motor shaft.
Leave 0.5 mm for the electromagnetic brake.
Hexagon socket set screw: 2-M5×10 (with a brass bushing)
Tightening torque: 3.9 N·m (40 kgf·cm)
Fix the parts so that the end of the motor shaft and the surface of
the pulley become flat.
See the photo for positions of the set screws.
2-M5×10
Brass bushing
2-M5×6