C4 Maintenance 7. Joint #3
92 C Series Maintenance Manual Rev.2
Installation: Joint #3 Motor (with a brake)
When tightening hexagon socket head cap bolts, refer to the 2.4 Tightening Hexagon Socket
Head Cap Bolts.
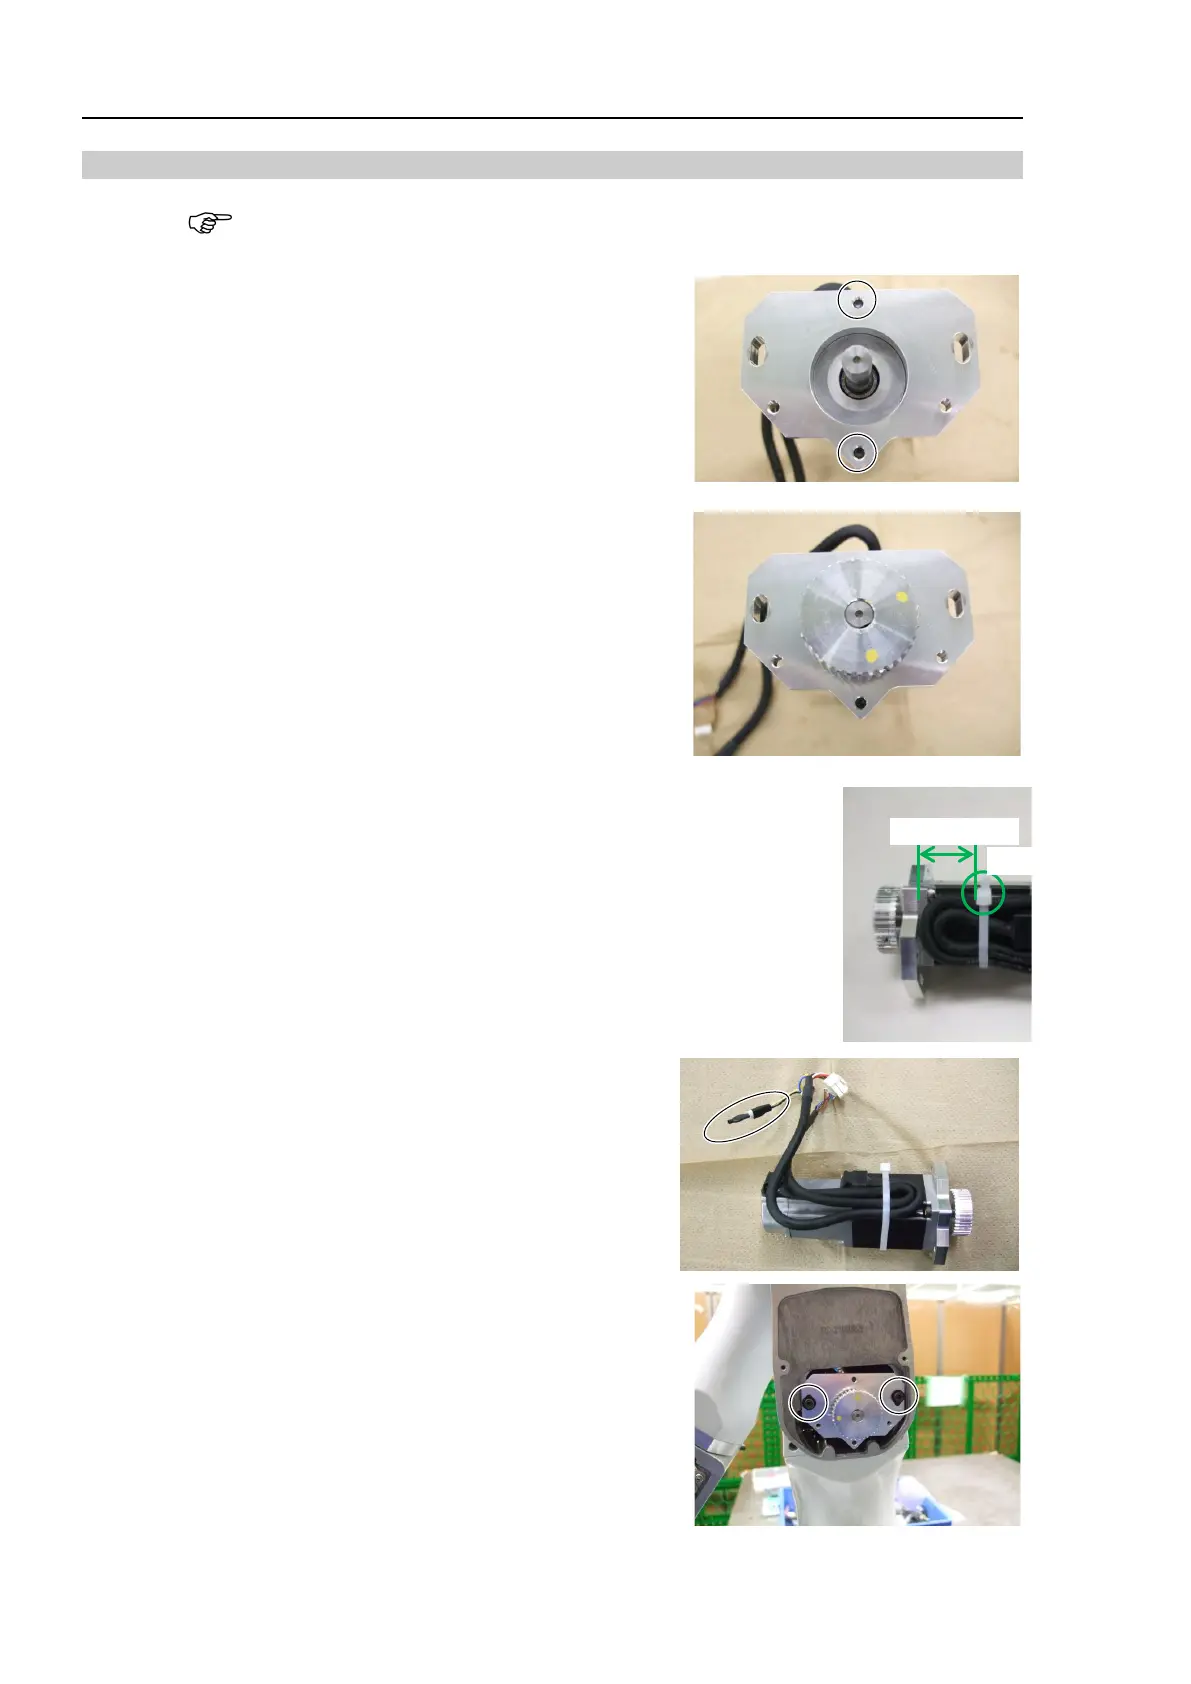
1. Install the motor plate to the Joint #3 motor.
Be careful of the direction of the motor plate. Be sure to tilt
the Arm. (See the figure.)
Hexagon socket head cap bolt: 2-M4×12
Tightening torque: 4.9 N·m (50 kgf·cm)
2. Mount the pulley 1 to the Joint #3 motor unit.
Hexagon socket set screw: 2-M4×8 (with a brass bushing)
Tightening torque: 2.5 N·m (25 kgf·cm)
Set the set screw to the flat face of the motor shaft. For the
other set screw, set the brass bushing to the end.
Join the end of the motor shaft and the side of the pulley, and
then fix them.
3. Fix the motor cable to the motor.
Wire tie: AB200
4. Install the removed noise dissipative diode.
Connector: D
5. Install the motor unit to the Arm #2.
Hexagon socket head cap bolts: 2-M4×15
(with a plain washer)
Temporarily tighten the screws.
Tighten the screws loosely enough to hold the motor unit.