C4 Maintenance 14. Replacing the LED Lamp
C Series Maintenance Manual Rev.2 159
Removal: LED lamp
1. Turn OFF the Controller power.
2. Remove the Arm #3 head cover.
For details, refer to C4 Maintenance: 3. Covers.
3. Remove the connector connected to the LED lamp.
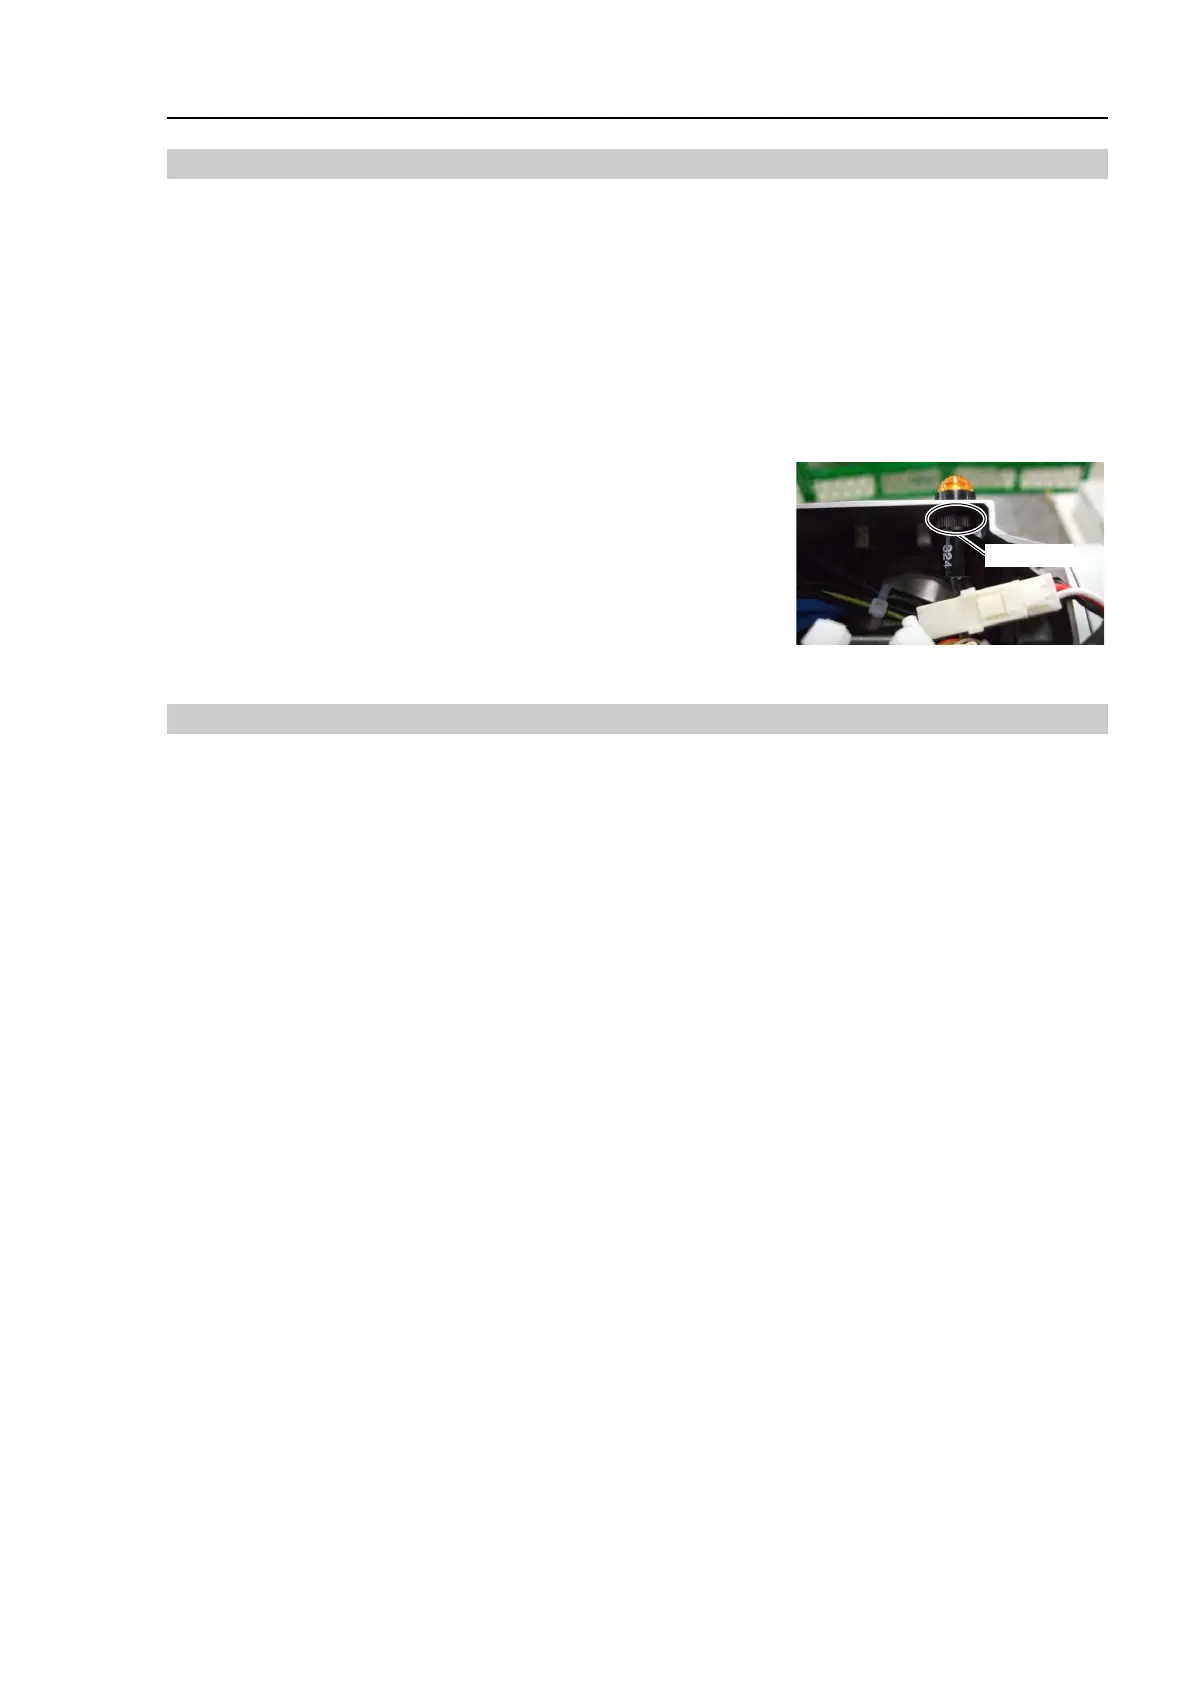
The connector for the LED lamp (LED) is under the Arm #3 head cover.
Connector: LED
4. Remove the LED lamp from the Arm #3.
Turn the
resin nut securing the LED lamp in the Arm #3
counter-clockwise.
Installation: LED lamp
1. Install the LED lamp to the Arm #3.
Detach the resin nut from the LED lamp and pass the lamp through the Arm #3. Turn the nut clockwise
from the inside of the Arm #3 and secure the lamp to the Arm #3.
2. Connect the following connectors.
Connector: LED
3. Install the Arm #3 head cover.
For details, refer to C4 Maintenance: 3. Covers.
 Loading...


