C4 Maintenance 13. Replacing the Control Board
156 C Series Maintenance Manual Rev.2
13.2 Replacing the Control Board 2
Removal: Control board 2
1. Turn OFF the Controller power.
2. Remove the Arm #3 head cover.
For details, refer to C4 Maintenance: 3. Covers.
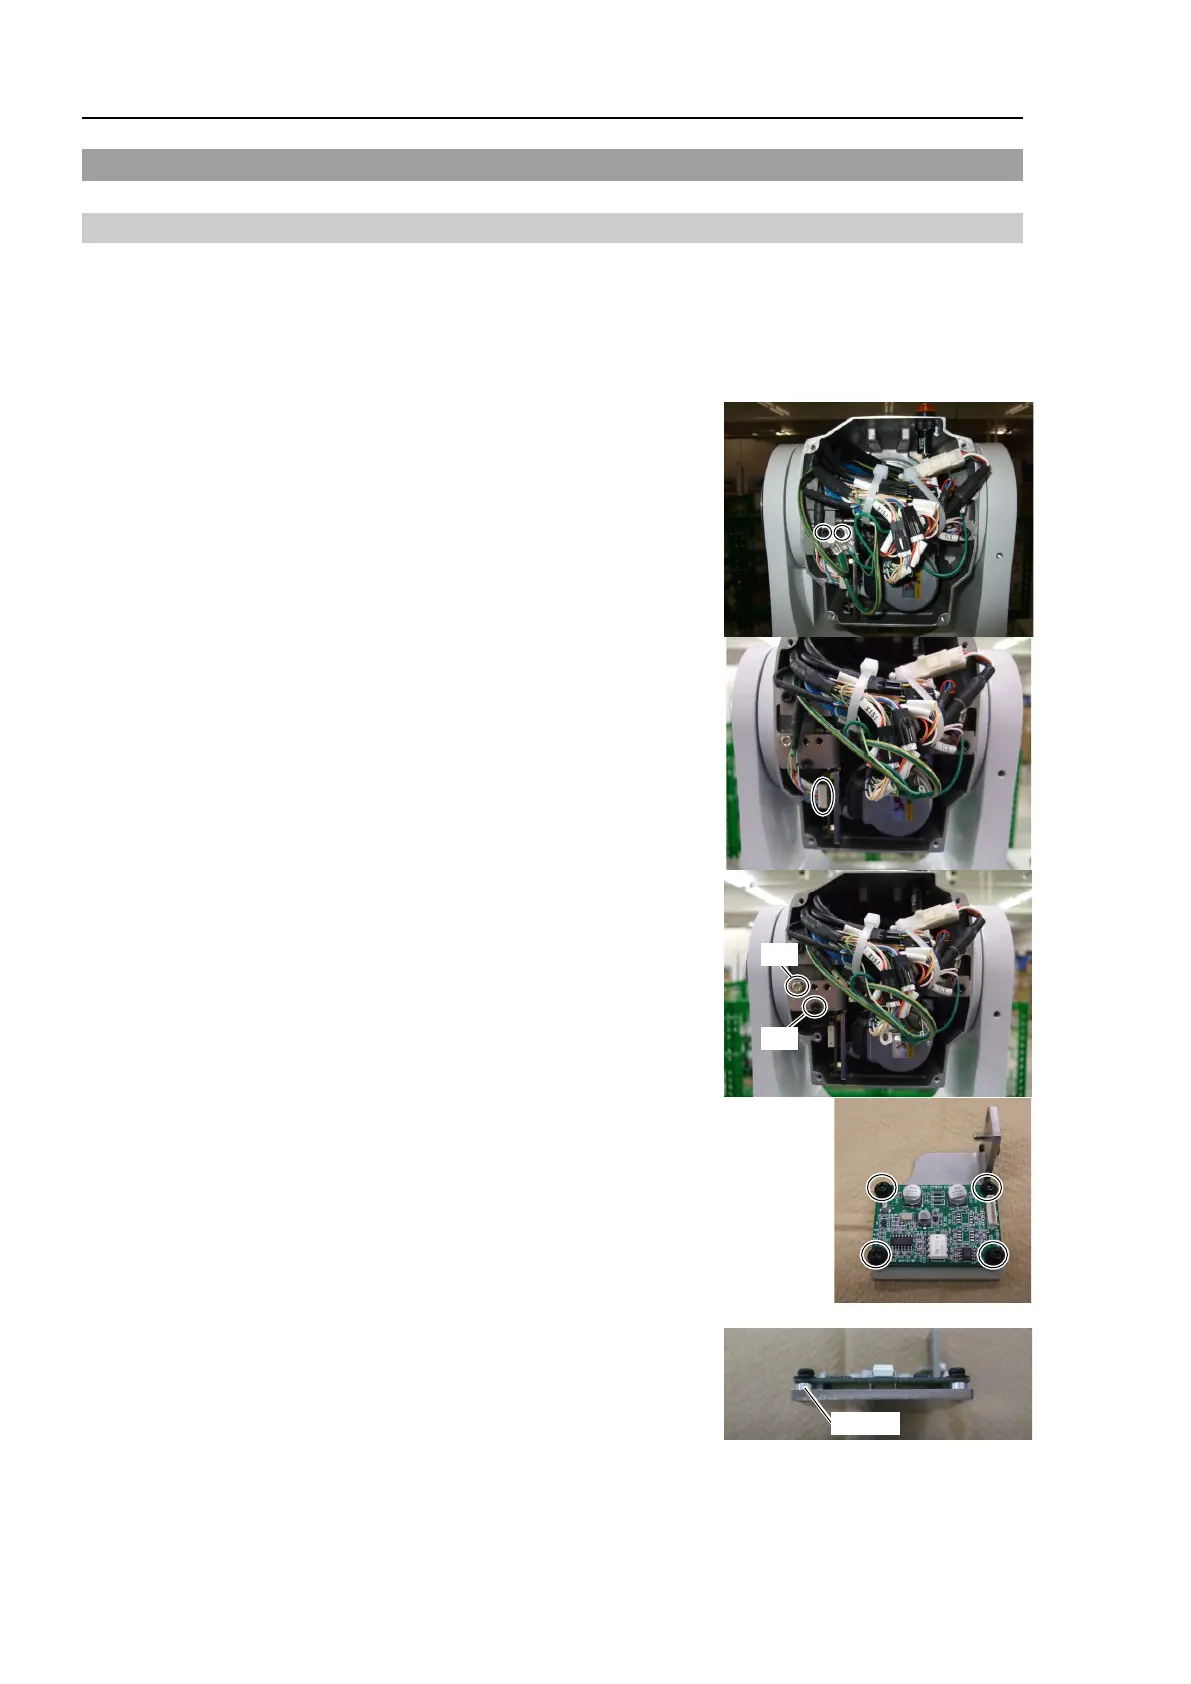
3. Remove the ground wire fixed to the plate.
Hexagon socket head cap bolts: 2-M4×5
4. Remove the connector connected to the control board 2.
Connector: GS02
5. Remove the plate fixed to the Arm #3.
Hexagon socket head cap bolt: M4×10
Hexagon socket head cap bolt: M3×8
6. Remove the control board 2 fixed to the plate.
Cross recessed head screw: 4-M3×8
There is a spacer between the plate and the control board 2.
The spacer will be used again. Be careful not to lose it.
Spacer: 4 spacers