C4 Maintenance 6. Joint #2
C Series Maintenance Manual Rev.2 75
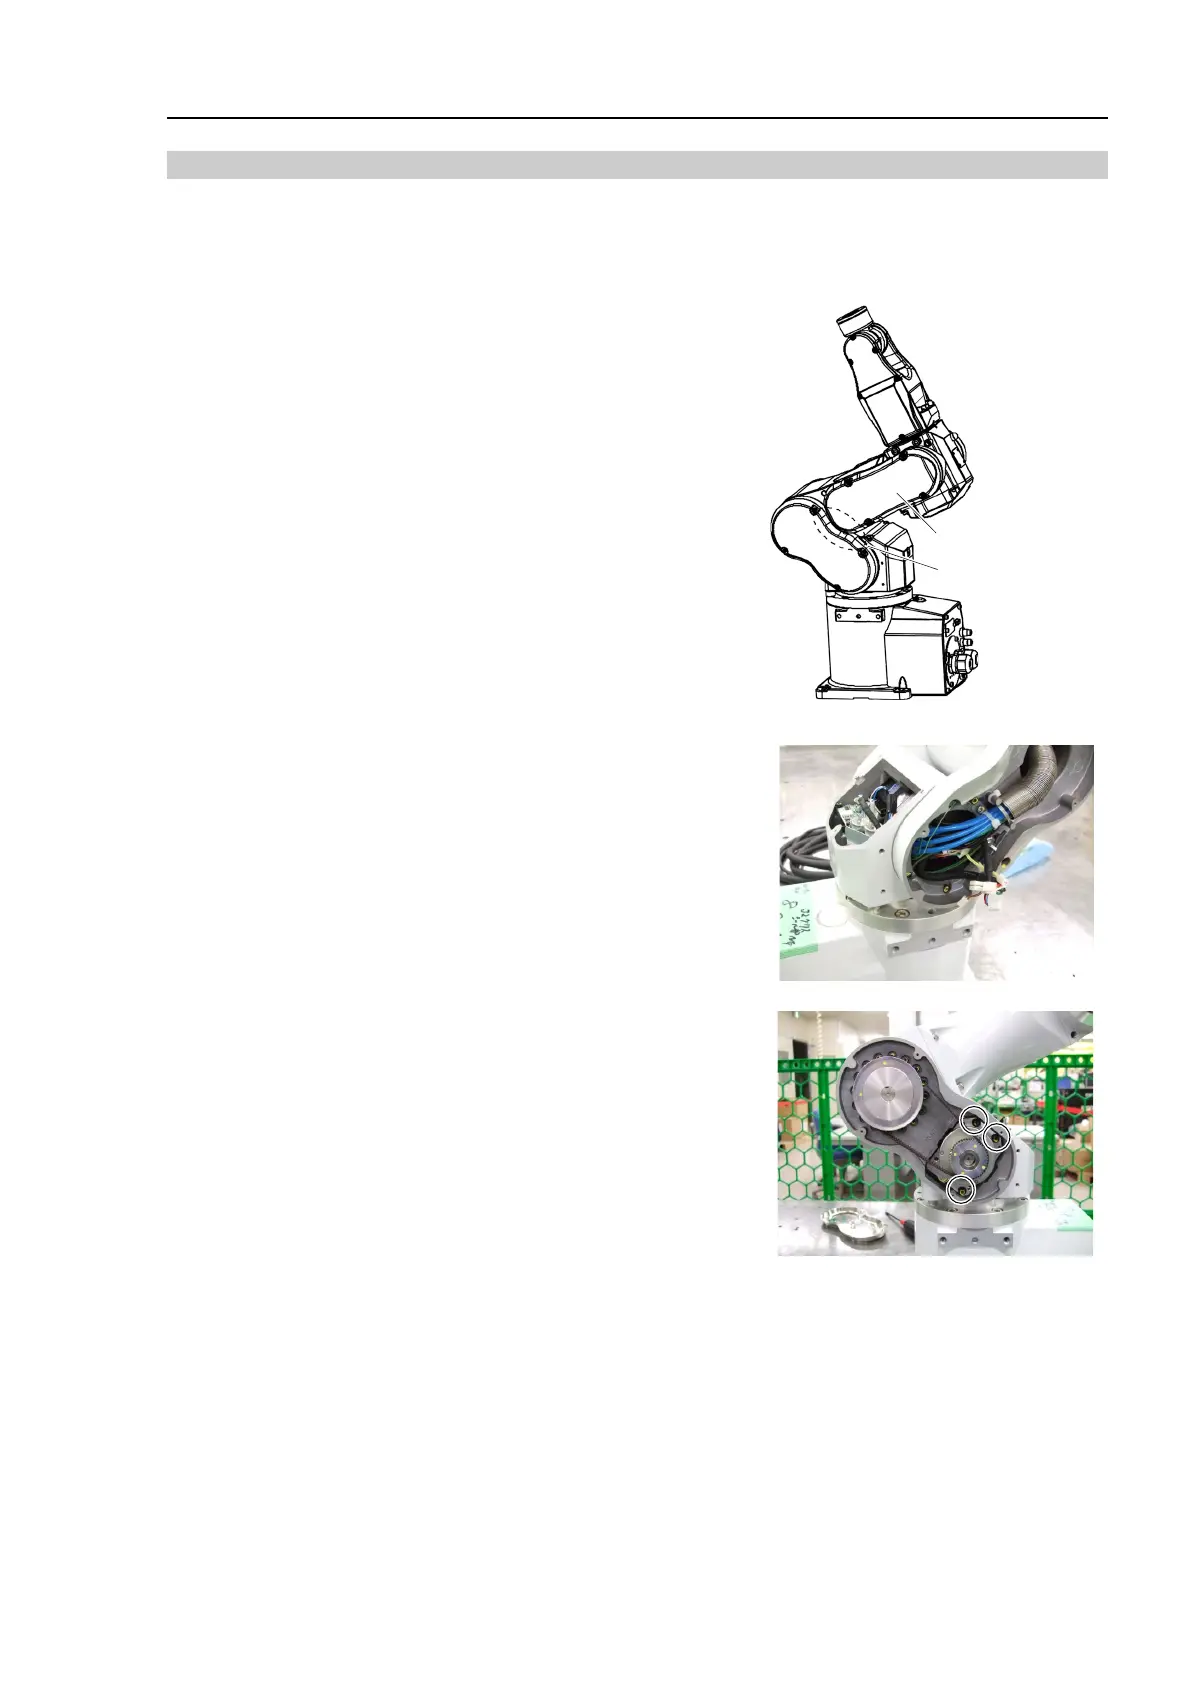
Removal: Joint #2 Motor
1. Remove the Arm #1 top cover and the Arm #1 side cover.
For details, refer to C4 Maintenance: 3. Covers.
2. Turn ON the Controller power.
3. Tilt Arm #2.
Put a cloth between Arm #1 and Arm #2 so that two arms do
not touch each other.
Protect arms
using a cloth, etc.
Tilt the Arm #2
4. Turn OFF the Controller power.
5. Disconnect the following connectors.
Connector: X121, X021, X62, BR021
(Hold the clip to remove.)
6. Tilt the Arm #2 and remove the Joint #2 motor unit and the belt
from the Arm #1.
If the bolts are removed with the Arm #2 is not tilted, the belt
will come off and the Arm #2 will fall. Be sure to tilt the Arm.
Hexagon socket head cap bolt: 3-M4×18
washer)