C8 Maintenance 5. Joint #1
C Series Maintenance Manual Rev.2 289
Installation: Joint #1 Timing belt (M/C Cable Downward)
When tightening hexagon socket head cap bolts, refer to the 2.4 Tightening Hexagon Socket
Head Cap Bolts.
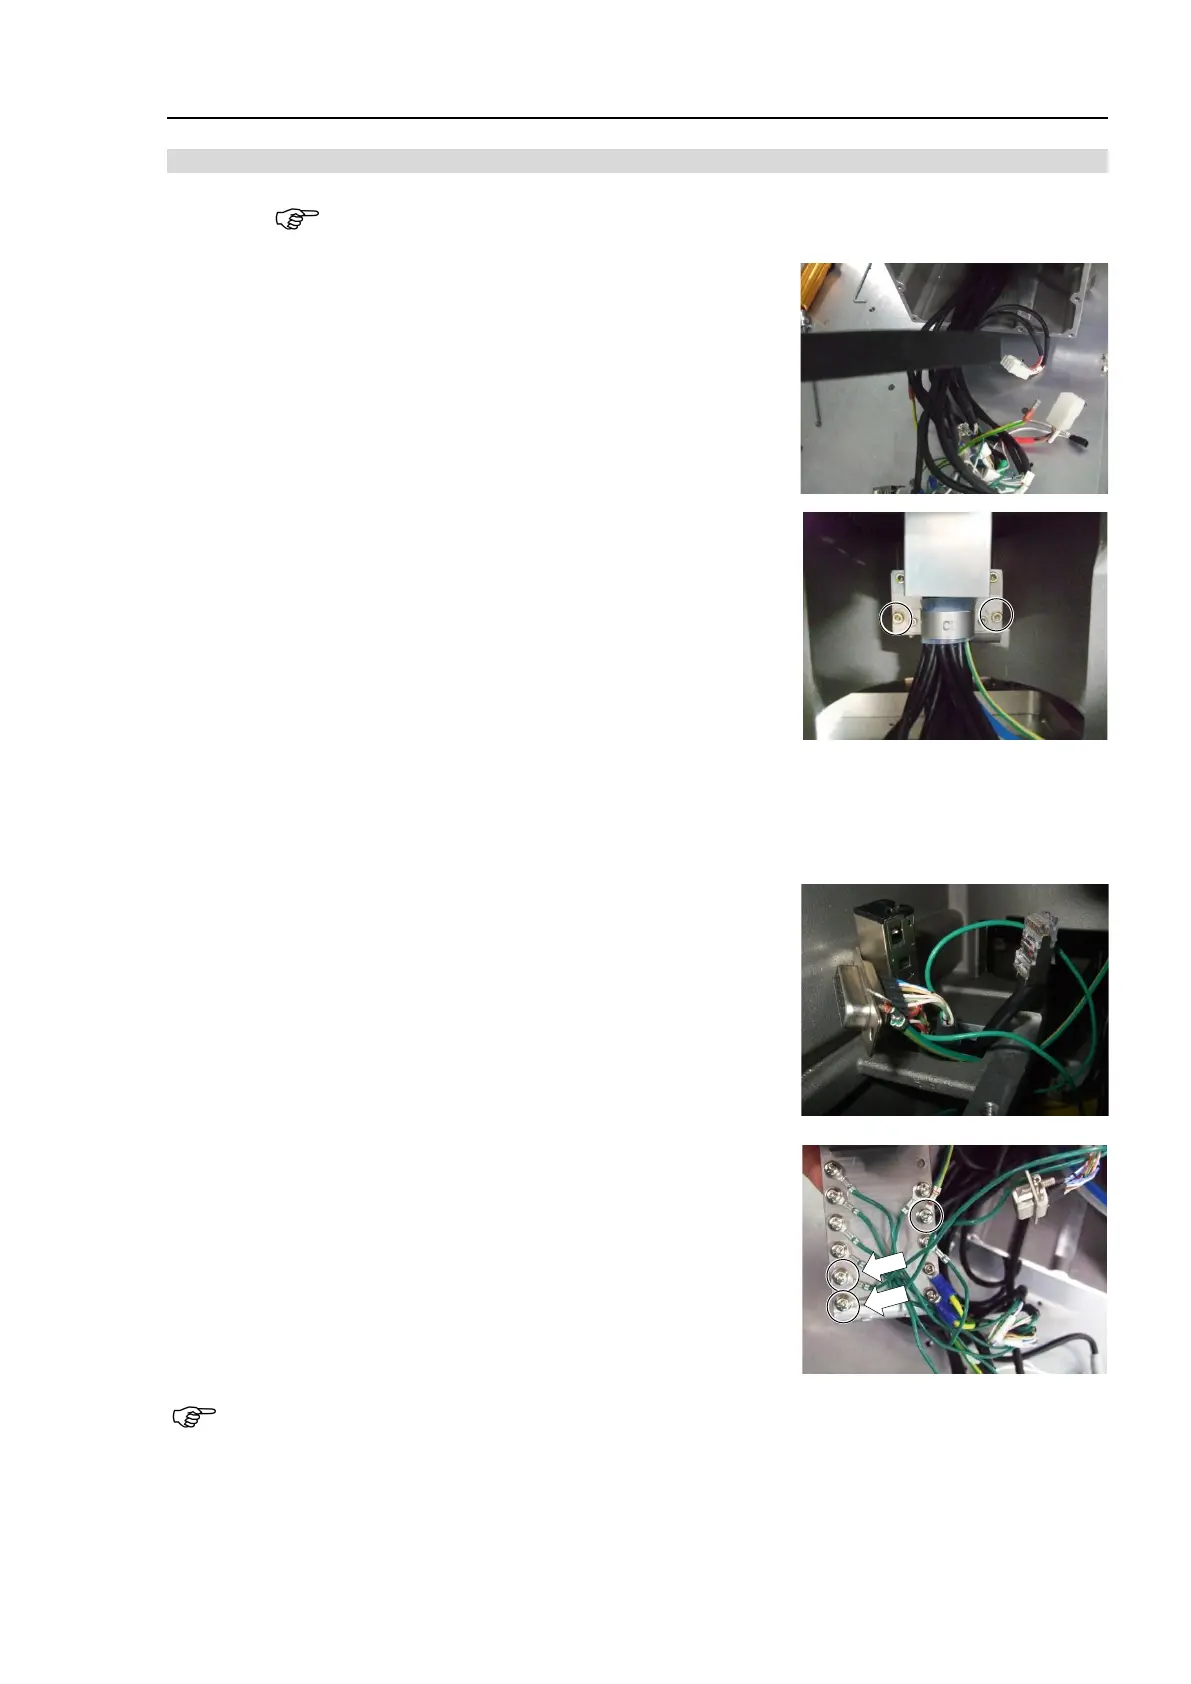
1. Pass the cables and air tubes to the Joint #1 timing belt.
2. Mount the Joint #1 cable fixing plate.
Hexagon socket head cap bolts: 2-M3×6
Tightening torque: 2.0 ± 0.1 N·m
3. Mount the Joint #1 motor unit.
For details, refer to C8 Maintenance: 5.1.1 Joint #1-Replacing the Motor (M/C Cable Backward),
Installation steps (1) to (4).
4. Disconnect the following parts from the hole inside the base to the
upper side of the base.
D-sub cable
Ground wire
RJ45 connector
F-sensor connector
5. Install the terminals of the D-sub cable ground wire and ground
wire (green/yellow).
D-sub cable ground wire terminals (×2) indicated by arrows
Ground wire (green/yellow) terminal (×1)
Cross recessed head screws with washer: 3-M4×8
Tightening torque: 0.9 ± 0.1 N·m
The installation positions of the D-sub cable ground terminals are
fixed. Make sure to install them to the two screw holes on the
backside of the Manipulator (as indicated by arrows in the