Appendix A Assembly Instructions
A-8 ER1 User Guide
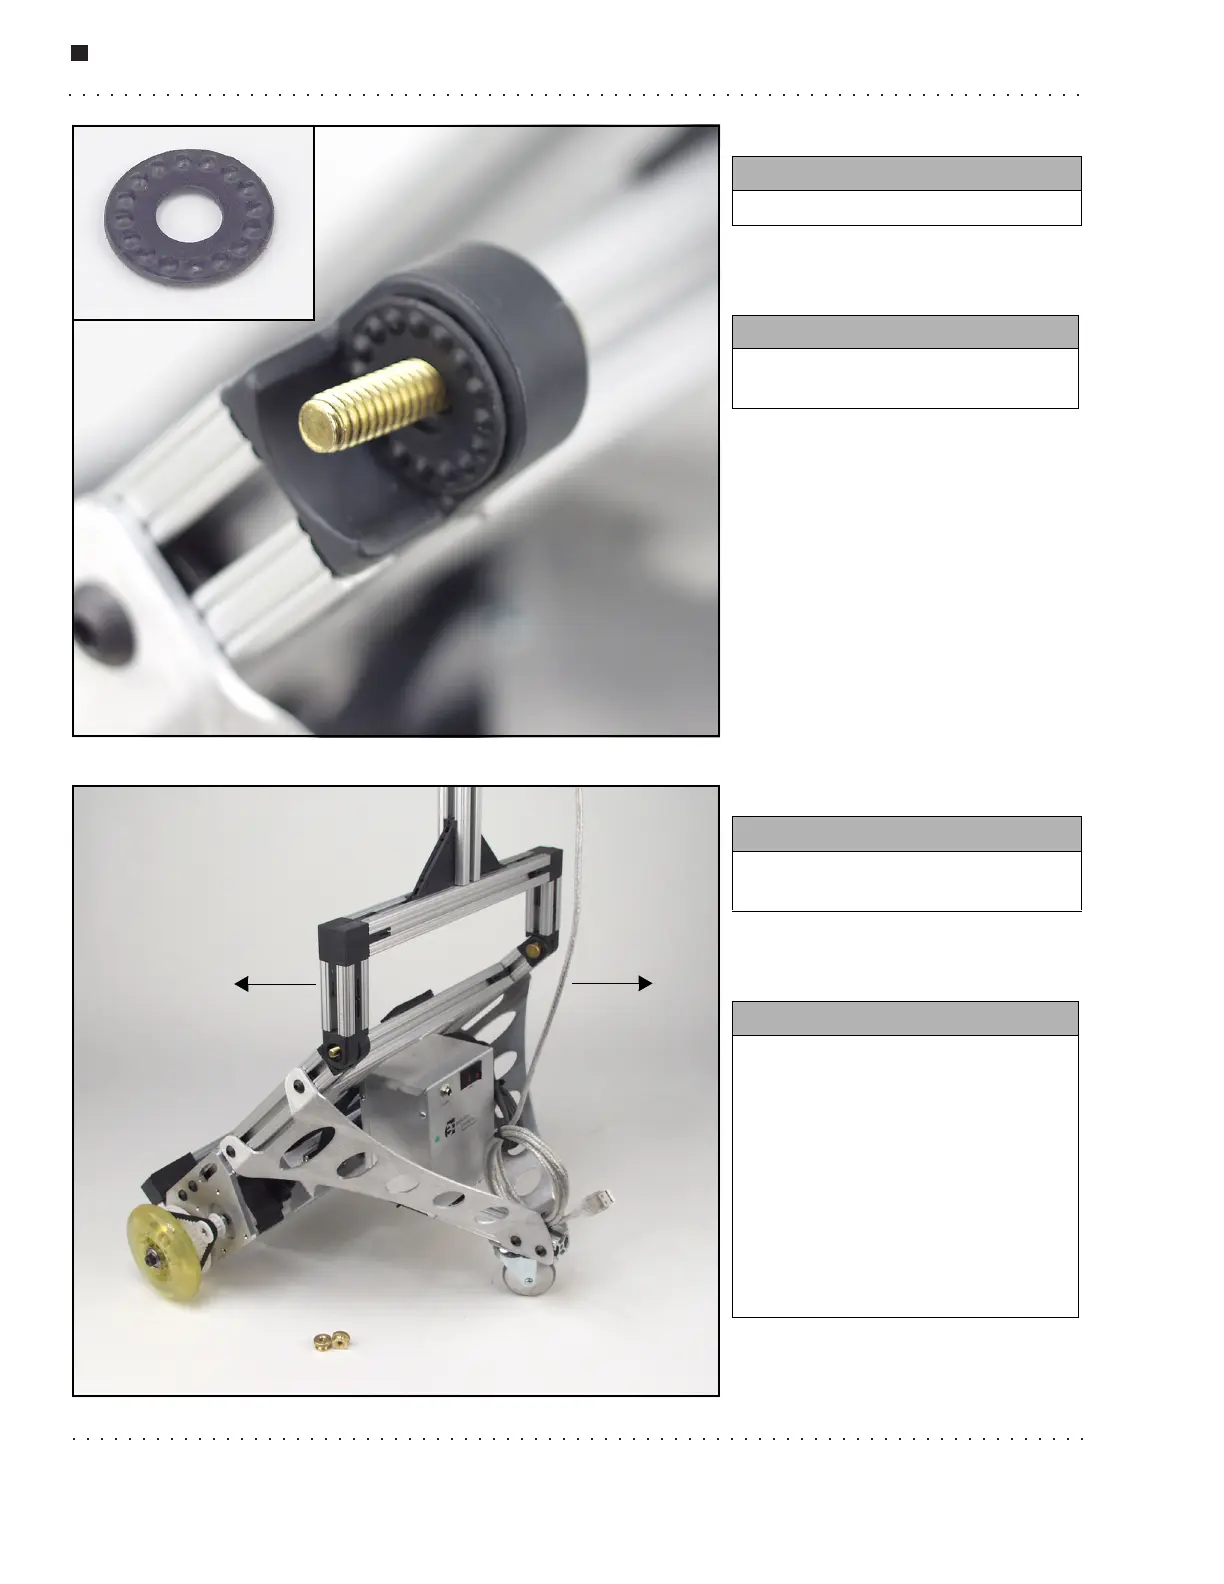
Step 2.
Step 3.
You need:
• 2 locking washers
Instructions:
• Place one locking washer on each
of the screw posts.
You need:
• The top of the robot (with the
camera head).
Instructions:
• Attach the top of the robot to the
screwposts with the locking
washers as shown. You will need
to pull the screws back through
the holes about 1/2'' and then
thread them through the hinge
halves on the top of the robot.
• Make sure that the camera is
pointing toward the front of the
robot.
Front
Back