SMP300 Series • Web-Based User Interface 60
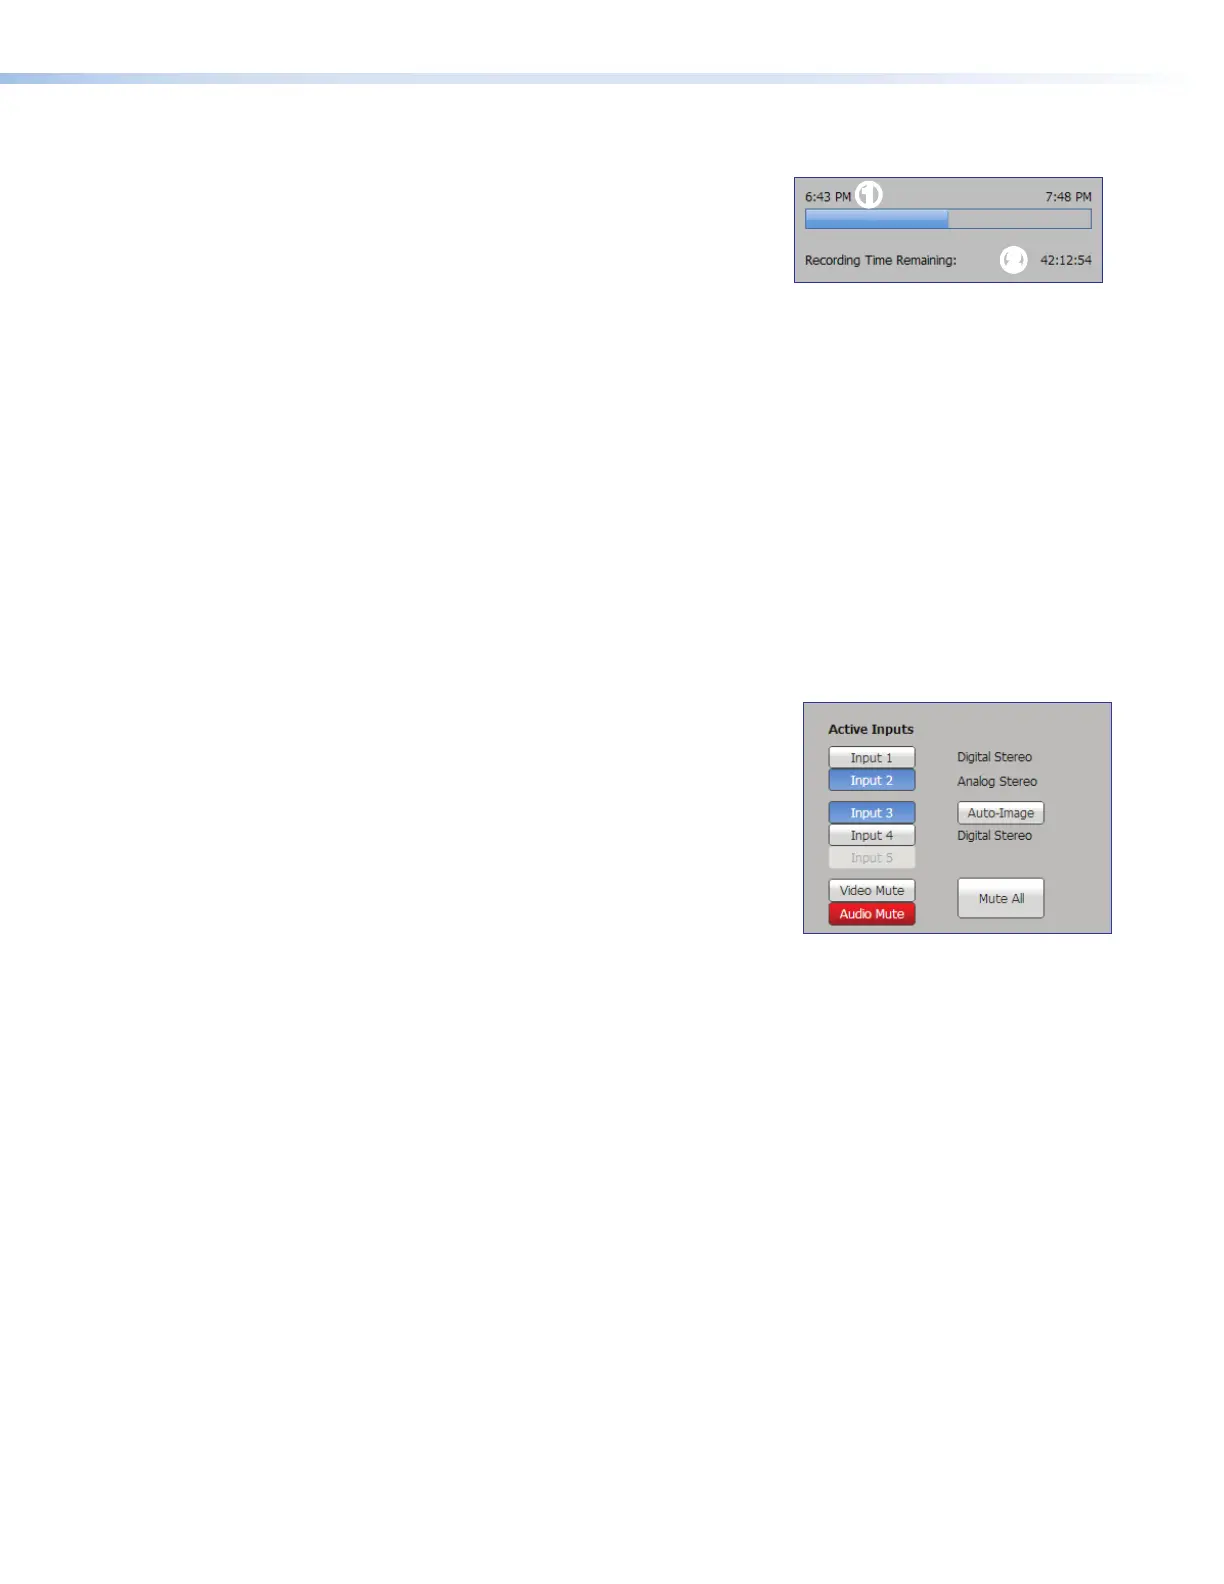
Progress bar
A progress bar (see figure34,
1
) below the
recording control buttons is a horizontal bar graph
that shows how much recording time has elapsed
and, if it is a scheduled session rather than an
ad hoc recording, how long the presentation is
expected to last. For an ad hoc recording, initially
the progress bar shows a five minute duration.
The displayed duration increases in five-minute
increments as the ad hoc recording progresses.
11
2
2
Figure 34. Progress Bar and
Recording Time
Available
Recording time available
Recording time remaining (
2
) is indicated below the progress bar in the format HHH:MM:SS.
The estimate of how much time remains available is based on the combination of available
storage space and the current stream resolution and bit rate. During a scheduled recording,
this field indicates how much time remains in the event. During an ad hoc recording, the
calculated time is displayed.
If dual recording mode is enabled, the remaining time is listed first for the internal storage
drive and then for the selected secondary (external USB) drive (132:46:27*00:03:44, for
example).
Input selection, mute controls, audio indication, and auto-image
Inputs are grouped into two channels:
• Channel A (see figure35,
1
) — Composed
of input 1 (HDMI) and input 2 (HDMI).
• Channel B (
2
) — Composed of input 3
(component/composite), input 4 (HDMI),
and optional input 5 (3G/HD/SDI)for the
SMP3513G-SDI and SMP 352 3G-SDI.
There is one analog audio input per channel. HDMI
inputs can be configured for digital audio (embedded
in HDMI) or a shared analog input for the channel.
The audio type for each input is displayed in the right
column (
4
).
4
4
1
1
2
2
3
3
5
5
Figure 35. Active Inputs,
Mute, Audio, and
Auto-image
Audio format (Off, Digital Stereo or Analog Stereo) must be configured in the Input/
Output Settings page (see Input/Output Settings on page74).
To select AV sources:
1. Click the input buttons (see figure35,
1
and
2
) in the left column of the Active
Inputs area to select AVsources for a presentation. Input changes take effect
immediately.
2. To apply Auto-Image to input 3, click Auto-Image (
5
). Auto-Image automatically sizes
and centers the selected input to match the channel B window.
3. Click the desired button (
3
) to mute video only (Video Mute), audio only (Audio Mute),
or both audio and video (Mute All).
When a mute mode is selected (active), the corresponding button or buttons are red.
Click the buttons to toggle mute states, use the front panel controls, or send SIS
commands to the unit via RS-232 or USB control. When unmuted, the button changes
from red to gray.
34
35