○○○○○○○○○○○○○○○○○○○○○○
2•34 User Guide
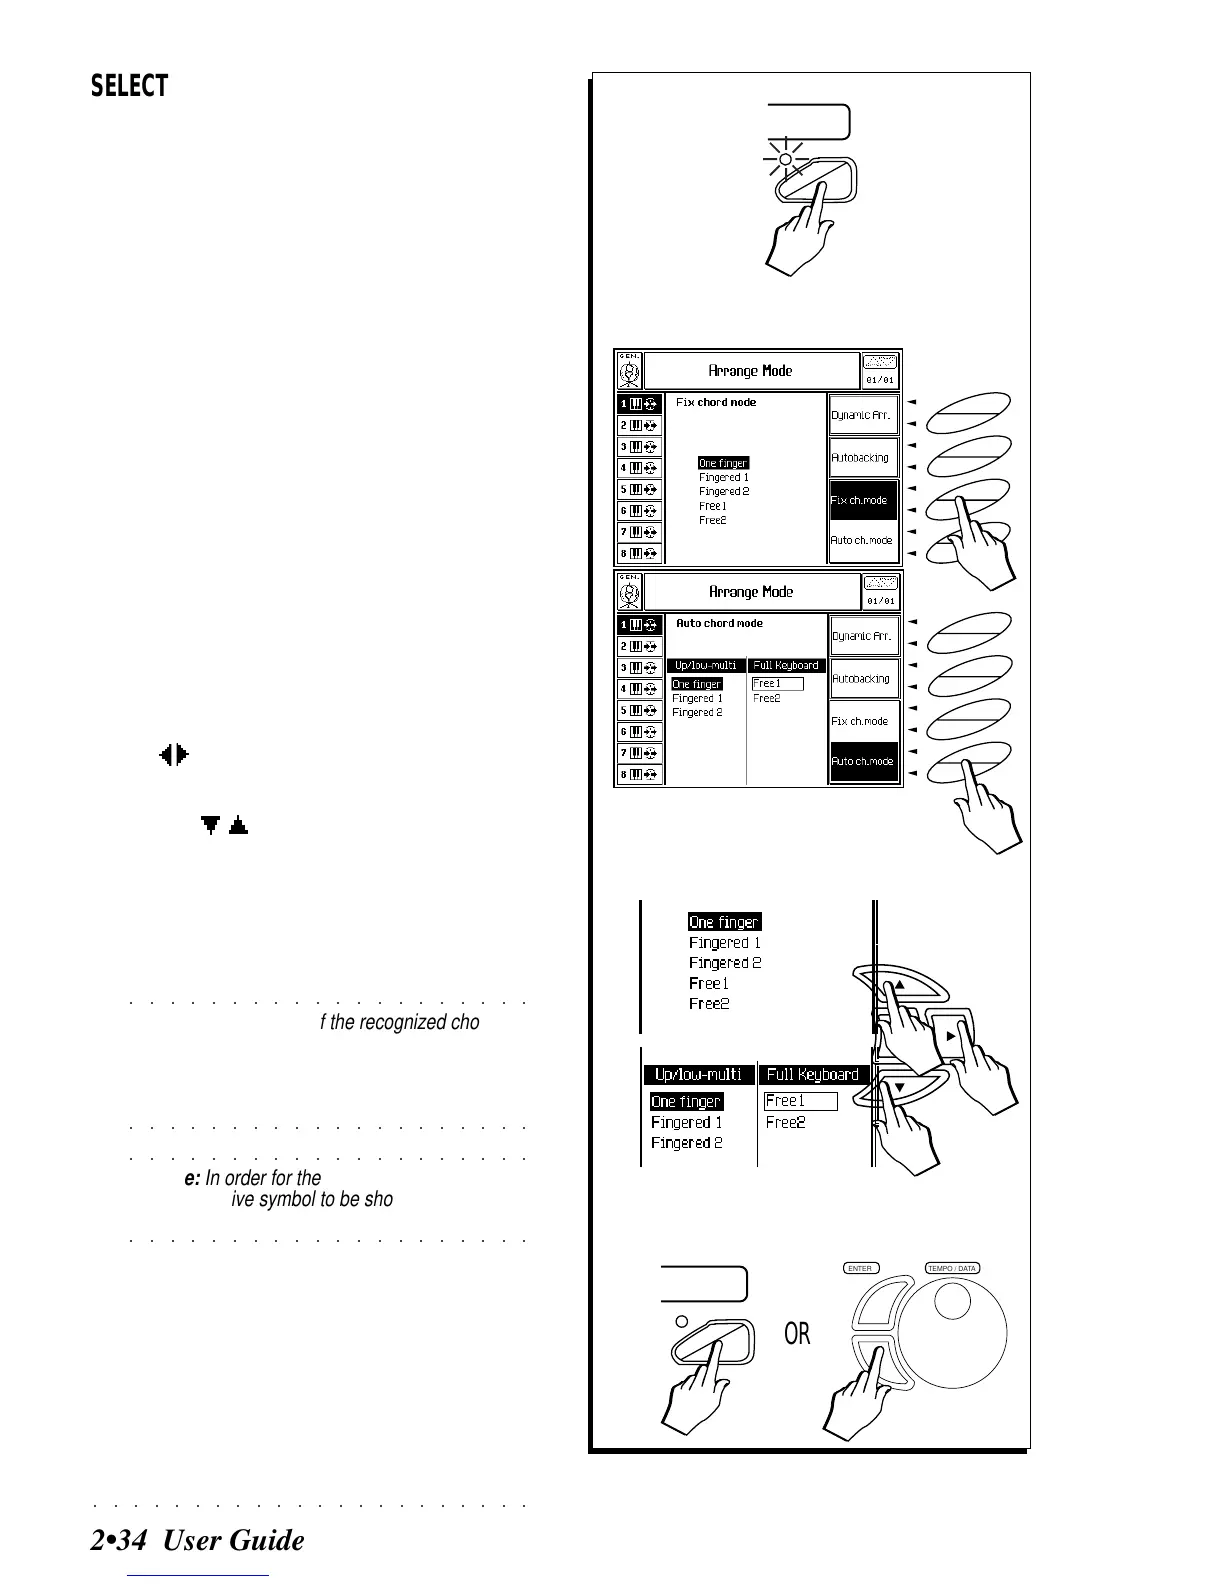
SELECTING THE ARRANGE MODE OP-
TIONS
1. Press the ARRANGE MODE button to gain access
to the «Arrange Mode» environment.
The page shows the parameters of either
«Auto Chord Mode» or «Fixed Chord Mode»,
depending on the option currently selected.
2. Use the Soft buttons to select one of the two Chord
Mode options.
• Fixed Chord Mode - the display shows a
single list of recognition modes.
• Auto Chord Mode - the display divides into
two parts. The left part shows the options for
Upper&Lower and Multi, while the right shows
those for Full Keyboard.
3. Select the preferred chord recognition mode with
the cursor buttons.
If the display is divided into two parts, use
the / cursor buttons to pass from left to right
and vice versa.
Use the / buttons to select the chord rec-
ognition options.
4. Exit «Arrange Mode» by pressing either ARRANGE
MODE or ESCAPE.
○○○○○○○○○○○○○○○○○○○○
©
Note: The symbols of the recognized chord
appear on the main Style display screen. If the
chord is not recognized, the chord symbol is shown
as the lowest note played followed by several
○○○○○○○○○○○○○○○○○○○○
asterisks. For example: «C***** ».
○○○○○○○○○○○○○○○○○○○○
©
Note: In order for the chord to be recognized
(and the relative symbol to be shown on the
○○○○○○○○○○○○○○○○○○○○
display) Arrange On/Off must be on
.
1
ARRANGE
MODE
2
F8
F7
F6
F5
F4
F3
F2
F1
F8
F7
F6
F5
F4
F3
F2
F1
3
4
OR