5. In General Settings, set the following:
a. Account Active to Yes.
b. Account Name: Any name to identify this specific user.
c. SIP Server field with your SIP server IP address or FQDN.
d. Secondary SIP Server with your secondary SIP server IP address or FQDN. Leave empty
if not available.
e. SIP User ID: User account information, provided by VoIP service provider (ITSP). Usually
in the form of digit similar to phone number or actually a phone number.
f. SIP Authenticate ID: SIP service subscriber’s authenticate ID used for authentication. Can
be identical to or different from SIP User ID.
g. SIP Authentication Password: SIP service subscriber’s account password to register to
SIP server of ITSP. For security reasons, the password will field will be shown as empty.
h. Outbound Proxy: configure this field with your outbound proxy IP address or FQDN.
Leave empty if not available.
6. Press Save and Apply to save your configuration.
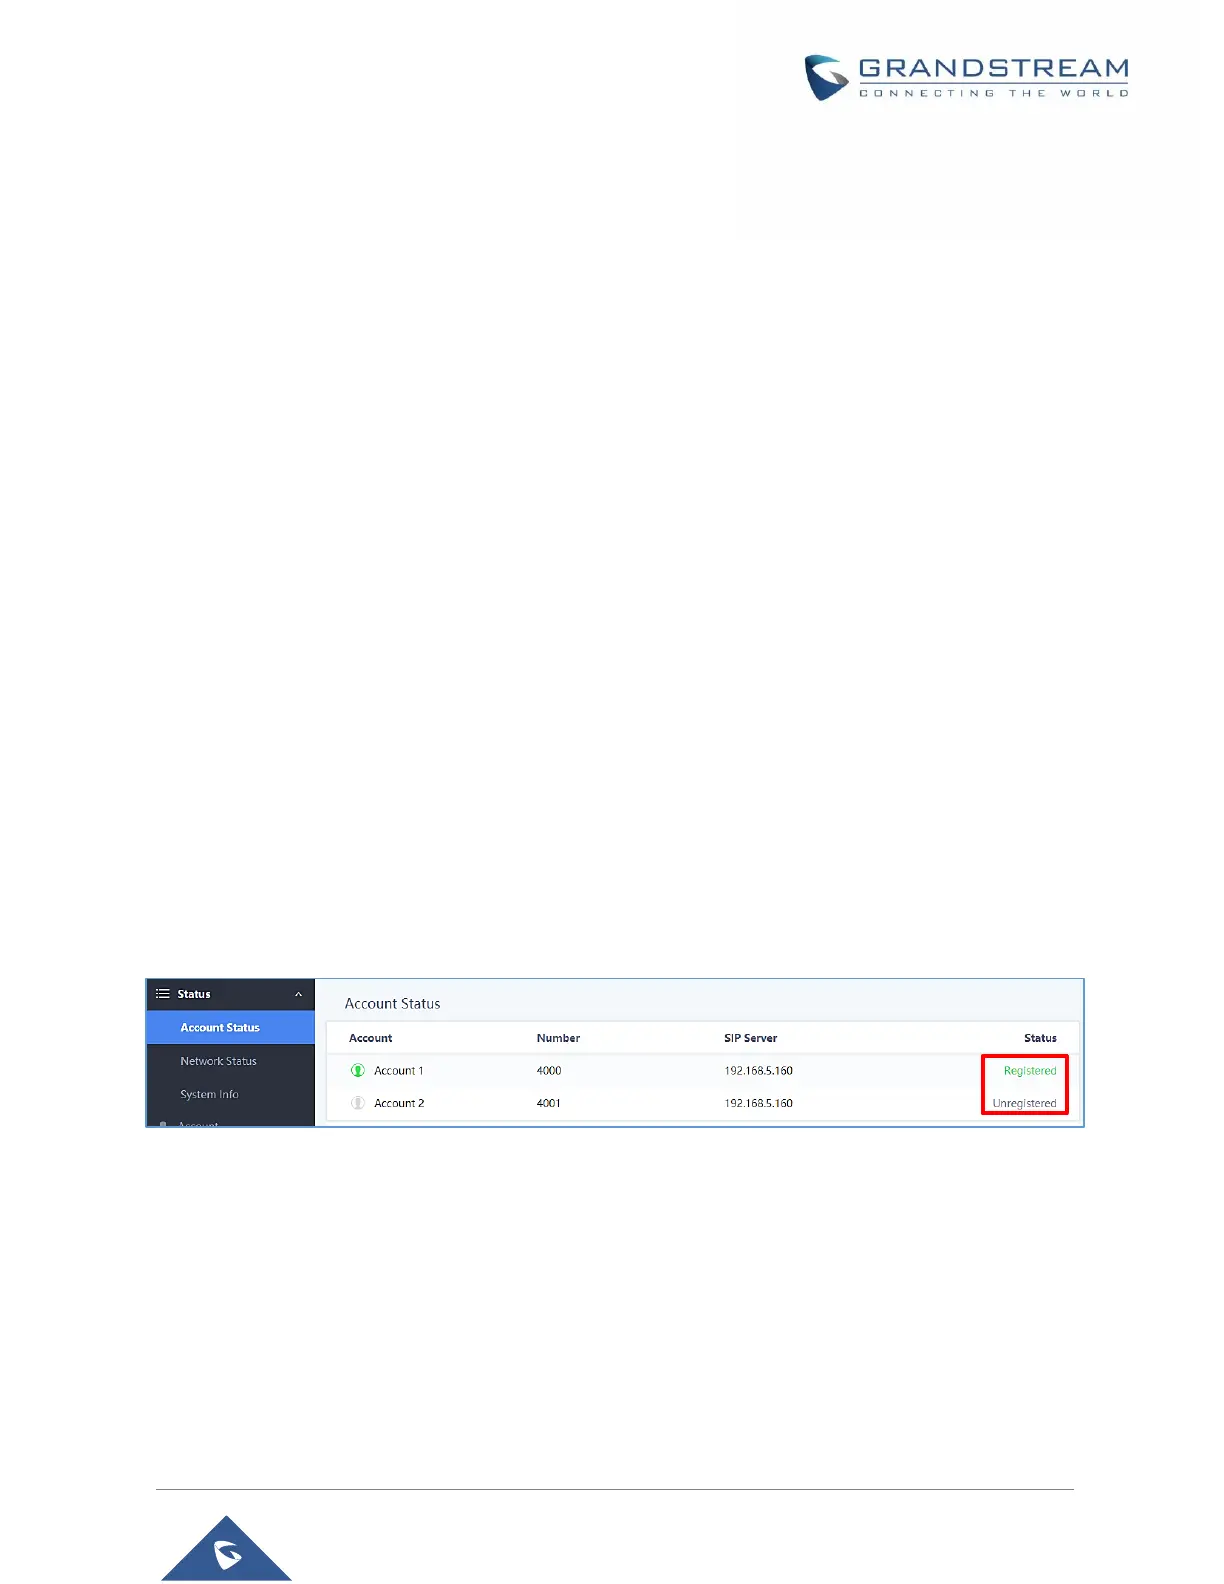
After applying your configuration, your phone will register to your SIP Server. You can verify if your WP820
has registered with your SIP server from its web interface under Status → Account Status (“Registered”
with green color when the account is correctly registered, or “Unregistered” with grey when the account is
not properly registered)
Figure 30: Account Status
Register Account via LCD Menu
To register your SIP account via the LCD menu, please refer to following steps:
1. Unlock your WP820 and press Menu to bring up operation menu.
2. Use arrow keys to reach Settings and then select Account tab.
3. Select which account you want configure and then set the following:
a. Account Activation to “On”.