WR1000-UM-251–01–9380 6 – 35
6. INSPECTION AND CHECK PROCEDURES
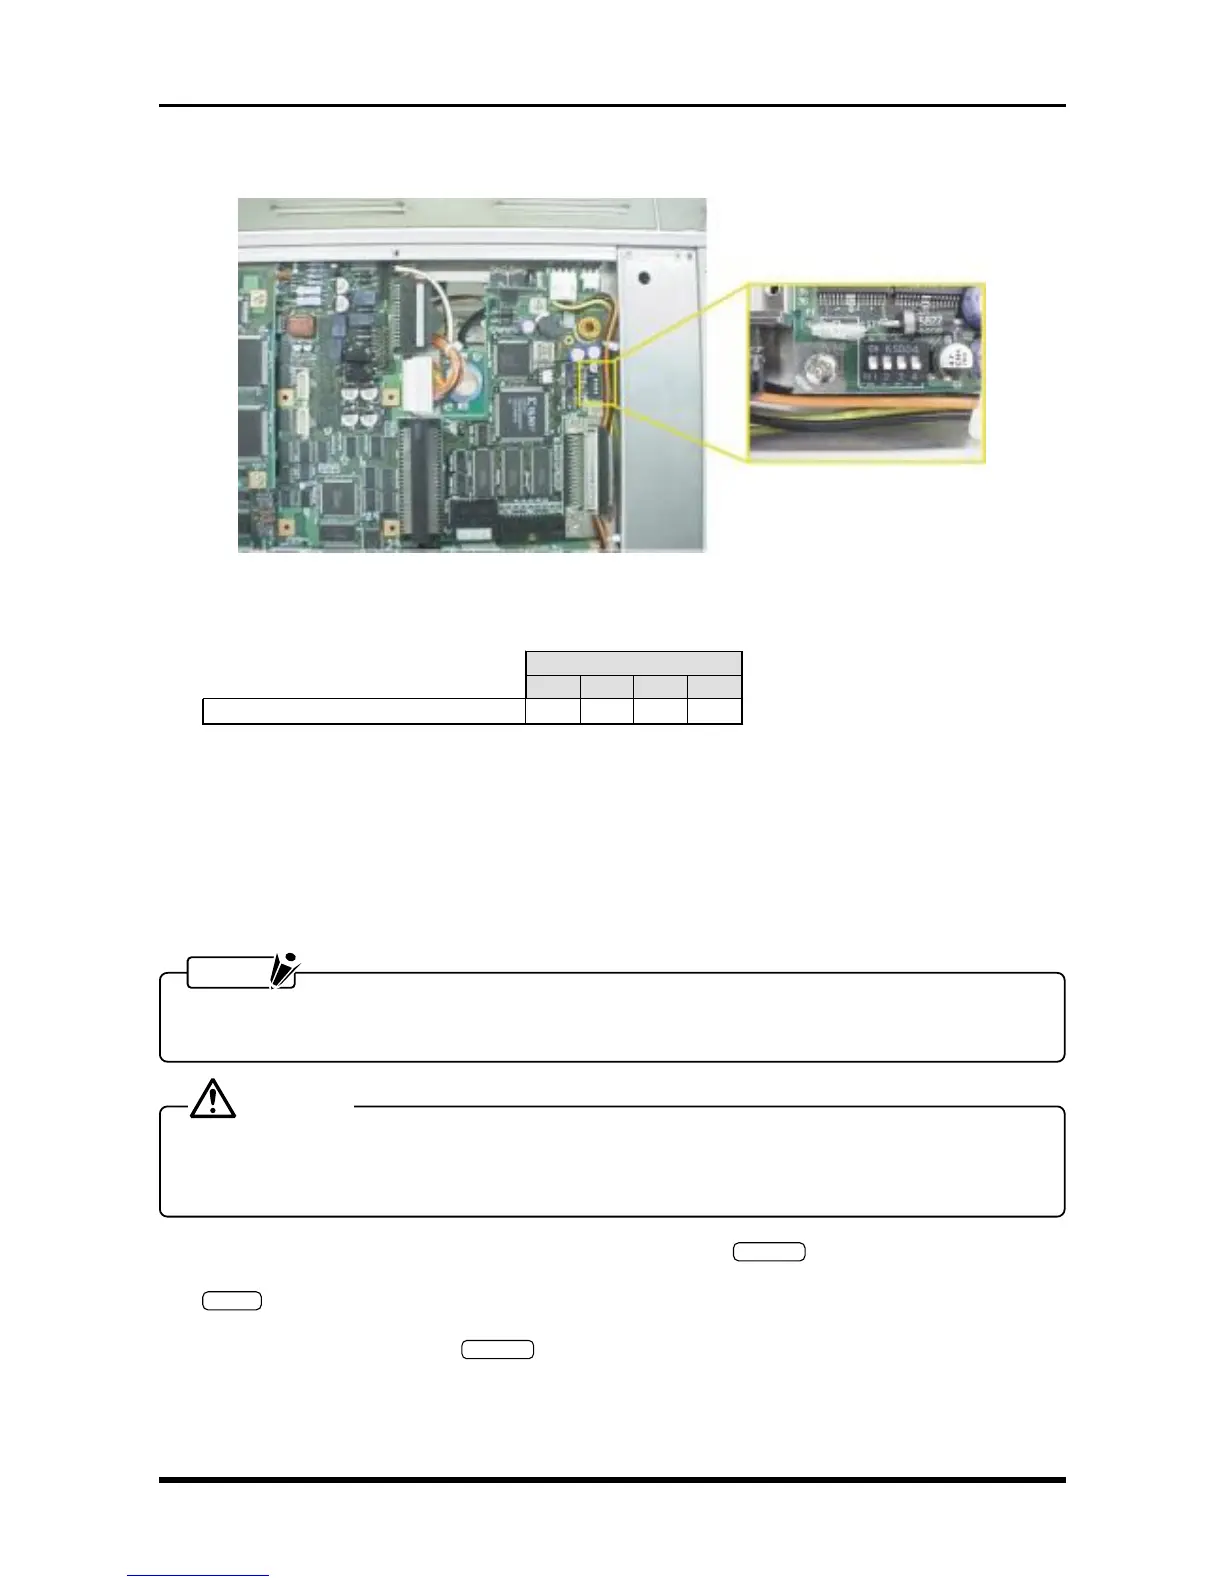
(3) Check that the four bits on DIP switch S1 on the SCSI control board are correctly set.
Fig. 6-3-15
Table 6-3-7
S1
1234
Neither the HDD nor MODD is installed
ON ON ON ON
(4) Connect the external HDD or MODD, then turn it on.
(5) Turn on the WR1000.
(6) The device ID and part number of the connected external memory device are displayed while the WR1000
is being booted, so check that its device ID is as follows.
ID2 :
| External HDD, MODD, or Zip drive
ID6 :
NOTE
• For the external memory device, specify a device ID from 2 to 6.
• The following Steps (7) and (8) are not required when testing an external MODD.
CAUTION
Performing Steps (7) and (8) will reformat the external hard disk, so first check that it does not contain
important data.
If the hard disk contains the customer’s data, do not reformat it.
(7) As the first step in reformatting the external hard disk, press the
SYSTEM
key on the Conditions panel to
open the System Settings window. Move the cursor to the “Disk Initialize” operation, then press the
ENTER
key.
(8) At the Disk Initialize menu, change the Initialize mode setting to HDD Reconfigure (FDISK), set the SCSI
ID setting to 2, then press the
EXECUTE
key to start reformatting the external hard disk.