152
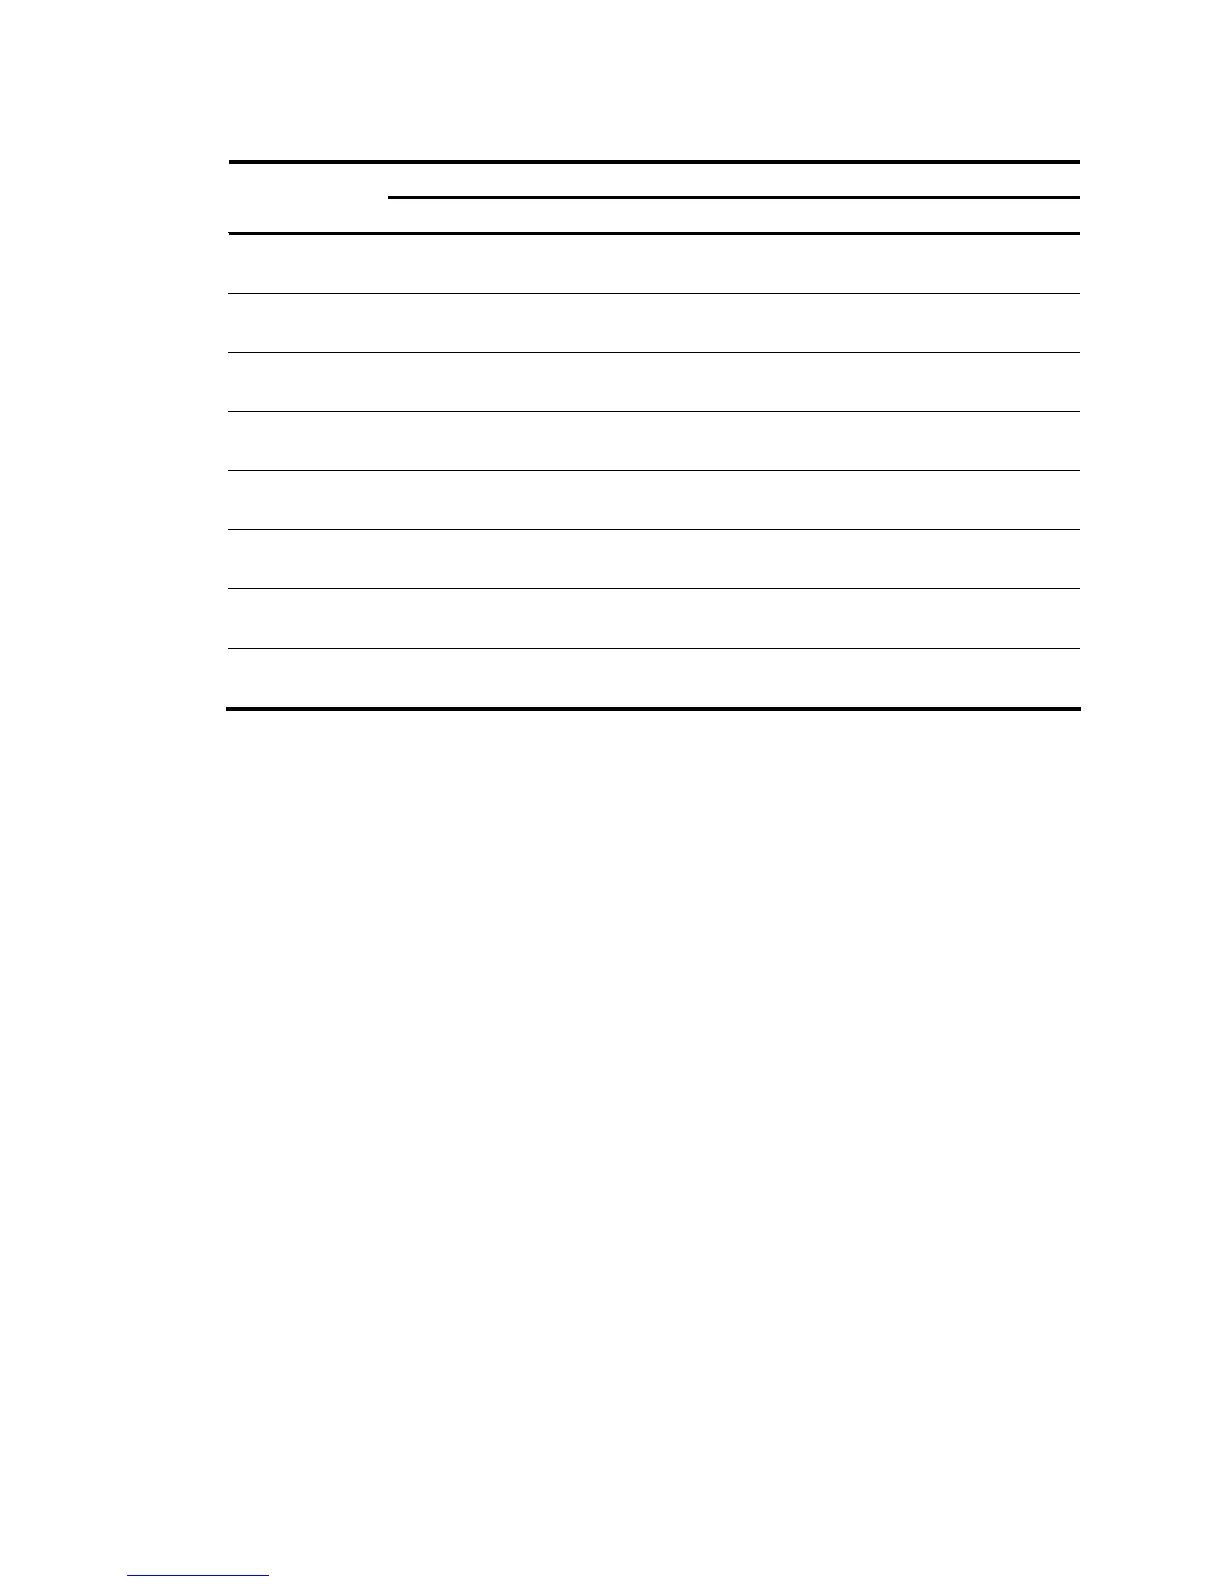
Table 80 RJ-45 MDI-X interface pinouts
10Base-T/100Base-TX 1000Base-T
Pin
Signal Function Signal Function
1 Rx+ Receive data BIDB+
Bi-directional data
cable B+
2 Rx- Receive data BIDB-
Bi-directional data
cable B-
3 Tx+ Send data BIDA+
Bi-directional data
cable A+
4 Reserved — BIDD+
Bi-directional data
cable D+
5 Reserved — BIDD-
Bi-directional data
cable D-
6 Tx- Send data BIDA-
Bi-directional data
cable A-
7 Reserved — BIDC+
Bi-directional data
cable C+
8 Reserved — BIDC-
Bi-directional data
cable C-
To ensure normal communication, the pins for sending data on one port should correspond to the pins for
receiving data on the peer port. When both of the ports on the two devices are MDI or MDIX, a crossover
Ethernet cable is needed. A cross-over cable connects devices of the same type. When one port is MDI
and the other is MDIX, a straight-through Ethernet cable is needed. A straight-through cable connects
devices of different types.
If an RJ-45 Ethernet interface with MDI/MDIX autosensing enabled can automatically negotiate pin roles.
The S7500E RJ-45 Ethernet interfaces support MDI/MDIX. By default, MDI/MDIX is enabled on a port.
Making an Ethernet twisted pair cable
Follow these steps to make an Ethernet twisted pair cable:
1. Cut the cable to length with the crimping pliers.
2. Strip off an appropriate length of the cable sheath. The length is typically that of the RJ-45
connector.
3. Untwist the pairs so that they can lay flat, and arrange the colored wires based on the wiring
specifications.
4. Cut the top of the wires even with one another. Insert the wires into the RJ-45 end and make sure
the wires extend to the front of the RJ-45 end and make good contact with the metal contacts in the
RJ-45 end and in the correct order.
5. Crimp the RJ-45 connector with the crimping plier until you hear a click.
6. Repeat the above steps with the other end of the cable.
7. Use a cable tester to verify the proper connectivity of the cable.

 Loading...


