28
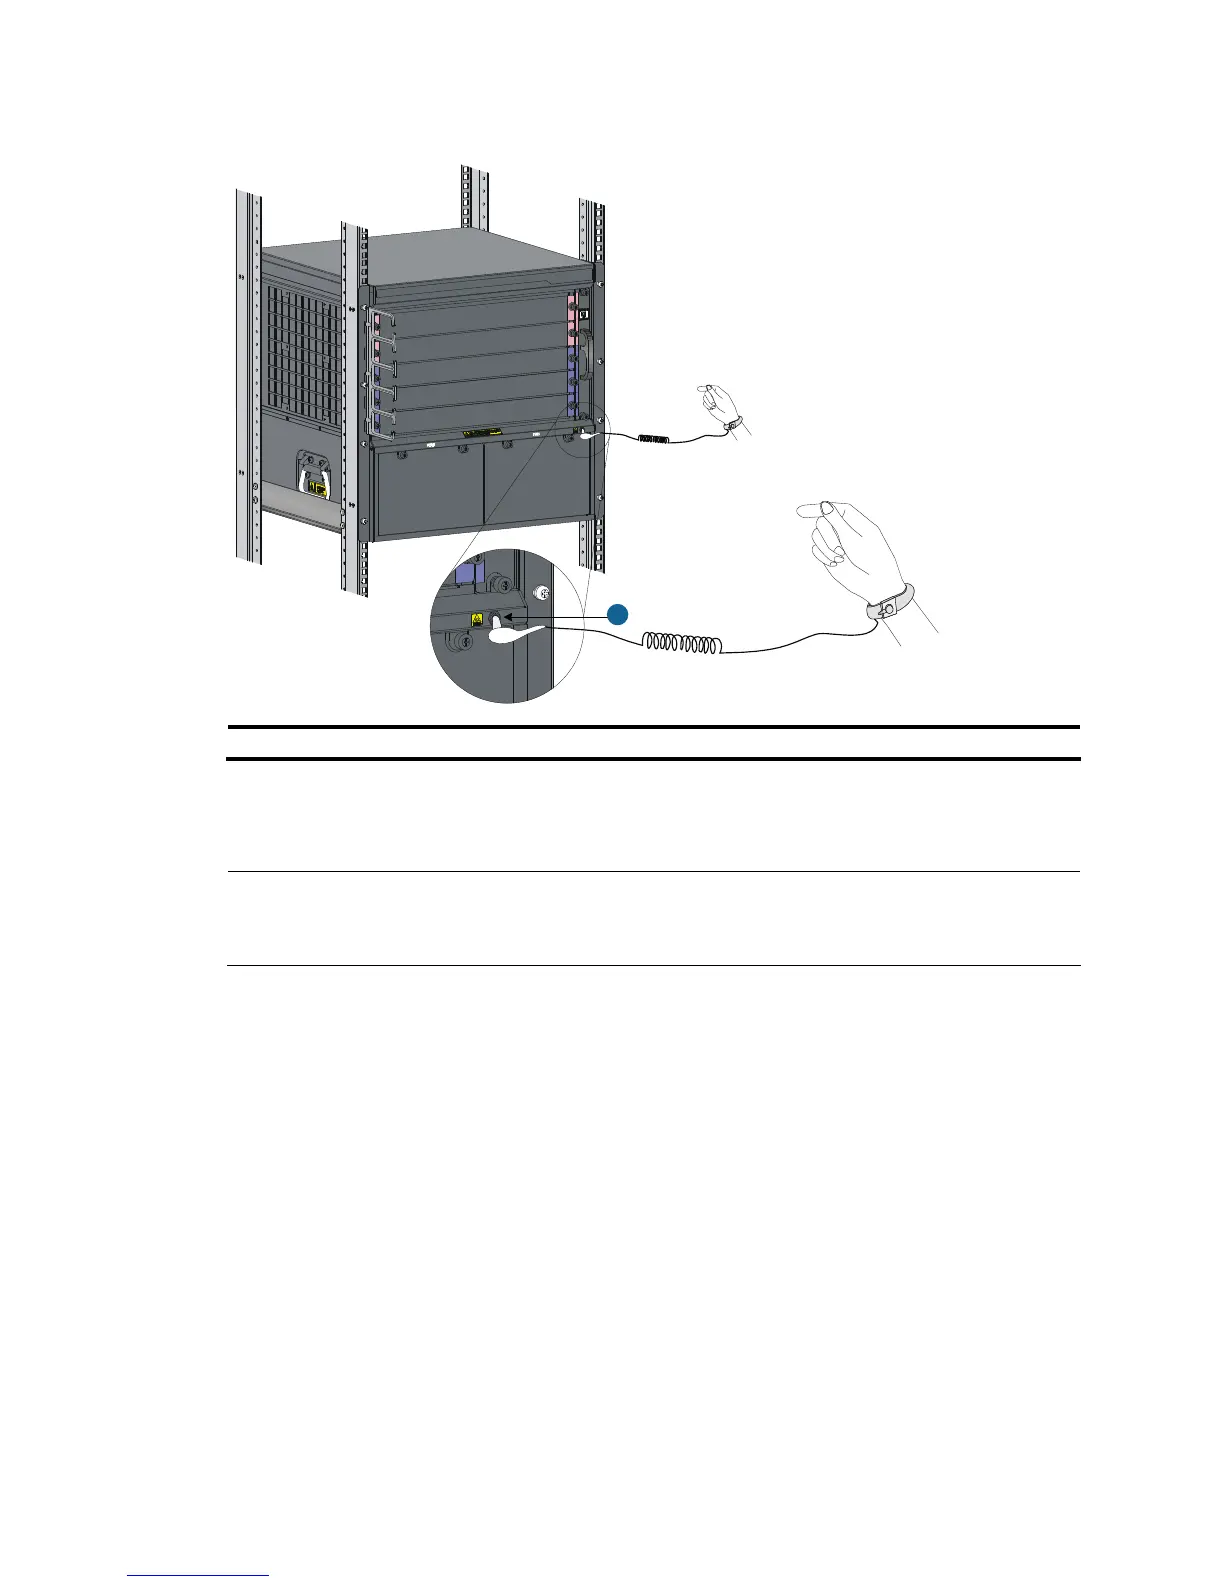
Figure 21 Attach an ESD-prevent wrist strap (on an S7503E)
1
1: ESD-preventive wrist strap port (having an ESD sign)
Installing a card
NOTE:
All the switching and routing processing units (SRPUs) and line processing units (LPUs) for the S7500E
series are hot swappable, and the installation procedures are similar.
Follow these steps to install a card:
Step1 Wear an ESD-preventive wrist strap, and make sure it has a good skin contact and is well grounded. For
more information, see “Attaching an ESD-preventive wrist strap.”
Step2 As shown in callout 1 on Figure 22, remove the blank filler (if any) from the slot to be used. Keep the
blank filler properly for future use.
Step3 As shown in callout 2 on Figure 22, hold the card by the front panel with one hand and support the card
bottom with the other (do not touch its circuit). Slide the card steadily into the slot along the guide rails.
Step4 As shown in callout 3 on Figure 22, when most part of the card is inserted in the slot, press the ejector
levers on the card outward.
Step5 Push the card until the positioning pin on card touches the hole on the chassis.
Step6 As shown in callout 4 on Figure 22, press the ejector levers inward until the ejector levers touch the panel
tightly and the card seats into the backplane.
Step7 As shown in callout 5 on Figure 22, fasten the captive screws on the card.
Step8 When the switch is powered on, check the running status of the card.

 Loading...


