46
Step3 When the switch is powered on, check the running status of the CF card.
NOTE:
• To check the CF card status, check the CFS LED on the SRPU of the switch. If the LED is on, the CF card
is installed successfully. For more information about CFS LED description, see the chapter “Appendix C
LEDs.”
• After the switch is powered on, you can check the CF card running status at the CLI. For more
information, see the chapter “Hardware management and maintenance.”
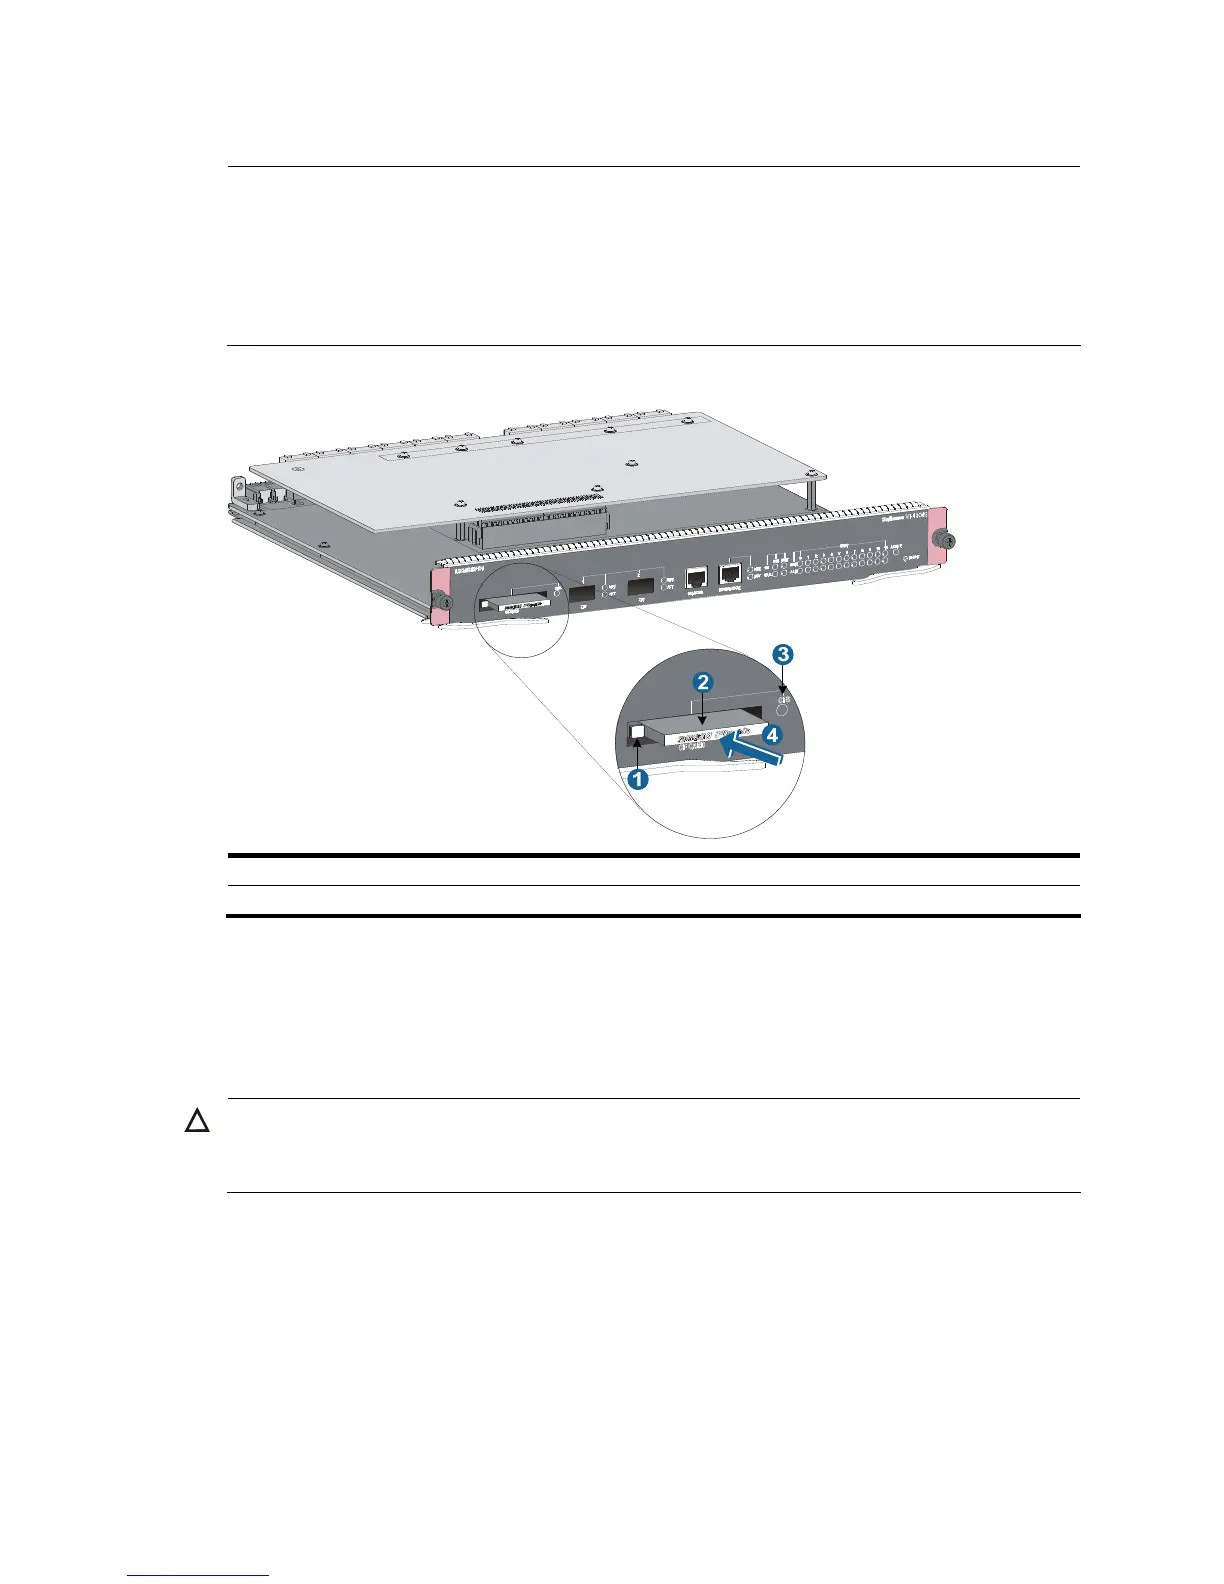
Figure 36 Install a CF card
1: CF card eject button 2: CF card
3: CF card status LED 4: Insert the CF card into the slot
Installing a transceiver module (optional)
Installing an XFP/SFP+/SFP module
CAUTION:
To avoid component damage caused by mis-operation, read this section carefully before installing an
XFP/SFP+/SFP module.
Follow these steps to install an XFP/SFP+/SFP module:
Step1 Wear an ESD-preventive wrist strap and make sure it has a good skin contact and is well grounded. For
more information, see “Attaching an ESD-preventive wrist strap.”
Step2 Take out the XFP/SFP+/SFP module from its package. Do not touch the golden finger of the module.
Step3 Pivot the clasp of the module up so that it catches a knob on the top of the module.
Step4 Holding both sides of the module, gently push the module into the slot until it has firm contact with the
slot (when the top and bottom spring tabs catch in the slot), as shown in Figure 37.

 Loading...


