7-22 Removal and Replacement
3. Replace the two mounting screws into the core I/O bulkhead, audio connector.
4. Replace the core I/O card.
5. Reconnect all the cables that were removed.
HP-HSC Card (HP9000 only).
There is a slot on the core I/O card for one HP-HSC card.
Removal: Refer to Figure 7-17
1. Remove the core I/O card.
2. Loosen the two (one on each side of the HP-HSC connector) captive mounting screws on the core I/O
card bulkhead.
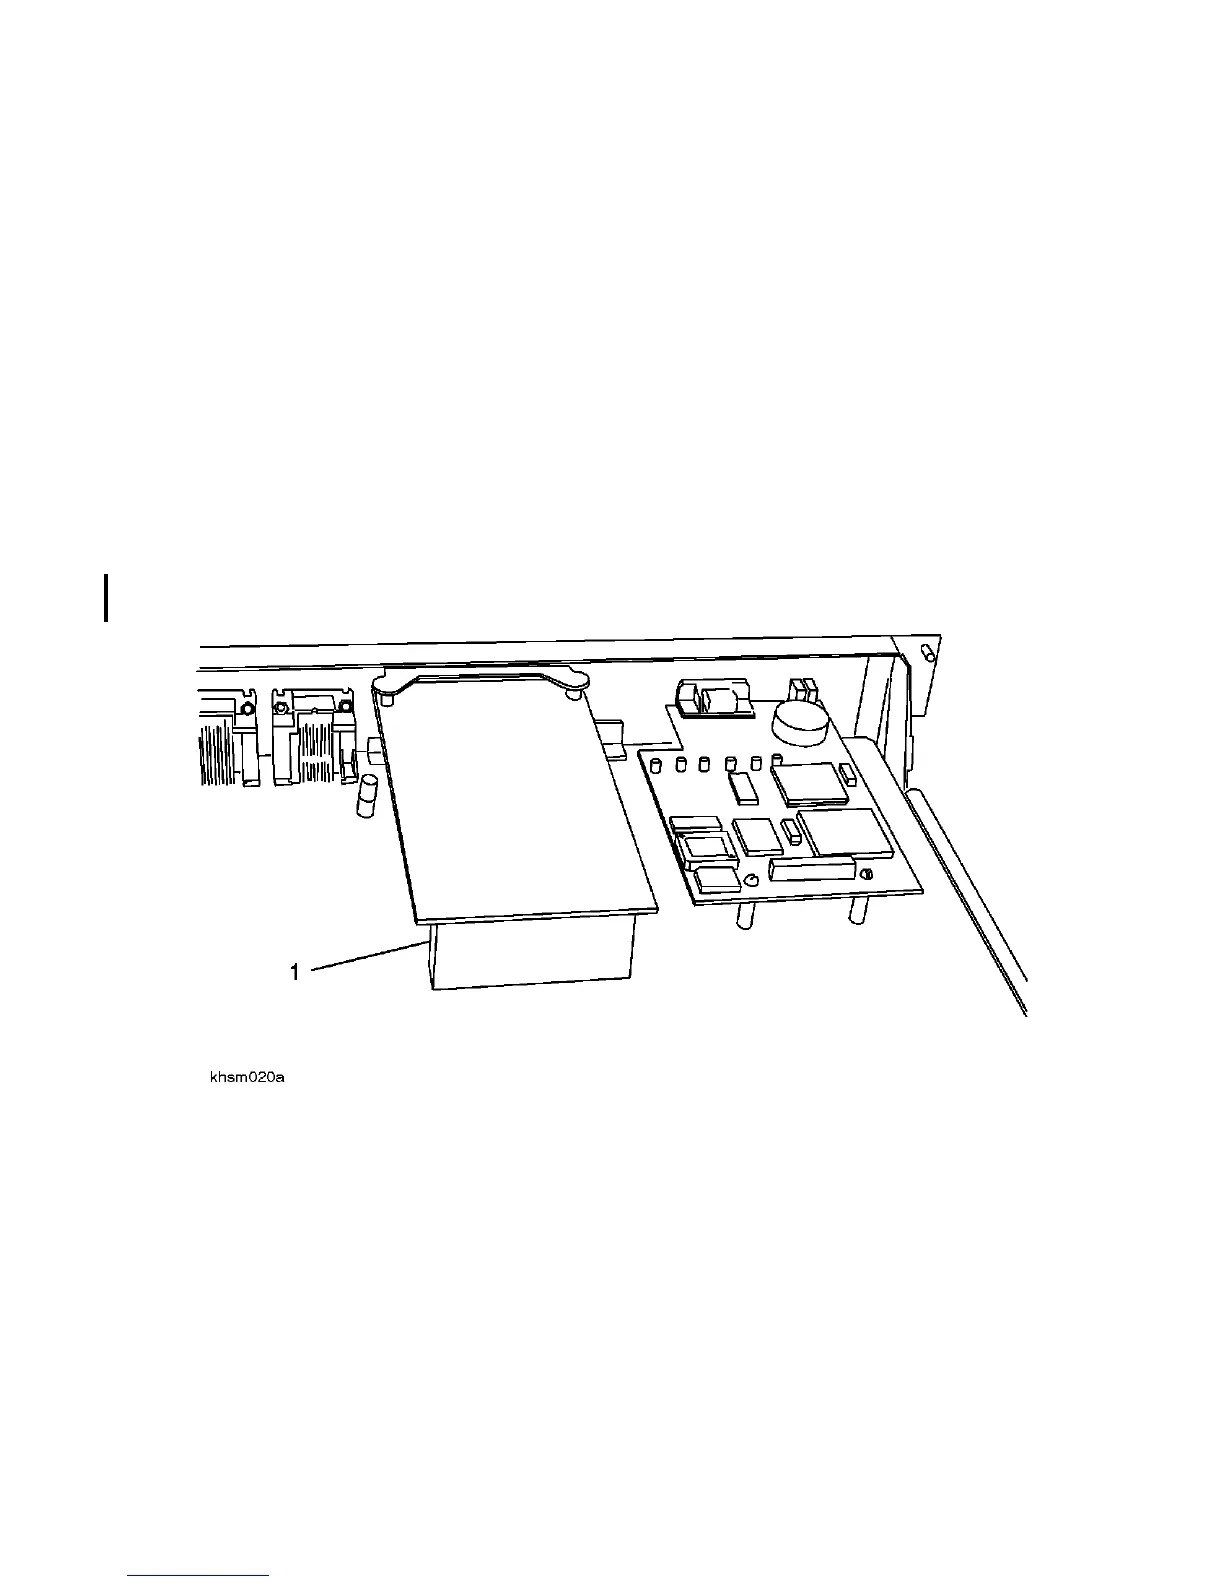
3. Pull the back of the HP-HSC card up, disconnecting it from the core I/O card connector (1).
4. Continue to lift the back of the HP-HSC card until angled enough to dis-engage the hooked tabs from
the mounting slots in the bulkhead.
Figure 7-17 HP-HSC Card Removal
Replacement:
1. Angle the HP-HSC card so the hooked tabs slide through the core I/O bulkhead slots.
2. Push the back of the HP-HSC card down to fully seat the card into the connector on the core I/O card.
3. Tighten the two captive mounting screws on the core I/O card bulkhead to secure the HP-HSC card to
the core I/O bulkhead.
4. Replace the core I/O card into the chassis.
5. Reconnect all cables that were removed.

 Loading...


