7-50 Removal and Replacement
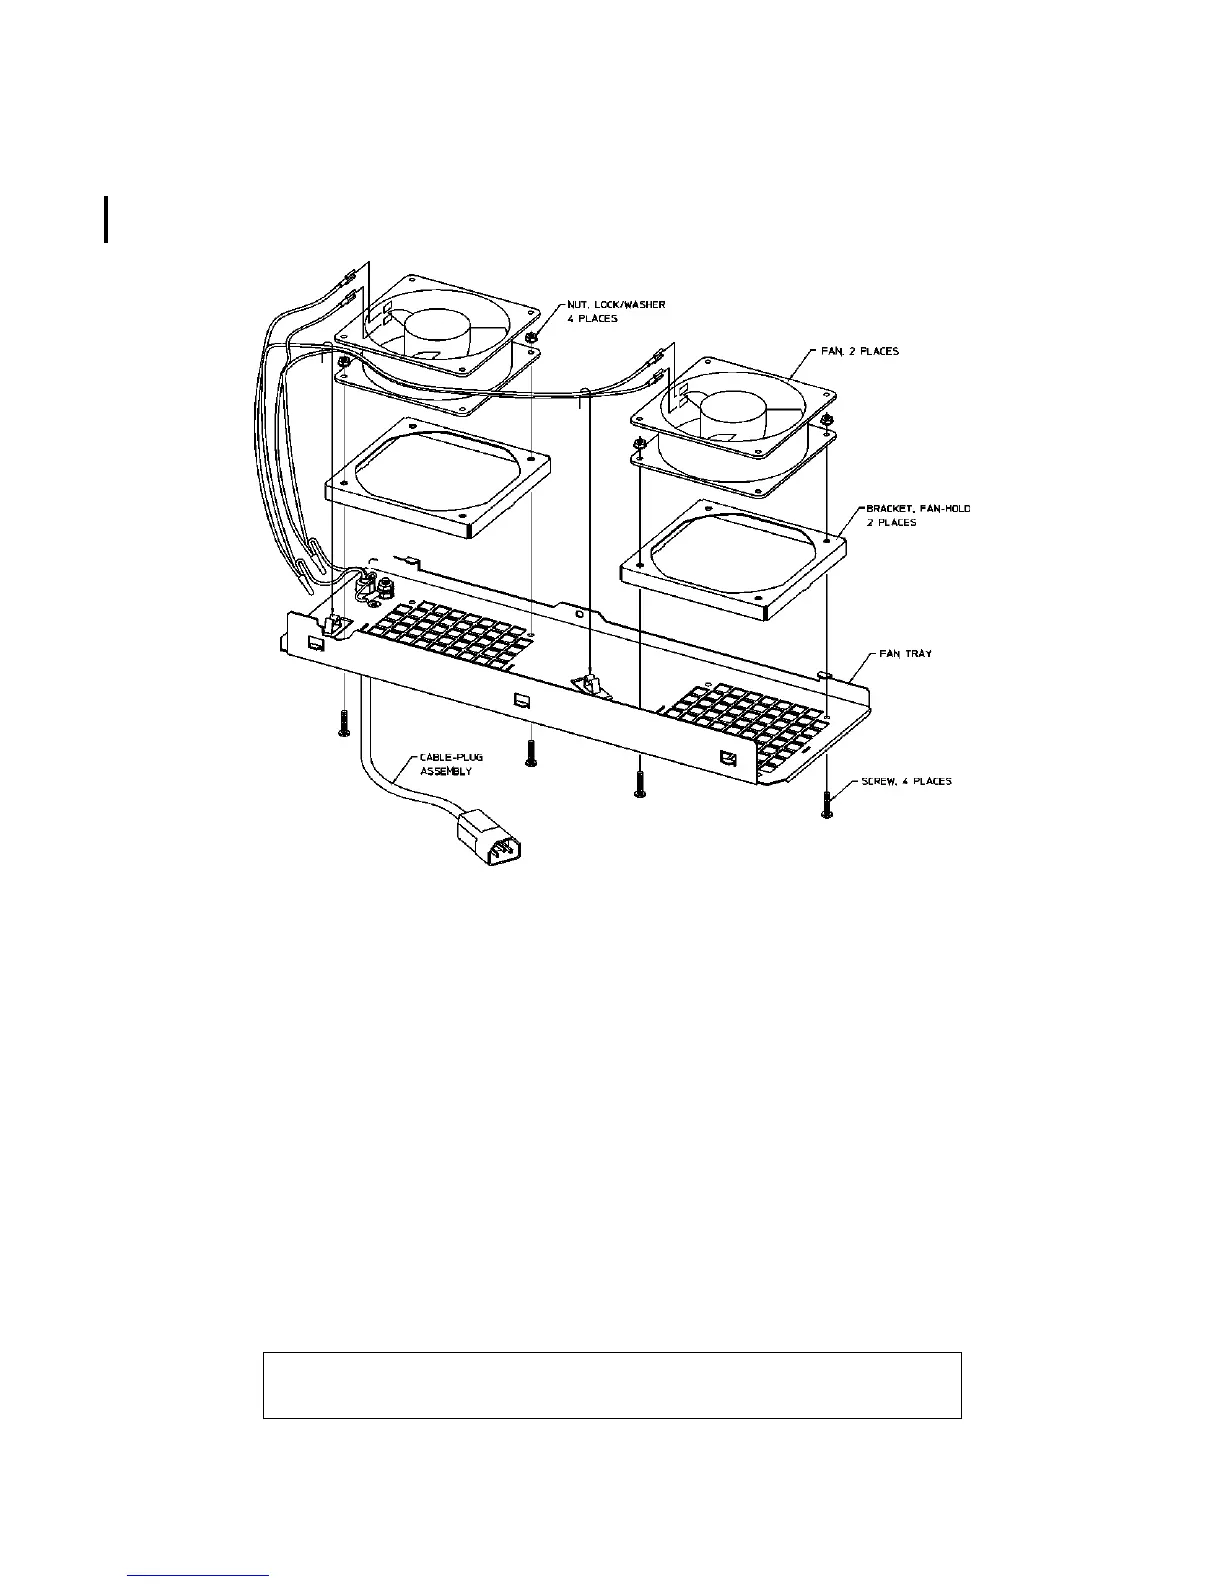
3. Attach mounting nuts/washers on the mounting screw. Tighten screws and nuts.
4. Attach power cord lugs to spades on the fan (polarity does not matter).
5. Replace fan assembly (refer to fan assembly replacement).
Figure 7-37. Fan Diagram
PDU
PDU Removal:
1. Turn OFF the power switch on the front of the cabinet.
2. Unplug the cabinet power cord from the wall outlet.
3. Remove the top cap (refer to top cap removal).
4. Unplug the PDU harness from the back of the ON/OFF switch.
5. Unclip the PDU harness from the cable clamps on the cabinet frame top and pull the PDU harness
down through the top frame.
6. Remove all component power cords from the PDU.
7. Remove the four (two on each bracket) mounting screws from the PDU mounting brackets that attach
to the frame columns.
8. Lift the PDU up to disengage, the PDU mounting bracket hooks from the frame column.
9. Pull the PDU out of the cabinet.
NOTE
The PDU mounting brackets could be removed at this point if necessary.

 Loading...


