Removal and Replacement 7-41
To replace the HP-PB I/O card cage, follow the above steps in reverse order.
Power Supply Removal
Refer to Figure 7-33 while performing these steps:
1. Remove the six screws from the rear cover (item 7).
2. Remove the two screws from the top of the power supply (item 1)
3. Remove the three power supply cables (3) from the SPCM board.
4. Disconnect the one power supply cable underneath the power supply.
5. Disconnect the AC connector from underneath the power supply.
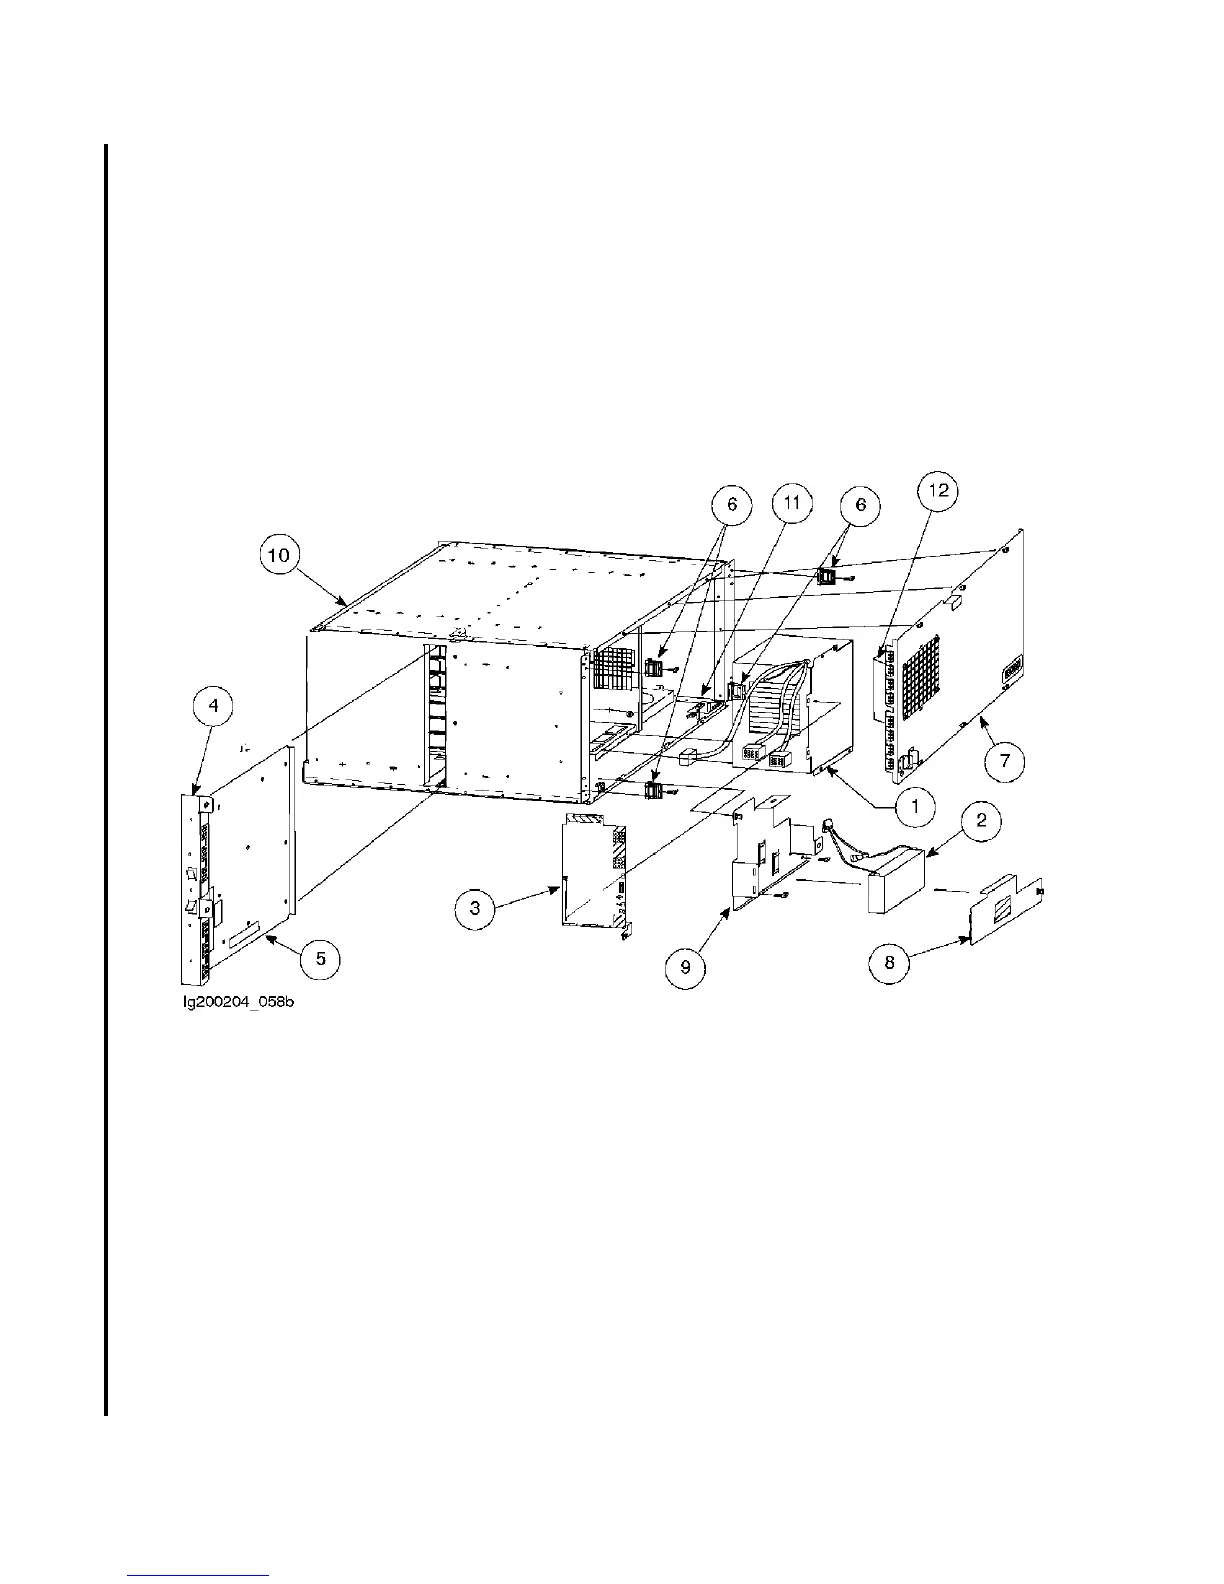
Figure 7-33 HP-PB I/O Card Cage Internal Components
To replace the power supply, reverse the above procedures. Refer to the cable connection diagram located
on the rear cover of the card cage to find out how to reconnect the cables.
SPCM Card Removal
Refer to Figure 7-33 while performing these steps:
1. Remove the five cables from the SPCM card (item 3). Make note of their location so you can reattach
them correctly.
2. Loosen the one screw and the retaining clip located at the bottom of the SPCM card.
3. Use the extractor handle to release the SPCM card from the backplane, and gently slide the card out
of the card cage along the slot guides.

 Loading...


