Removal and Replacement
Procedures
63
4.14 Front Panel I/O Device Assembly
To remove the front panel I/O device assembly:
1. Disconnect power from the system (section 4.2), open the access panel (section 4.9), and remove the front bezel
(section 4.12).
2. Unlatch the plastic snap that secures the cables inside the chassis and disconnect the front panel I/O device
assembly cables from the system board.
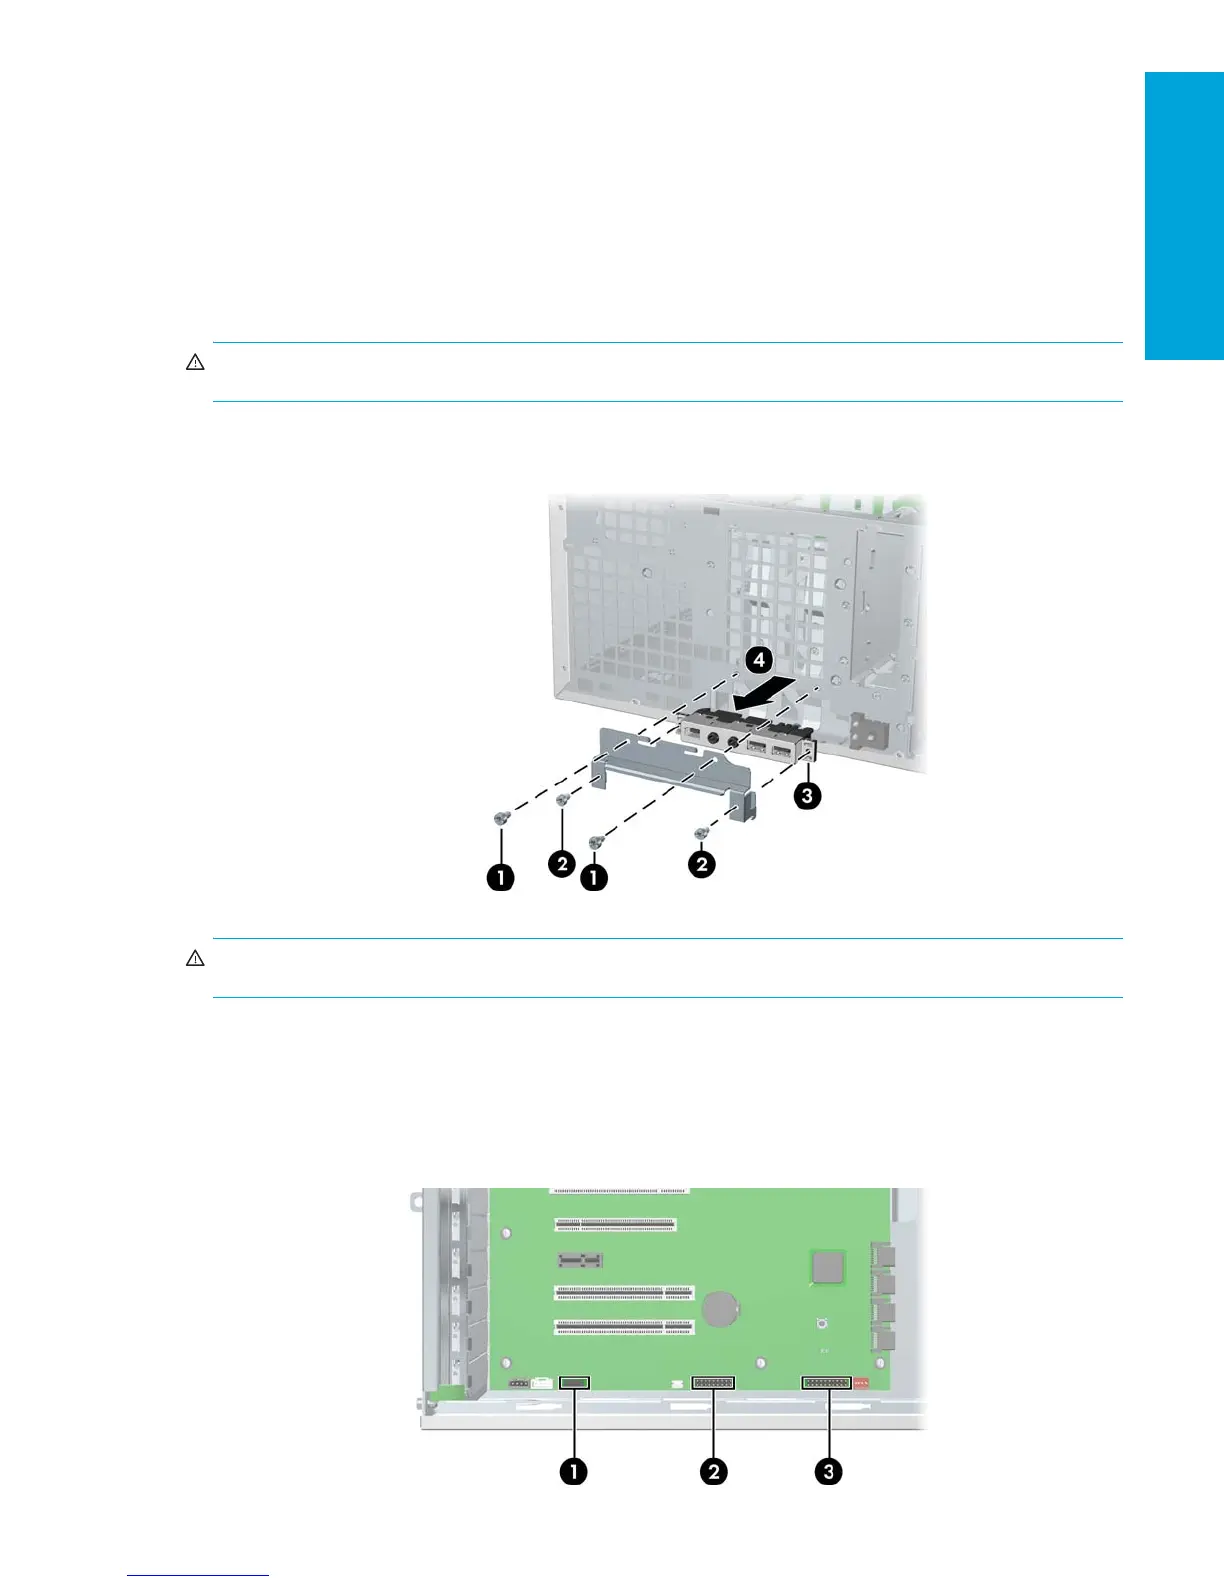
3. Remove the two smaller Torx screws 1 that hold the front panel I/O device assembly 3 and bracket to the
chassis.
4. Remove the two larger Torx screws 2 that hold the front panel I/O device assembly 3 to the bracket.
5. Separate the bracket away from the front panel I/O device assembly.
WARNING! The next step requires the removal of cables through the chassis. Some edges on the chassis might be
sharp. Be careful when removing these cables.
6. Pull the front panel I/O device assembly out about two inches away 4 from the chassis.
7. Pull the front panel cables through the chassis and out the front of the unit. You might have to slide the cables out
one at a time.
To replace the front panel I/O device assembly:
WARNING! The next step requires threading cables through the chassis. Some edges on the chassis might be sharp.
Be careful when installing these cables.
1. Thread each front panel I/O device assembly cable through the same holes from which they were removed.
2. Push the front panel I/O device assembly in to the chassis. Using your fingers, orient the cables so that there is
enough room for the front panel I/O device assembly to easily fit in its slot.
3. Loosely put the bracket on the front panel I/O device assembly and hook the bracket to the chassis.
4. Screw the bracket to the front panel I/O device assembly and screw the bracket to the chassis.
5. Connect the front audio cable to 1. Connect the front USB cable to 2. Connect the front control panel cable
to 3. If an IEEE-1394 card is installed, connect the front IEEE-1394 cable to the card.