Removal and Replacement
Procedures
87
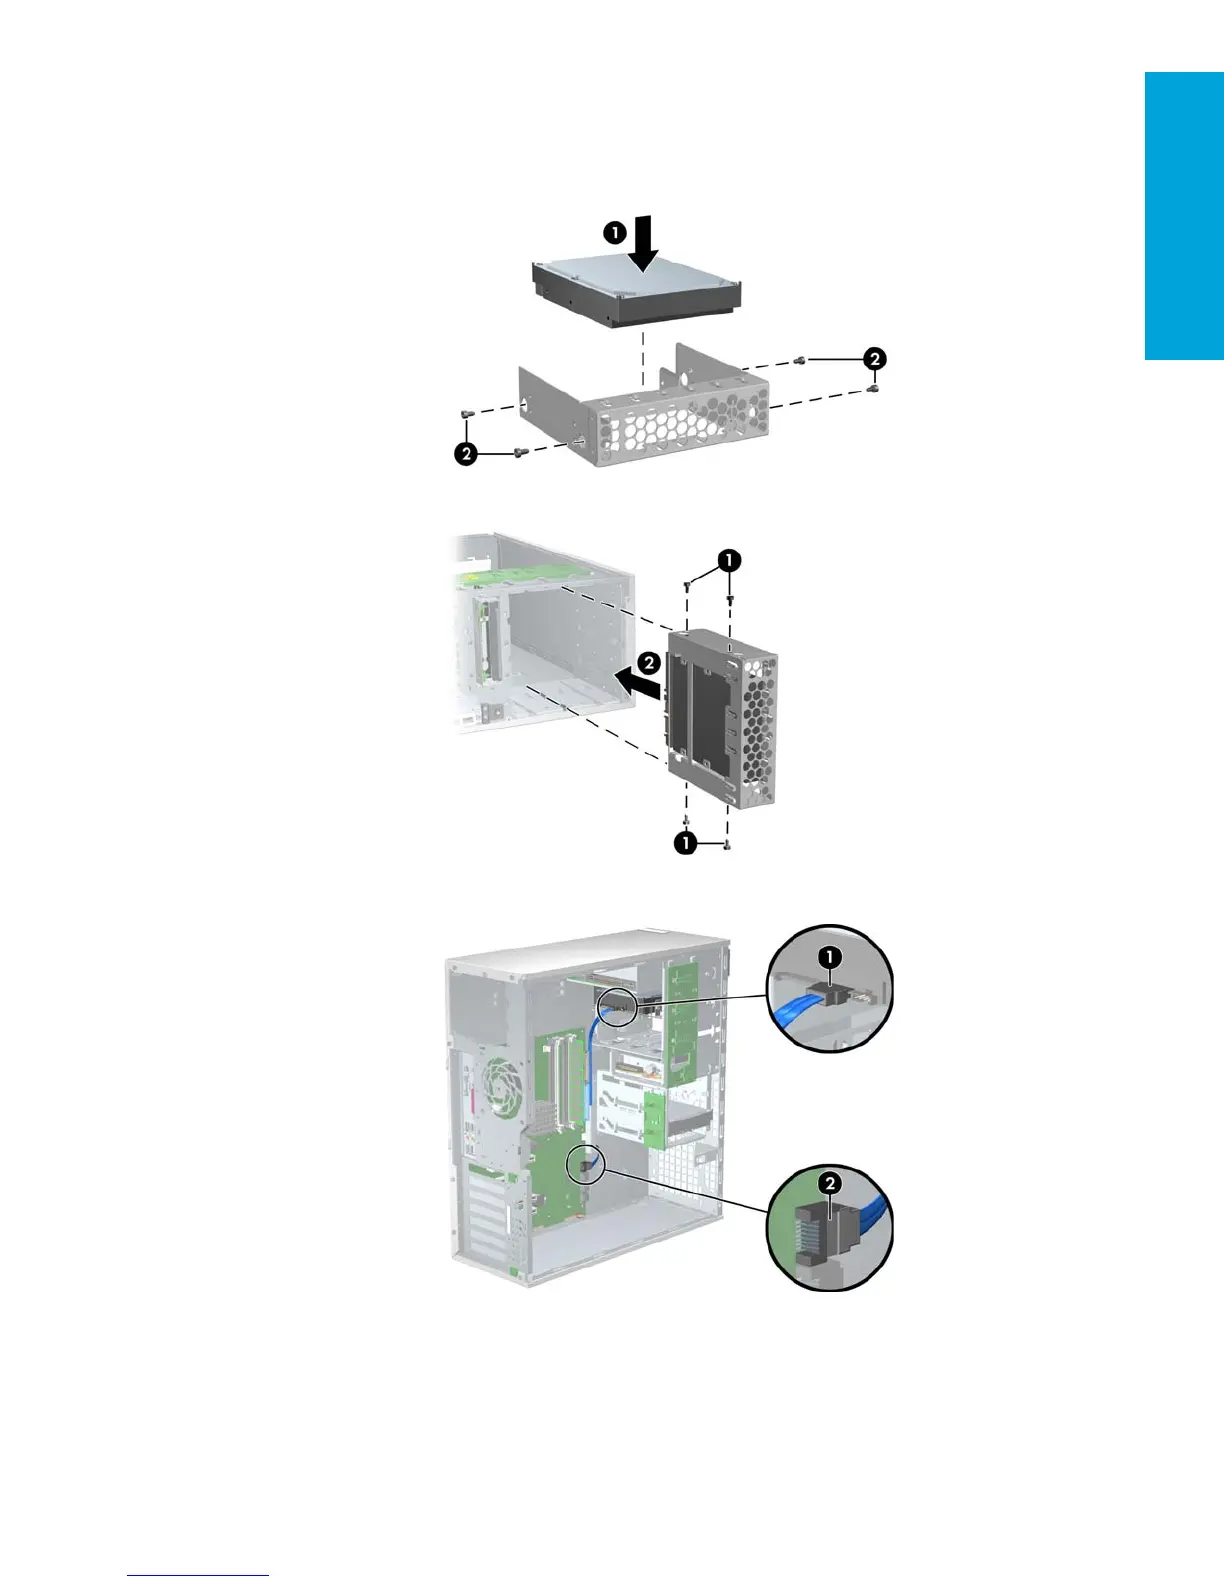
4.28.1 Installing Hard Drives in the Optical Drive Bay (Optional)
1. Disconnect power from the system (section 4.2), open the access panel (section 4.9), and remove the front bezel
(section 4.12).
2. Place the hard drive in the bracket 1 and secure with American National screws 2 as shown in the following
illustration.
3. Screw four screws to the bracket 1. Align the screws with the grooves in the optical drive bay and slide the drive
in 2 the chassis.
4. Connect the data cable to the hard drive 1 and to the system board 2. SATA installation is shown.
5. Connect the power cables (not shown).