Getting Started
20 Intel
®
Entry Storage System SS4000-E User Guide
Initializing the Disks
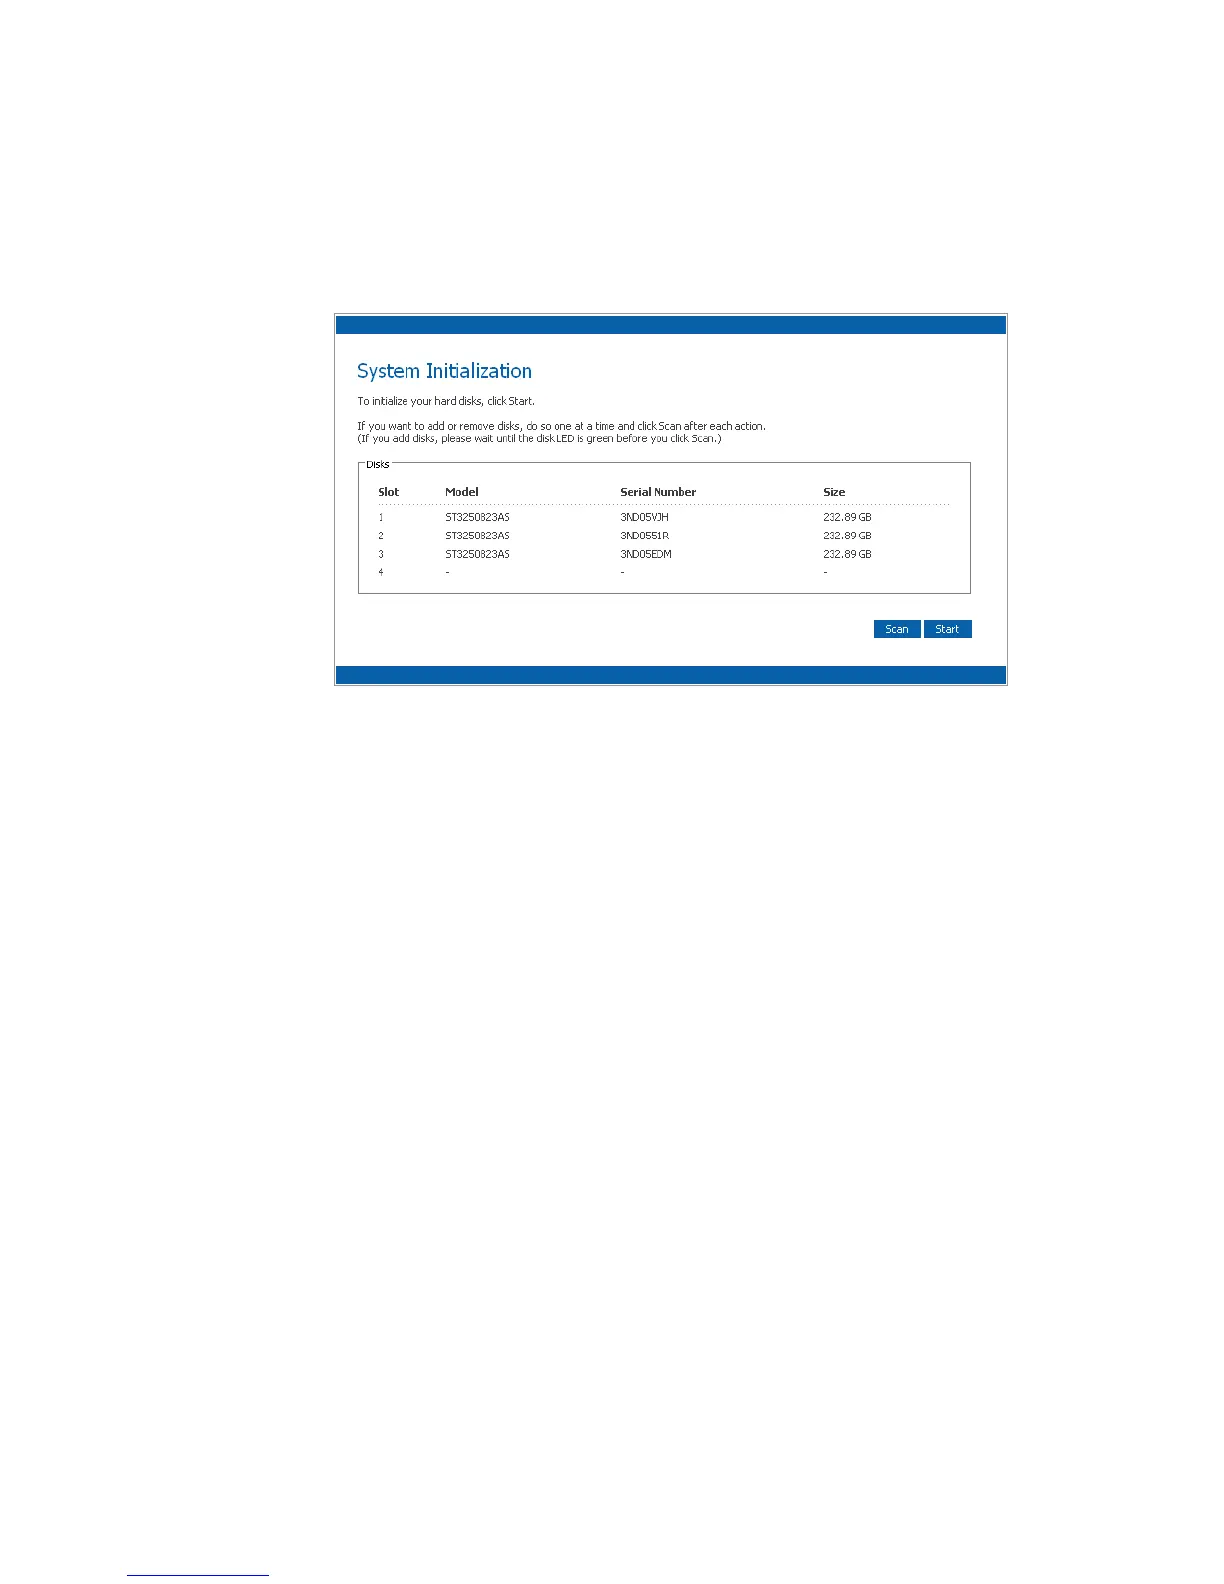
Once you install the Console and connect to the storage system, the System Initialization
page displays.
If not, all the hard disks were detected, or if you want to add, remove, or reorder the disks,
insert or remove the disks one at a time and click Scan after each action.
Note: If you have four disks that are not the same size, it is recommended that you put disks close
in size in slots 1 and 2.
For example, if one disk is 100 GB, one disk is 200 GB, one disk is 300 GB, and one disk
is 400 GB, you should put the 100-GB disk in slot 1 and the 200-GB disk in slot 2 instead
of putting the 100-GB disk in slot 1 and the 300- or 400-GB disk in slot 2. This ensures
that if you use a RAID 10 configuration , the amount of disk space available for data is
maximized.
For more information about disk configurations, see “Levels of RAID” on page 169.
To initialize the hard disks:
1. Click Start. The firmware is uploaded to the hard disks. When this process is
complete, the storage system restarts.
Note: The operating system and storage system software are installed on each disk
in your storage system to ensure that the failure or removal of any one disk
does not cause the entire storage system to fail.
2. If the welcome screen does not display immediately after the storage system restarts,
close the browser window and log in again using the Console.
You can now perform the initial configuration as described in “Configuring Your
Storage System” on page 21.