10. Parts replacement
10.1. Introduction
If some of the Unisab III main parts are defective they can be replaced. It is recommended to
contact Johnson Controls Denmark before replacing any of these parts.
The main parts comprise:
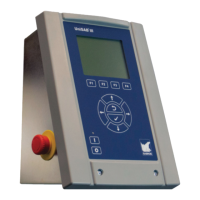
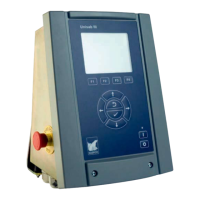
a. Front panel in which display and keyboard are fitted
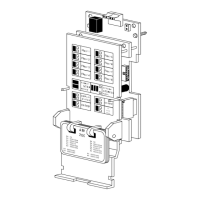
b. Print cassette with plug connections
Additional parts:
a. Internal battery
All replacements must be carried out with Unisab III in a state of no voltage. Remember
that outside control voltage may still be connected/live although the power supply
for Unisab III is disconnected. Also disconnect the main supply to the motor to prevent it
from starting up inadvertently.
The parts are shown in chapter 11. Spare parts.
10.1.1 Replacing front panel
Open the front panel by loosening the two bolts at the bottom of the panel (bolt size
6x16mm, Torx T30). Be careful not to stretch the cable for the front panel and place the front
panel in the service position. Loosen the two small screws fastening the front panel cable to
the print cassette and disconnect the cable. The front panel can now be removed from the
Unisab III controller.
Disconnect the front panel cable from the old front panel and check the cable. If the cable is
in good condition it can be reused with the new front panel. If it is damaged a new cable must
be used.
Mount the new front panel in the reverse order as described above. When closing the front
panel, please observe the position of the front panel cable and be careful not to catch the ca-
ble between the front panel and the control cabinet.
Connect supply voltage.
10.1.2 Replacing print cassette
Depending on the error in the print cassette it can be an advantage to transfer the configura-
tion files to the SD flash card before replacing the cassette. By doing so, you can quickly up-
load the complete configuration to Unisab III when the print cassette has been replaced and
the unit will be configured the exact same way as before. See chapter 8. Unisab III (boot) and
communication set-up for a description on how to transfer and upload configuration files.
Remove the front panel as described in subsection 10.1.1. Replacing front panel.
Disconnect all the cable plug connections. Please note that each plug is fastened with two
small screws (one in each end of the plug). Be careful not to pull the wires when disconnect-
ing the plugs. When all the cable plugs are disconnected it may be necessary to dismantle the
cable glands in the bottom of the control cabinet to provide easy access to the print cassette.
The print cassette is fastened by 6 bolts, 3 at the top and 3 at the bottom of the control cabi-
net (bolt size 5x8mm, Torx T25). Loosen the 6 bolts (it is not necessary to unscrew the bolts
completely). It is now possible to lift off the print cassette from the 6 bolts and remove it from
the control cabinet.
Parts replacement
312/319
Engineering manual - Unisab III 1.10
001930 en 2014.09
 Loading...