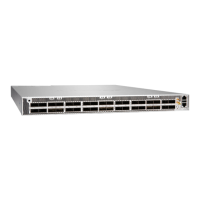
PTX10001-36MR Installaon Overview
IN THIS SECTION
Overview of Installing the PTX10001-36MR | 76
PTX10001-36MR Installaon Safety Guidelines | 77
Overview of Installing the PTX10001-36MR
Before you begin to install and connect a PTX10001-36MR, ensure that you have reviewed the
informaon in "PTX10001-36MR Installaon Safety Guidelines" on page 77.
You can mount a PTX10001-36MR:
• Flush with the front of a 19-in. four-post rack. Use the standard mounng brackets provided with the
PTX10001-36MR for this conguraon.
• Recessed 2 in. (5 cm) from the front of a 19-in. four-post rack. Use the extension bracket provided in
the standard mounng kit for this conguraon. Recessed mounng is primarily used in enclosed
cabinets to allow room for cabling.
To install and connect a PTX10001-36MR:
1. Unpack the PTX10001-36MR and verify the components received. See "Unpack the
PTX10001-36MR" on page 78.
2. Determine how the device is to be mounted.
Mount the PTX10001-36MR in a rack or cabinet. See "Mount the PTX10001-36MR in a Rack or
Cabinet" on page 80.
3. For installaons that require a separate grounding conductor to the chassis, follow the instrucons in
"Connect the PTX10001-36MR to Ground" on page 86.
4. Connect the PTX10001-36MR to power. Depending on your conguraon, follow the instrucons in
"Connect AC/HVDC Power to the PTX10001-36MR" on page 88 or "Connect DC Power to the
PTX10001-36MR" on page 90.
5. Connect the PTX10001-36MR to a management console for inial conguraon. See "Connect the
PTX10001-36MR to a Management Console" on page 96.
76

 Loading...