78 English
1 Attachment frame with tipping function
1. The attachments are fitted on a Kärcher interchangea-
ble frame or on an integrated interchangeable frame
from the attachment manufacturer, and are fitted and
secured on the attachment frame.
1 Control lever
2. The attachment frame is controlled using the control le-
ver at the right of the joystick.
1 Switch for "double-acting control hydraulics AUX rear" /
"attachment frame with tipping function"
3. To activate, switch the switch over to "attachment frame
with tipping function".
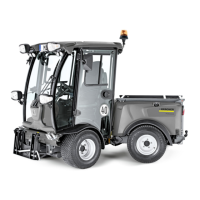
9.4.2 Mounting options on the attachment frame
1 Mounted spreader
2 Interchangeable frame (integrated in the attachment)
3 Attachment frame with tipping function
1. Attaching / removing is described using the example of
a mounted spreader.
9.4.3 Setting the fixing
Note
The setting for the fixing of the interchangeable frame must
only be made during first installation or when fitting to an-
other carrier vehicle.
1 Screw with nut
2 Fixing hook (2x)
3 Attachment frame
1. Undo the nuts to the left and right by about 1 revolution.
2. Fit the attachment to the attachment frame and secure
it using retaining pins and retaining clips, see the follow-
ing chapter9.4.4 Fitting the attachment to the vehicle.
3. Completely lower the attachment frame.
4. Press the fixing hook against the attachment frame as
shown.
5. Re-tighten the nuts to the left and right.
 Loading...