Keyscan Inc. A Member of the Kaba Group – CA150 Rev. B Installation Guide (07.15)
6. Select start > All Programs > Keyscan NETCOM Program Tool and select Keyscan NETCOM Program Tool.
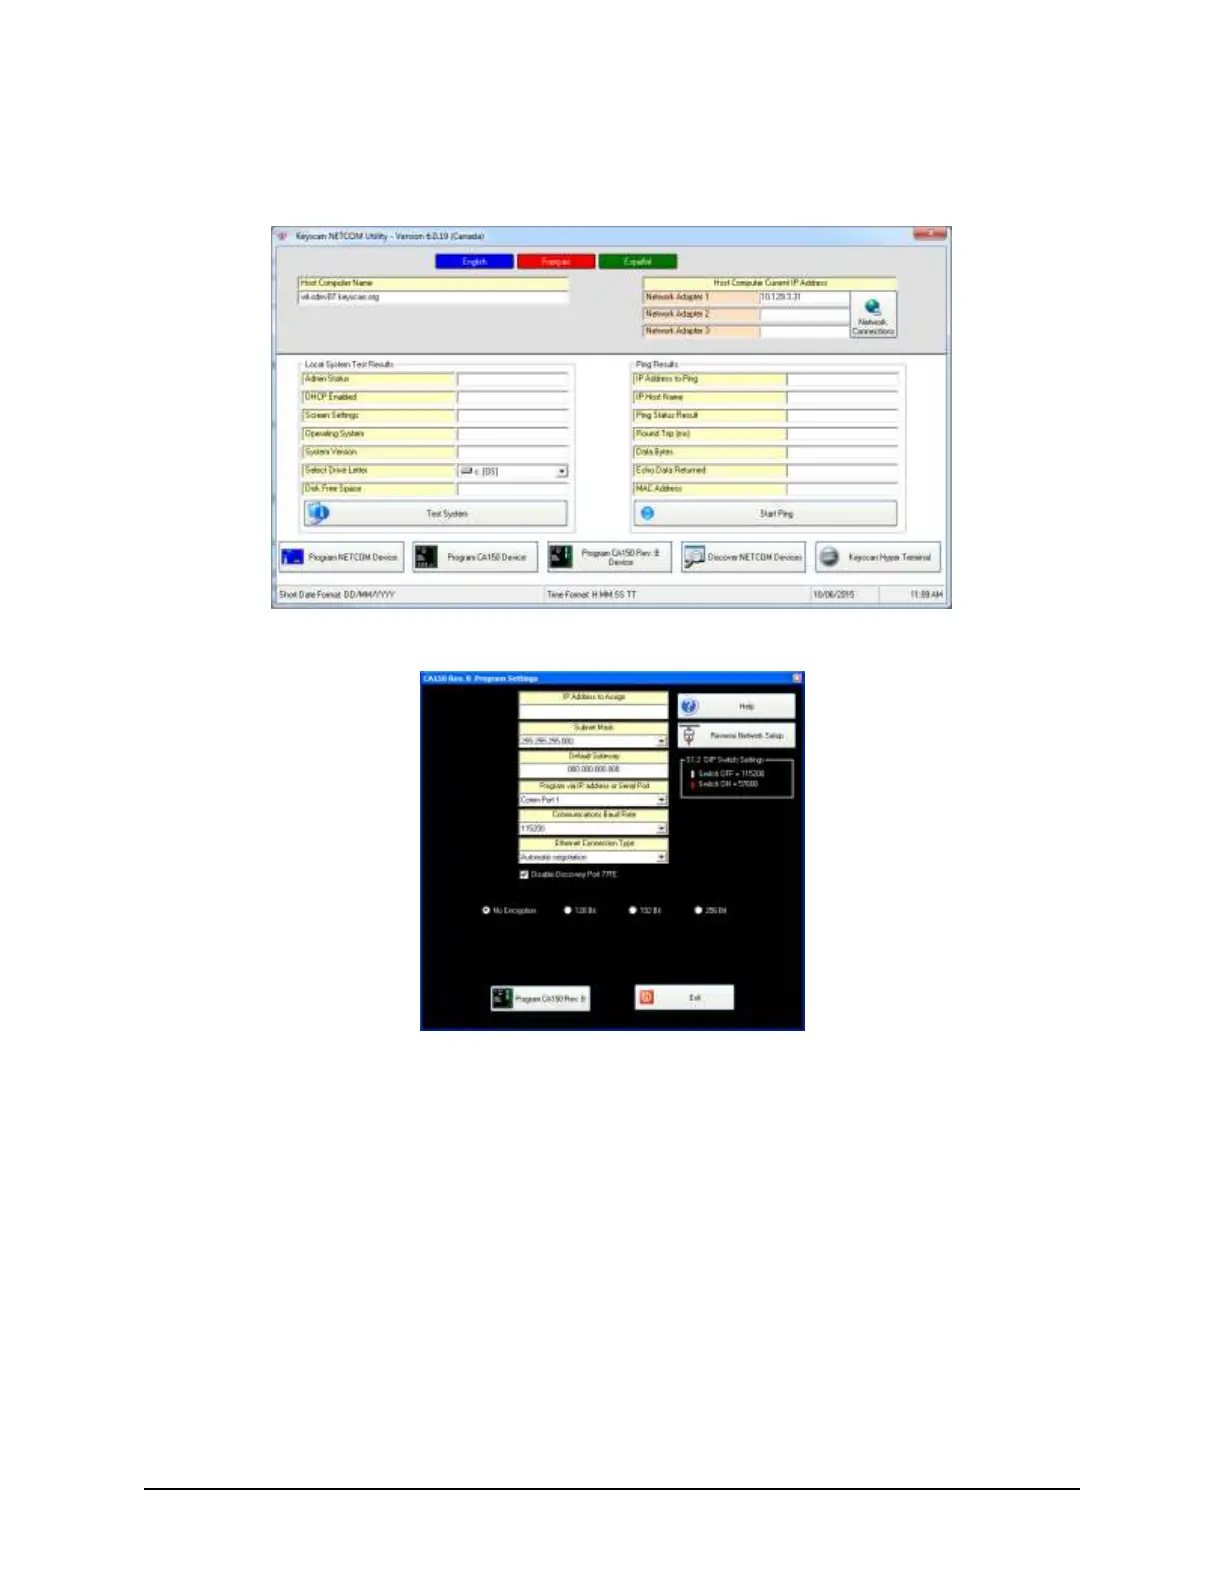
7. From the Keyscan NETCOM Utility screen, select the Program CA150 Rev. B Device button. (The CA150
Rev. B control board has DIP switches.)
8. From the CA150 Rev. B Program Settings screen, enter the IP address assigned to the CA150’s on-board
Ethernet module in the IP Address to Assign field.
9. Click on the down arrow below and to the right of Subnet Mask and select the subnet mask from the drop
down list.
10. If assigned, enter the gateway in the Default Gateway field; otherwise by-pass this step.
11. Click on the down arrow below and to the right of Program via Port. From the drop down list, select the
laptop/PC COM port with the data serial cable connection to the CA150.
12. Click on the down arrow below and to the right of Communications Baud Rate and select the same baud
rate that corresponds to the S1.2 DIP switch setting on the CA150 control unit.
13. Leave Ethernet Connection Type set on Automatic Negotiation unless the IT administrator gives a specific
setting.
If the CA150’s on-board Ethernet module experiences network communication difficulties, you may
have to alter the Ethernet Connection Type from automatic negotiation. (The Ethernet Connection
Type is the network speed & duplex setting). Set the CA150 baud rate so it matches the network
equipment setting. If the network equipment was on an automatic setting, then reconfigure both the
network equipment, which may include routers or switches, and the CA150 Rev. B to a matching fixed