Page 44
Operation
optoNCDT 1700
6.8 Setting Mid-Point
The function „Setting mid-point“ displaces the analog measurement value to the value for the mid-point of the
measurement range, so +5 V respectively 12 mA.
The action „set mid point“ can be activated in three different ways:
- Press the button Zero/Select on the sensor. Afterwards the red LED flashes “Zero”. The initial state is
reached by a second press.
- External Low-Signal at the input “Zero”.
Connect GND 0.5 ... 3 s: SET (mid-point)
Connect GND 3 ... 6 s: RESET (reset)
At firmware version 6.000 using the command “SETZero”, see Chap. 8.5.21
using parameters x = 1 setting ;
using parameters x = 0 reset
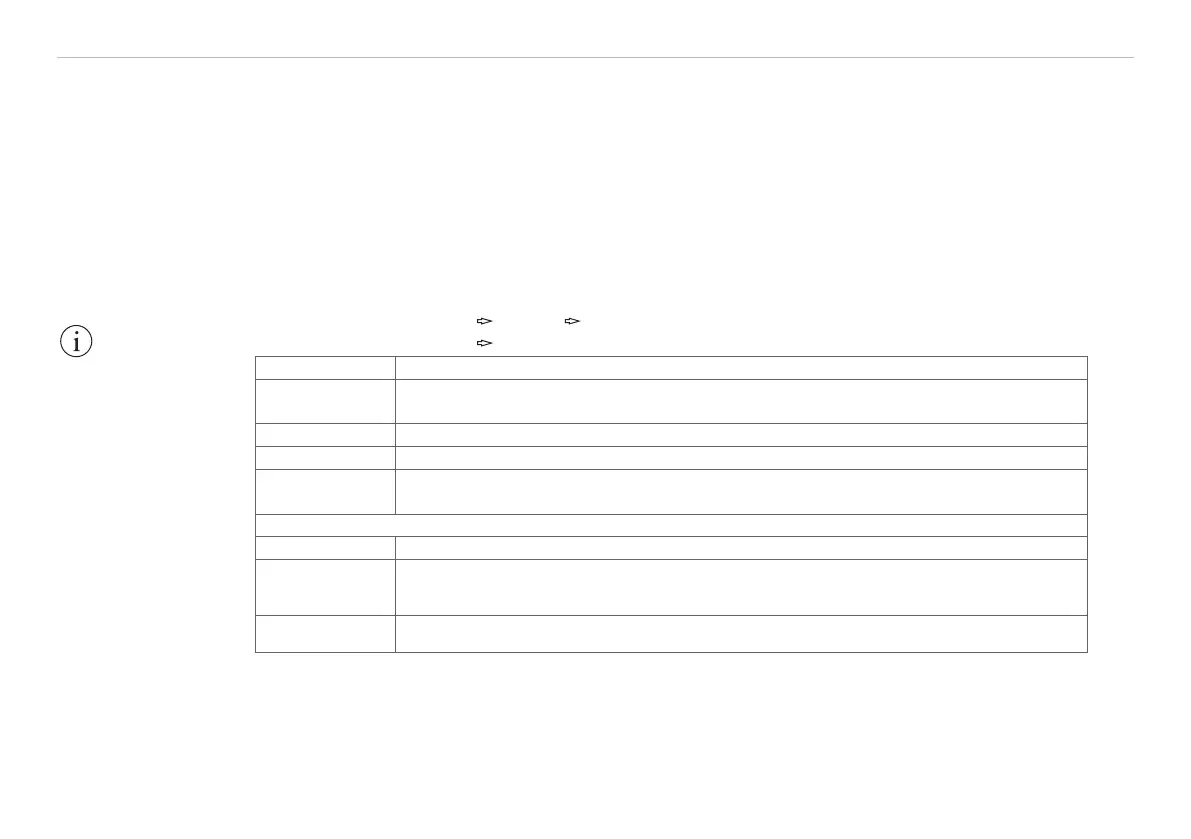
Sequence „Set mid-point“
Operation
mode
error-mode
Setpoint value Centre of the analog area
Step 1 Move object to be measured and sensor to desired position relative to one another.
Step 2
Press Zero key once or connect the “Zero” input to GND for 0.5 up to 3 s or com-
mand “SetZero”
1
.
Output signals after ”Set mid-point”
Indicator „Zero“ LED lights up.
Analog values
U
A
= 5 V or
I
A
= 12 mA
Digital value D
A
= 8184
Fig. 24 Sequence for setting the mid-point
1) Possible at Firmware version 6.0
IMPORTANT!
“Master“ is only
available in “Switch
mode“ and “Set mid-
point“ is only available
in “Error mode“, see
Chap. 6.5.
“Master“ or “Set mid-
point“ requires that an
object to be measured
is within the measure-
ment range.
“Set Midpoint“ has an
influence on the
analog and digital
1
output.