OM-278680 Page 34
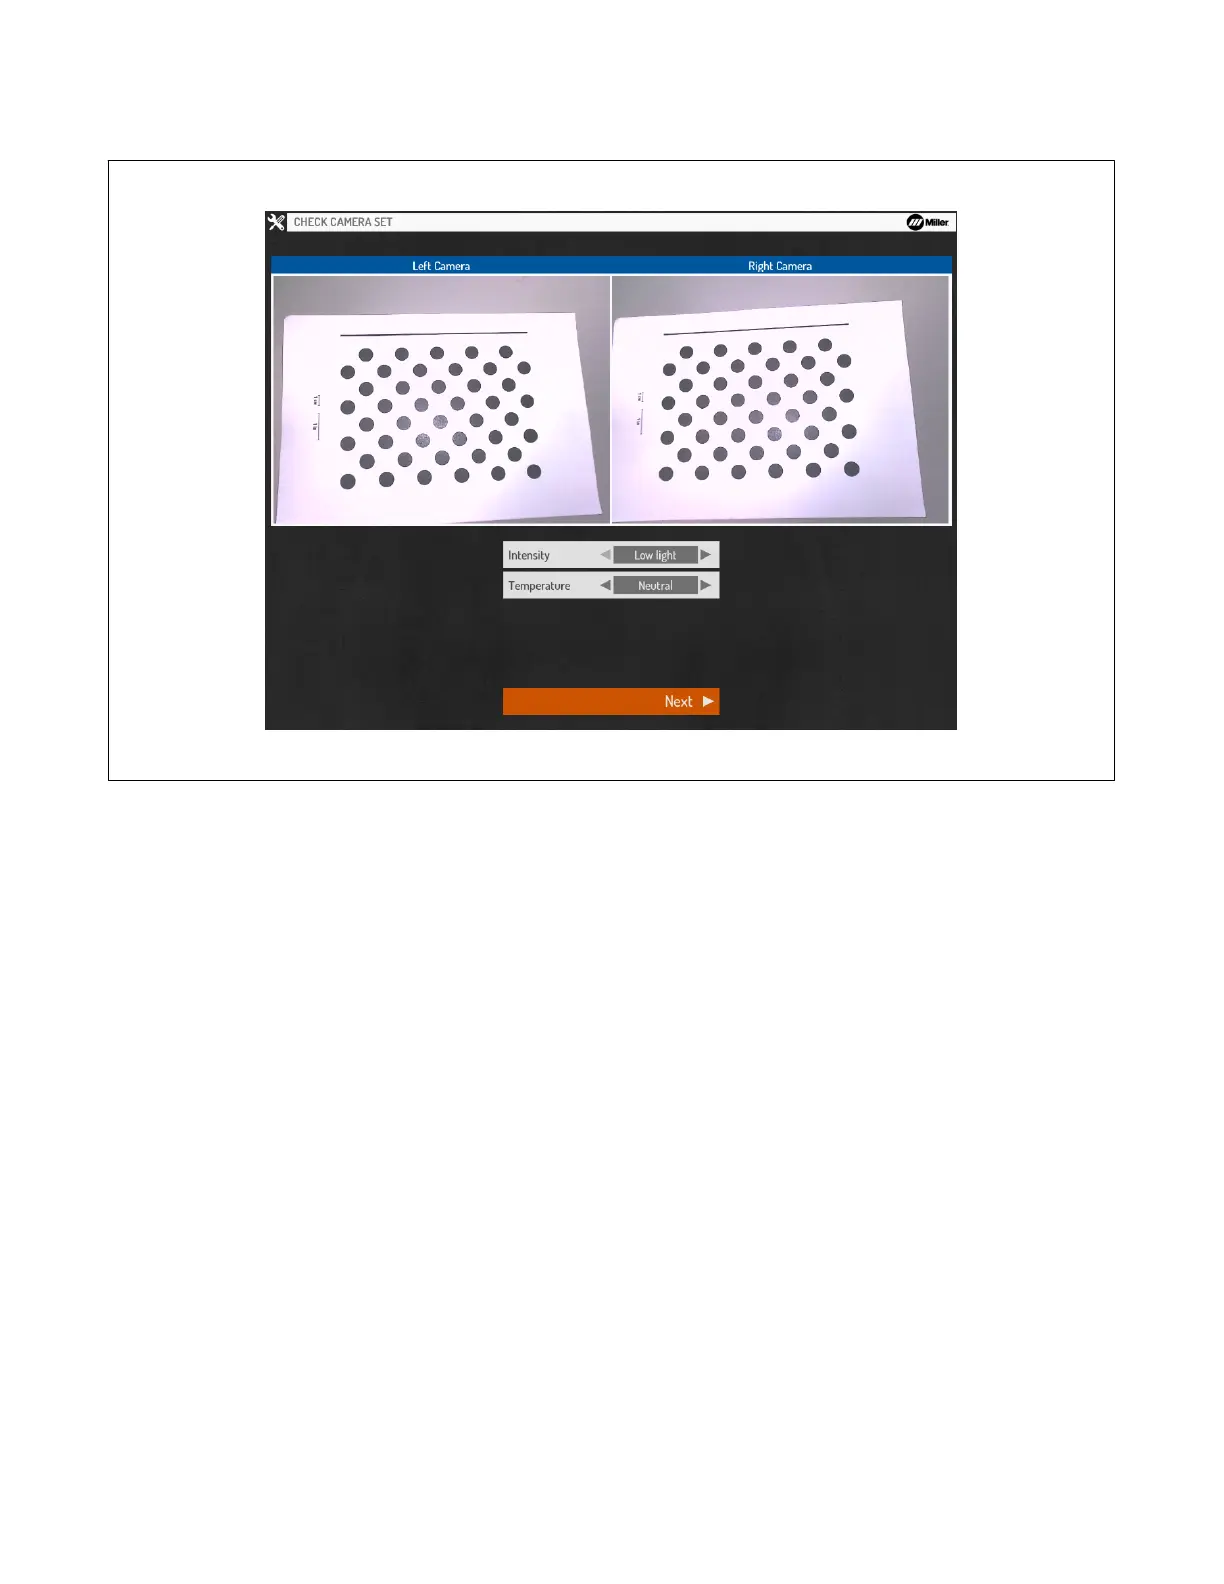
1. Check Camera Set
Adjust the Intensity and Color Temperature as needed until the displayed images closely match how they appear in the real world. Select Next to
proceed.
Figure 8-14. Checking Camera Set
2. Auto-Focus Cameras
Locate the camera calibration sheet (supplied with the simulator and also available to print from the AugmentedArc product website). Place it on a
flat surface. Hold the helmet over the calibration sheet so that the helmet cameras are facing straight down. Orient the helmet so that the
Alignment Guide Reference Line and the Calibration Sheet Reference Line are aligned. Move the helmet closer to or farther from the calibration
sheet until the Alignment Guide Border and the Calibration Sheet Border match (This should occur when the helmet is about 14 in. away from the
calibration sheet).
It may be easiest to achieve proper helmet alignment while wearing the helmet and looking at the helmet display.
If printing calibration sheet, verify printed measurements are accurate using a ruler or tape measure.