OM-278680 Page 35
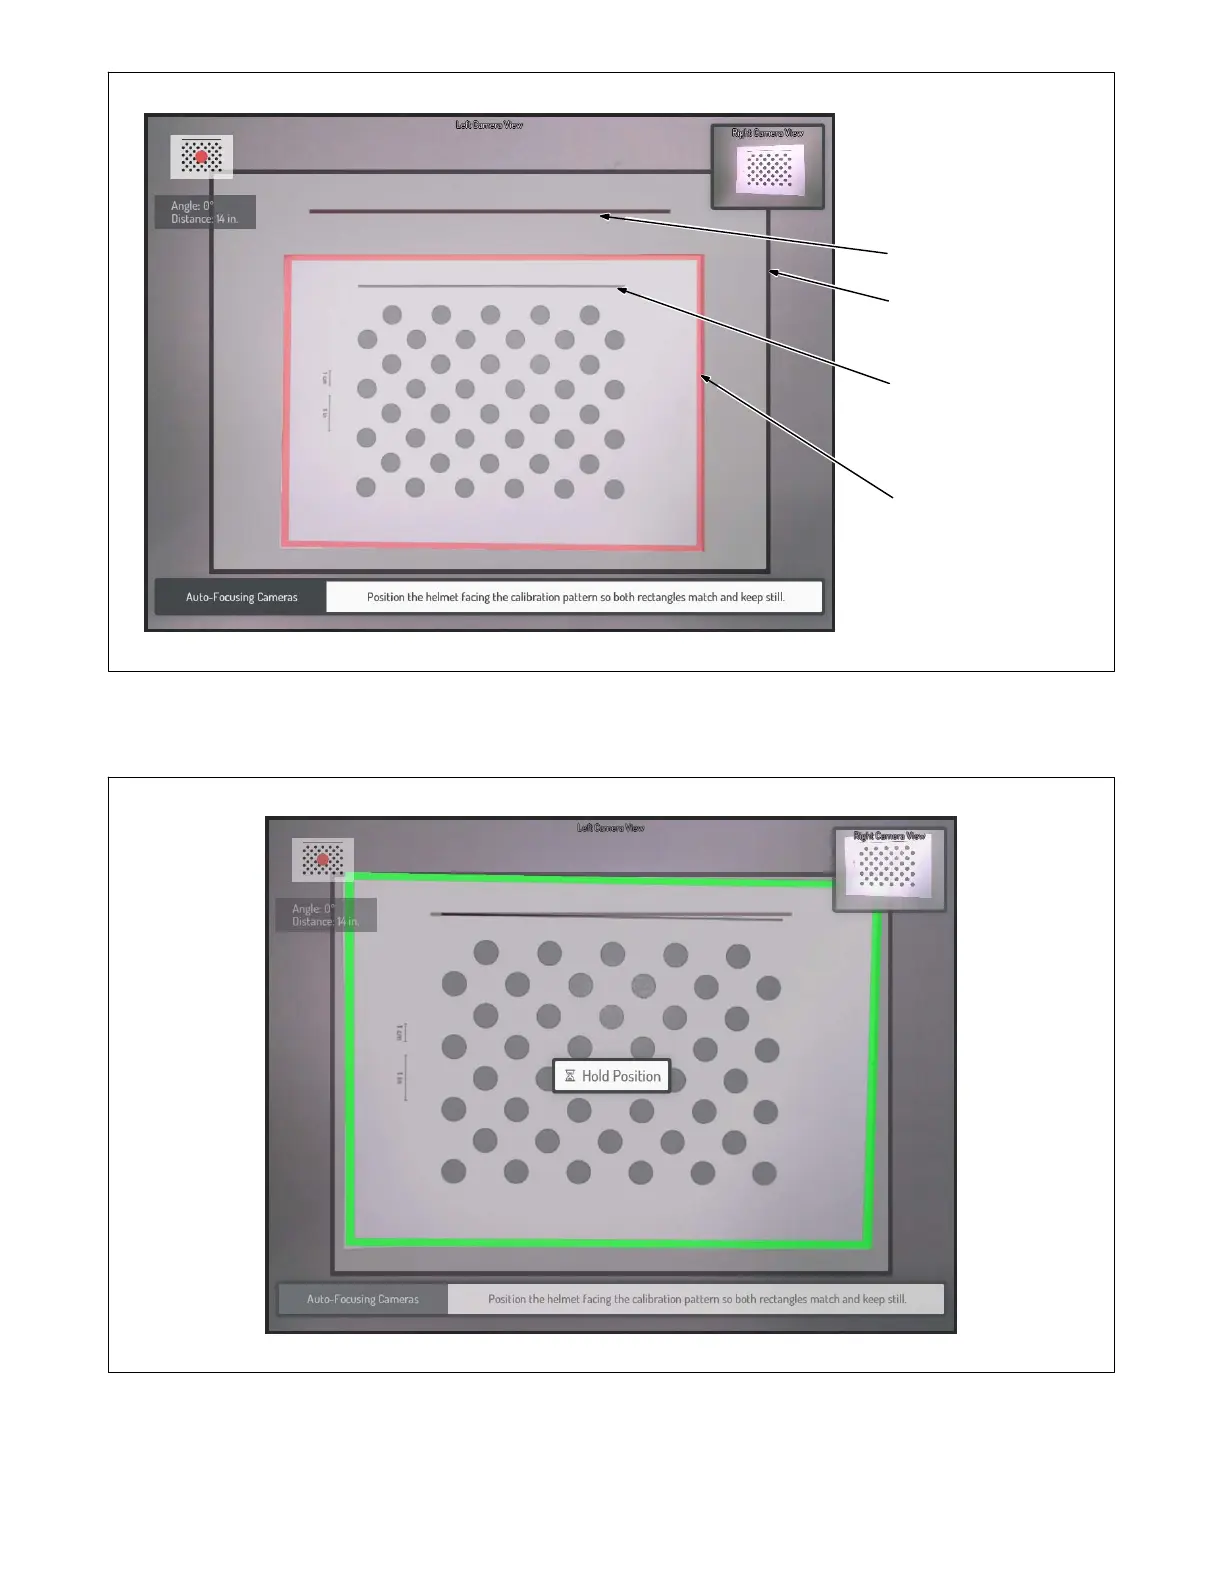
1 Alignment Guide
Reference Line
2 Alignment Guide Border
3 Calibration Sheet
Reference Line
4 Calibration Sheet Border
1
2
3
4
Figure 8-15. Auto-Focus Cameras
When the helmet is positioned properly, the border of the calibration sheet will turn green and a message will appear that says Hold Position.
Hold the helmet still for a few seconds until the auto-focus process is completed. After completion, it will automatically proceed to the next screen.
Figure 8-16. Hold Position
3. Confirm Focus
While keeping the helmet in the same position and orientation, the display will show the Left Camera’s view of the calibration sheet. Observe the
calibration sheet dots. If there is any perceived blur, press Cancel and repeat the auto-focus process. If they appear to be in focus (without any
significant blur), press OK to proceed. On the next screen, repeat the process for the Right Camera.