8-10
8.13.3 Remove the Rear Cover Plate of the Work Surface
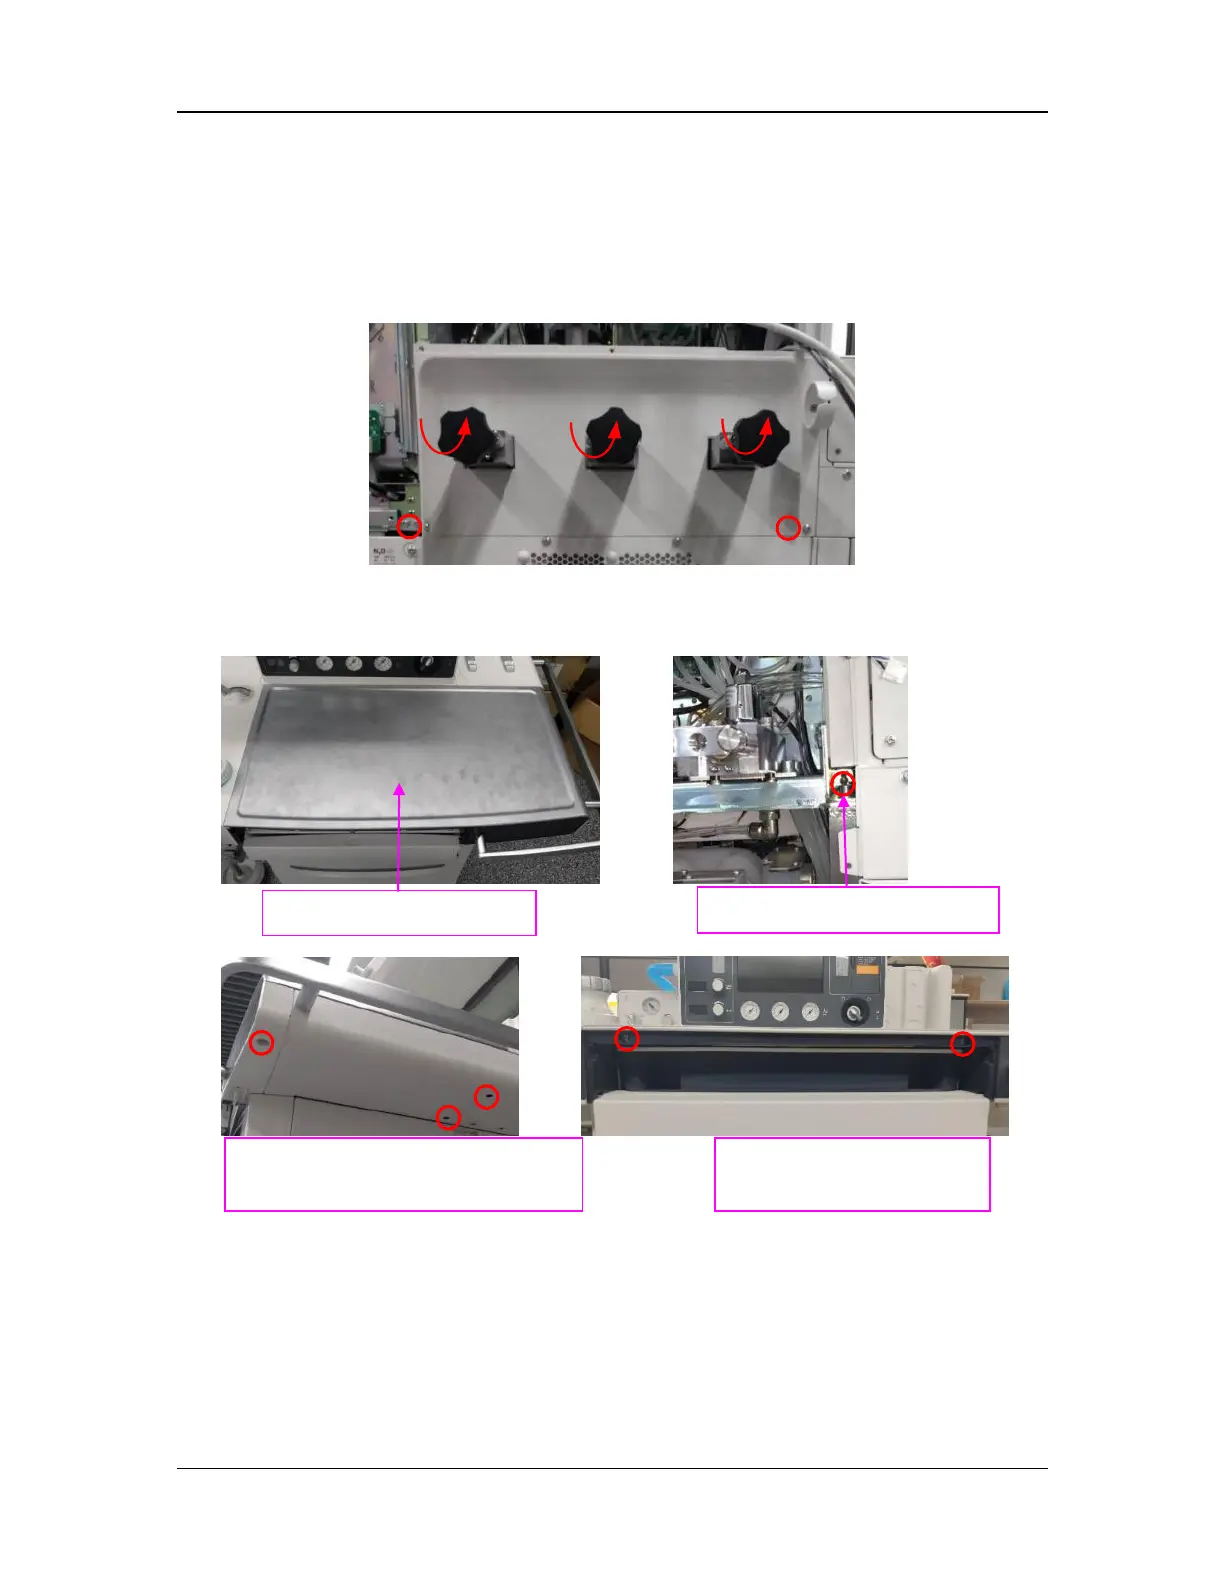
1. Turn the three pentagonal knobs on the cylinder yoke assembly counterclockwise to remove
the knobs (if there is a cylinder yoke).
2. Remove the two screws from the rear cover plate of the work surface with the Phillips
screwdriver to remove the rear cover plate.
8.13.4 Remove the Work Surface Cover Plate FRU
Loosen the four captive screws with the Phillips screwdriver, remove the two screws, and remove
the work surface cover plate.
8.13.5 Remove the Instrument Panel Assembly
1. Remove the five screws (marked by ○ in Figure A) from the instrument panel assembly and
loosen the two captive screws (marked by △ in Figure A) with the Phillips screwdriver.
2. Open the BFCS door, remove the set screws fastening the air needle valve knob and O2
needle valve knob with the M3 hexagon screw spanner, and take out of the knobs, as shown
in Figure B.
One captive screw on the rear
Three captive screws on the bottom
right
Open the front VE door and
remove the two screws

 Loading...
