2 System Performance and Workflow
2-10
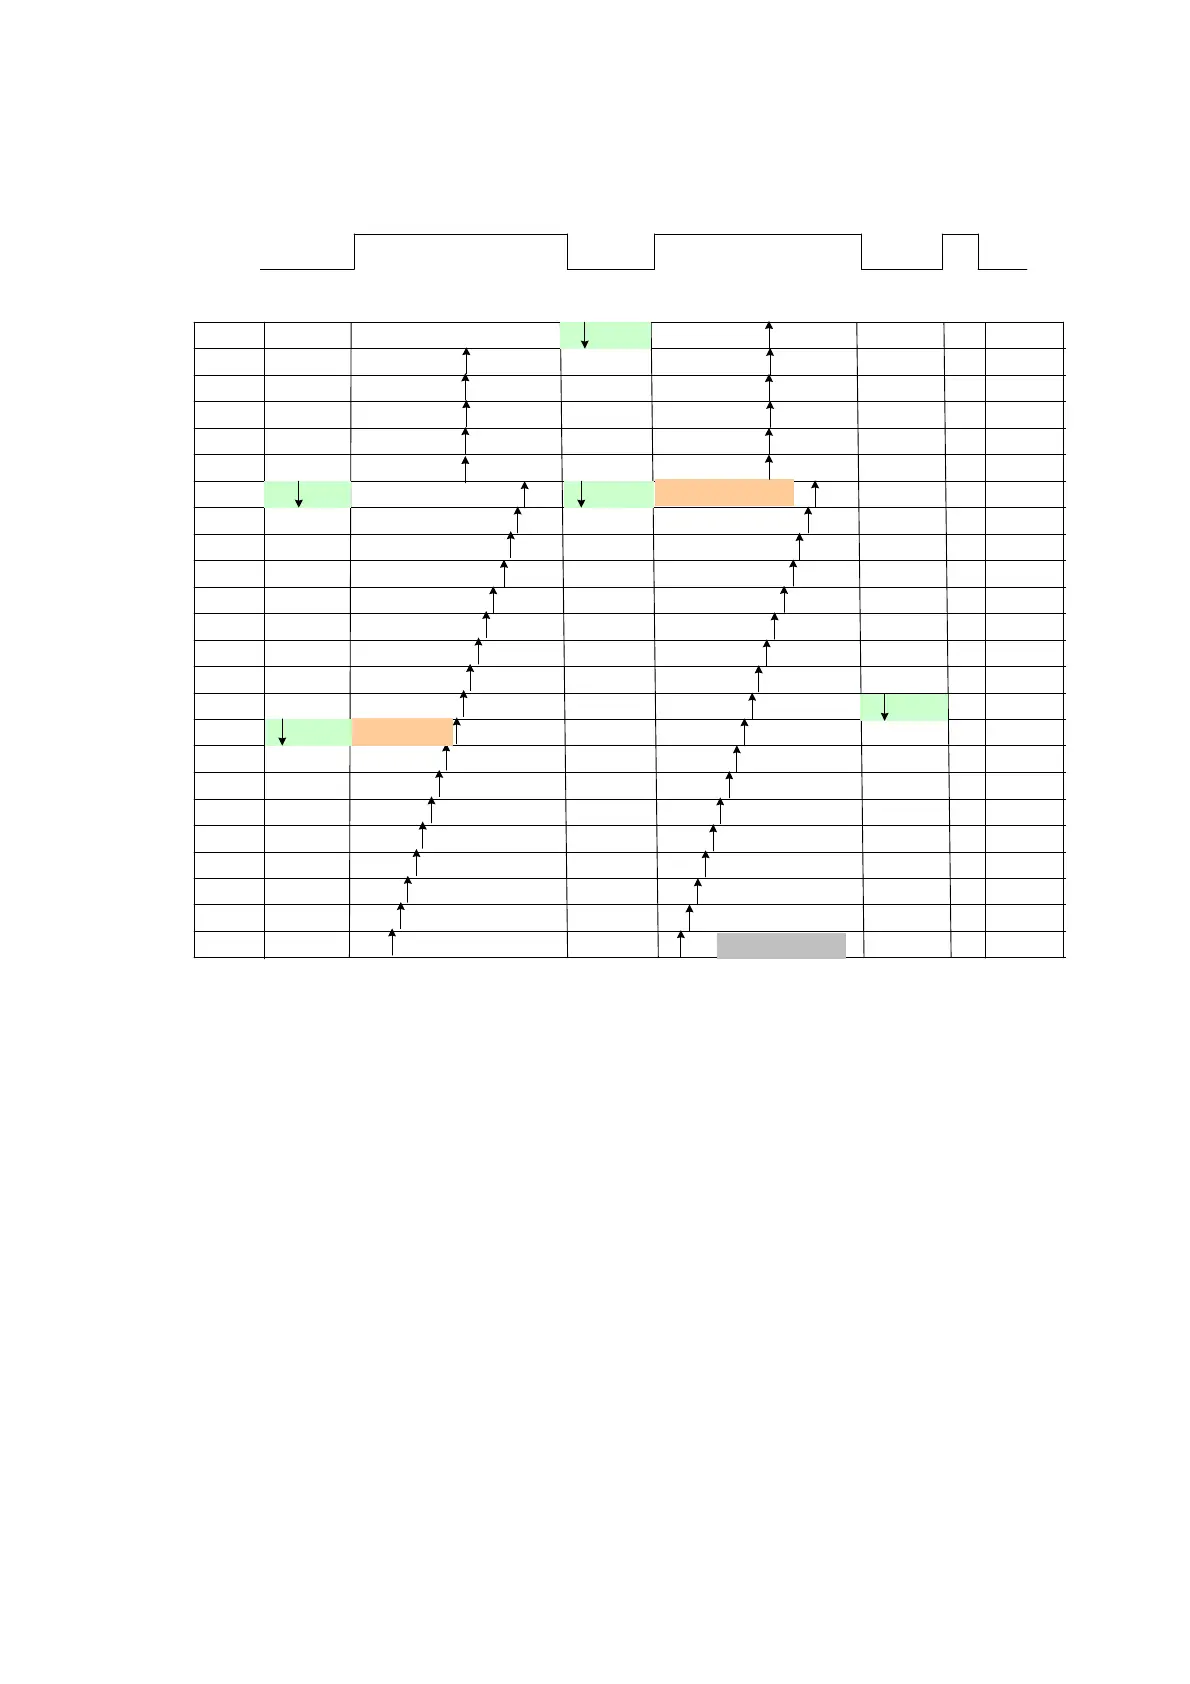
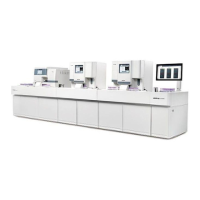
Figure 2-3 Workflow for Single-/Double-reagent Tests
Stop
StopStop
Reaction
disk
Period
Position
N=1 R1 33#cuvette
34#cuvetteN=2
……
N=7
N=8
N=9
N=10
N=11
MIX SS
P1
P2
P3
P4
P5
P6
P7
P8
P9
P10
P11
P12
P13
P14
P15
P16
P17
P18
P19
P20
P21
P22 P23
P24
P25
N=16
N=15
N=14
N=13
N=12
N=23
N=22
N=21
N=20
N=19
N=18
N=17
N=27
N=26
N=25
N=24
2#cuvette
3#cuvette
4#cuvette
5#cuvette
6#cuvette
7#cuvette
8#cuvette
9#cuvette
10#cuvette
11#cuvette
R2
MIX R2
12#cuvette
13#cuvette
14#cuvette
15#cuvette
16#cuvette
17#cuvette
18#cuvette
19#cuvette
……
39#cuvette
40#cuvette
1#cuvette
End
Single-reagent
reaction starts
Double-reagent
reaction starts
finish the photoelectric collection and
stopping the reaction disk at R1 dispensing
position)
23 cuvettes (rotating N circles +23 cuvettes to
finish the photoelectric collection and stopping
the reaction disk at R2 dispensing position)
9 cuvettes
P27P26
P28
P29
P30
P31
P32
P33
P34
P35
36.0
Stop
RB1
RB2
RB13
RB16
RB14
RB12
RB3
RB15
RB17
……
……
……
In the figure above, RB1-RB17 are the 17 reagent blank points measured after
R1 is dispensed and before S is dispensed.P1-P35 are the 35 measuring points
after sample is dispensed and mixed to the time when the test with the longest
reaction time is finished.The measuring point, at which sample is dispensed but
not mixed, is invalid and not used in calculation.