4 Units Description
4-30
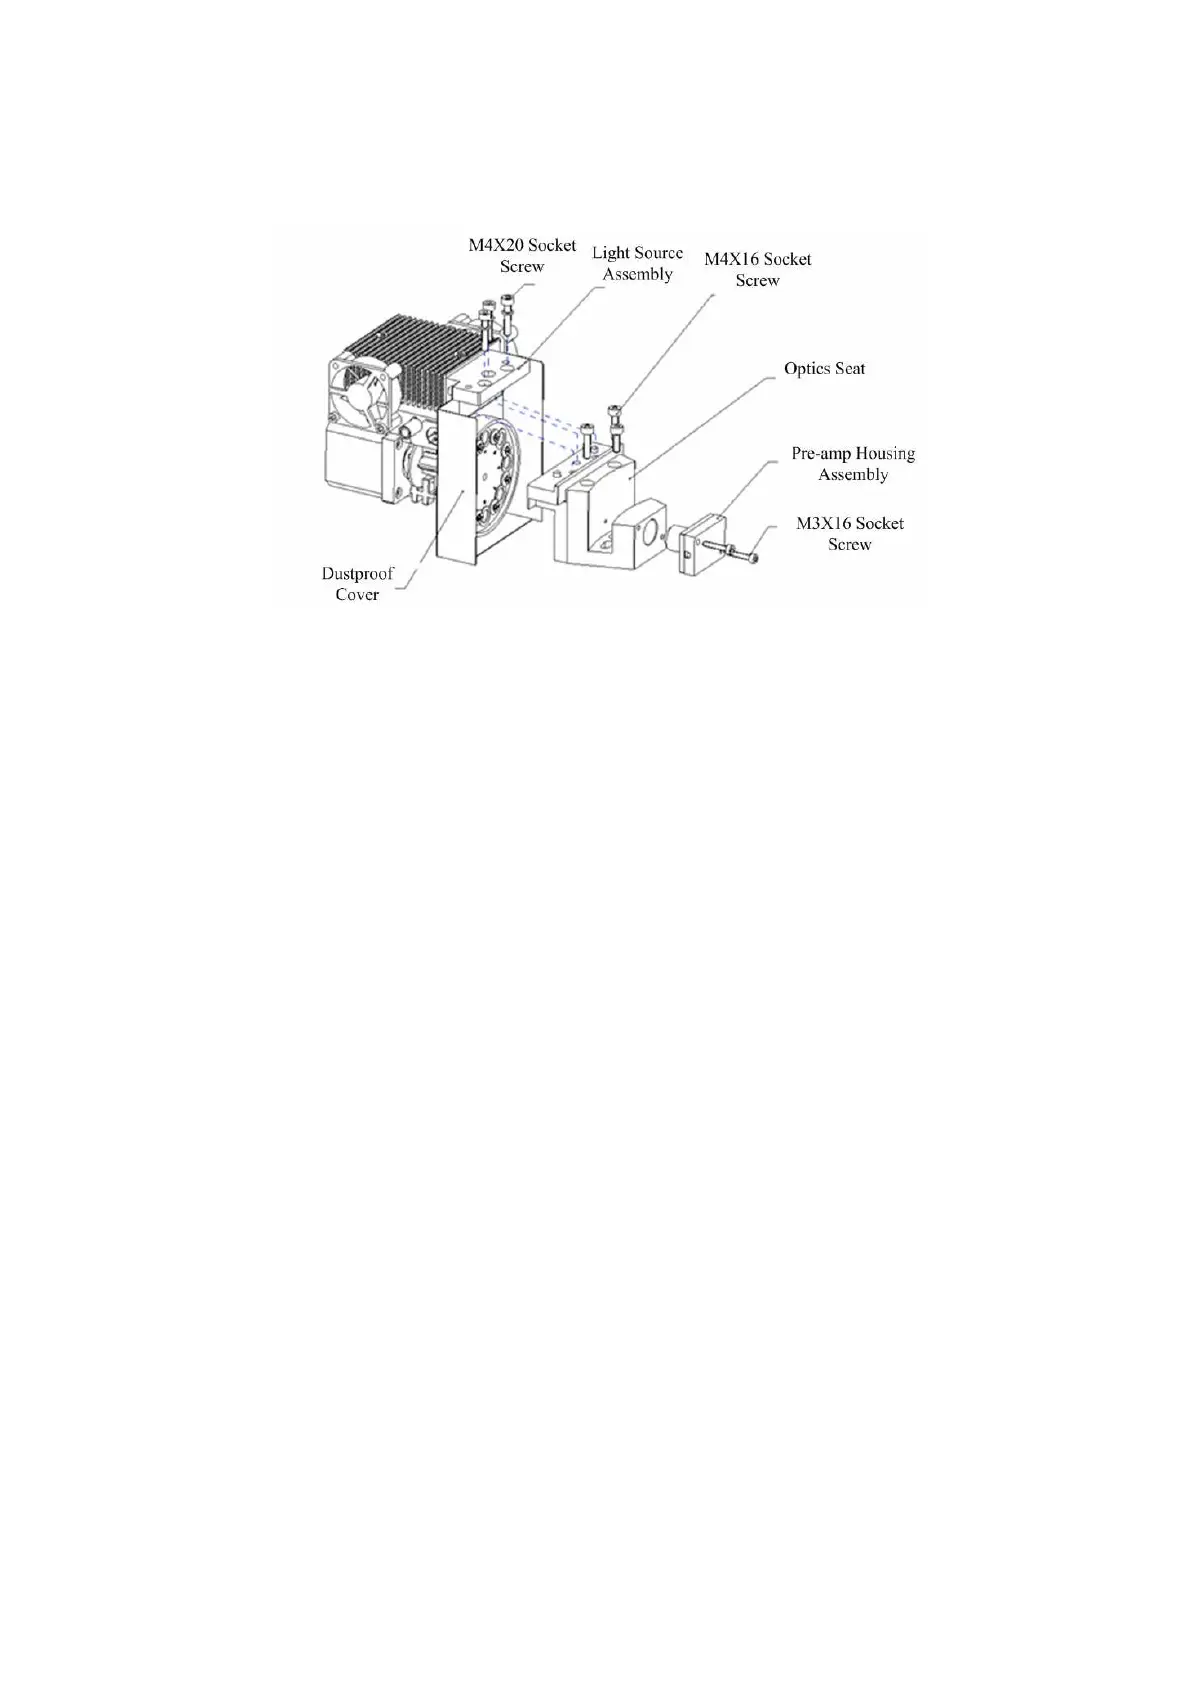
4.6.3 Dismounting and Mounting Photometric Unit
Figure 4-35 Dismounting Photometric Unit
Dismounting steps are as follows.
1. Remove the rear panel of the analyzer and the table panel 1 above the light
source aassembly.
2. Remove the light source assembly: Loosen the three M4X20 socket screws and
unplug the connectors of the lamp wire, the fan wire, the motor wire and the
sensor wire. And then remove the light source assembly.
3. Remove the forward optics assembly: Remove the reaction disk cover and the
reaction disk. Loosen the three M4X16 socket screws and remove the forward
optics assembly.
4. Remove the pre-amp housing assembly: The pre-amp housing assembly is
installed on the forward optics assembly. Unscrew the two M3X16 socket screws
and remove the pre-amp housing assembly.
5. Reserve the steps described above to mounting the photometric unit
6. Dismounting and mounting the AD housing is independent on what to do with the
light source assembly and the forward optics assembly.
Precautions:
1. The light source assembly should be inclined slightly to the reaction disk when
removed together with the dustproof cover. Be careful not to scrape the filter.
2. You can remove the dustproof cover and then remove the light source assembly.
Thus it is easier to operate.
3. The forward optics assembly is connected with the reaction disk by matching the
two pins at the bottom of the optics seat with the two corresponding pin holes in
the reaction disk. It may be tight when taking out the forward optics assembly due
to the firm conjunction.
4. Unplug the connectors of the wire before removing the assemblies and plug the
connectors after installation.
5. Be careful not to scrape the surface of the filter when removing the light source
assembly.