44/128
T25 System Manual Part 2: Initial Setup without a Computer
© MOBOTIX AG • Security-Vision-Systems • Made in Germany
www.mobotix.com • sales@mobotix.com
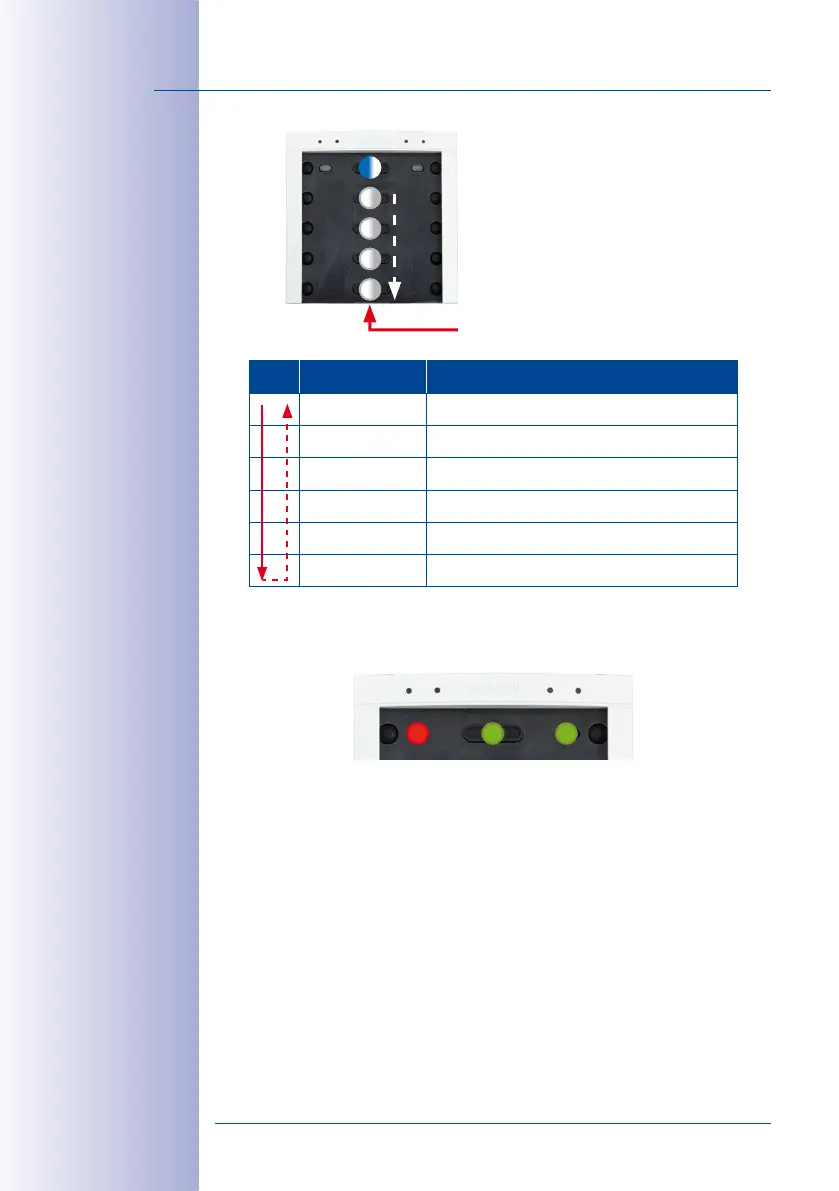
Pattern
Button Set Description
a
MX-Bell1-Button-F1
LED1 permanently blue, 2to 5 flashing white
b
MX-Bell1-Button-F2
LED1 permanently blue, 2+3, 4+5 sequence white
c
MX-Bell1-Button-F3
LED1 permanently blue, 2, 3, 4+5 sequence white
d
MX-Bell1-Button-F4
LED1 permanently blue, 2, 3, 4, 5 sequence white
e
MX-Bell1-Button-05
LEDs1, 2, 3, 4, 5 sequence white
f
MX-Bell1-Button-XL1
LEDs1to 5 flashing white simultaneously
Once you have found the proper pattern, keep any one of the buttons at the center pressed
until the LEDs are flashing repeatedly in a sequence. Next, the top center and right buttons
(OK and Letter) light up green and the button at the top left (ESC) lights up red.
The button contacts are now locked until the function and bell buttons have been inserted
and the admin card has been trained.
Press any one of these buttons
Pattern1 (MX-Bell1-Button-F1):
LED1 permanently blue (function button) LEDs
2to 5 sequence white (4bell buttons)
1
3
2
4
5
LED sequence