45/128
Step2: Set Up the BellRFID Access Module
© MOBOTIX AG • Security-Vision-Systems • Made in Germany
www.mobotix.com • sales@mobotix.com
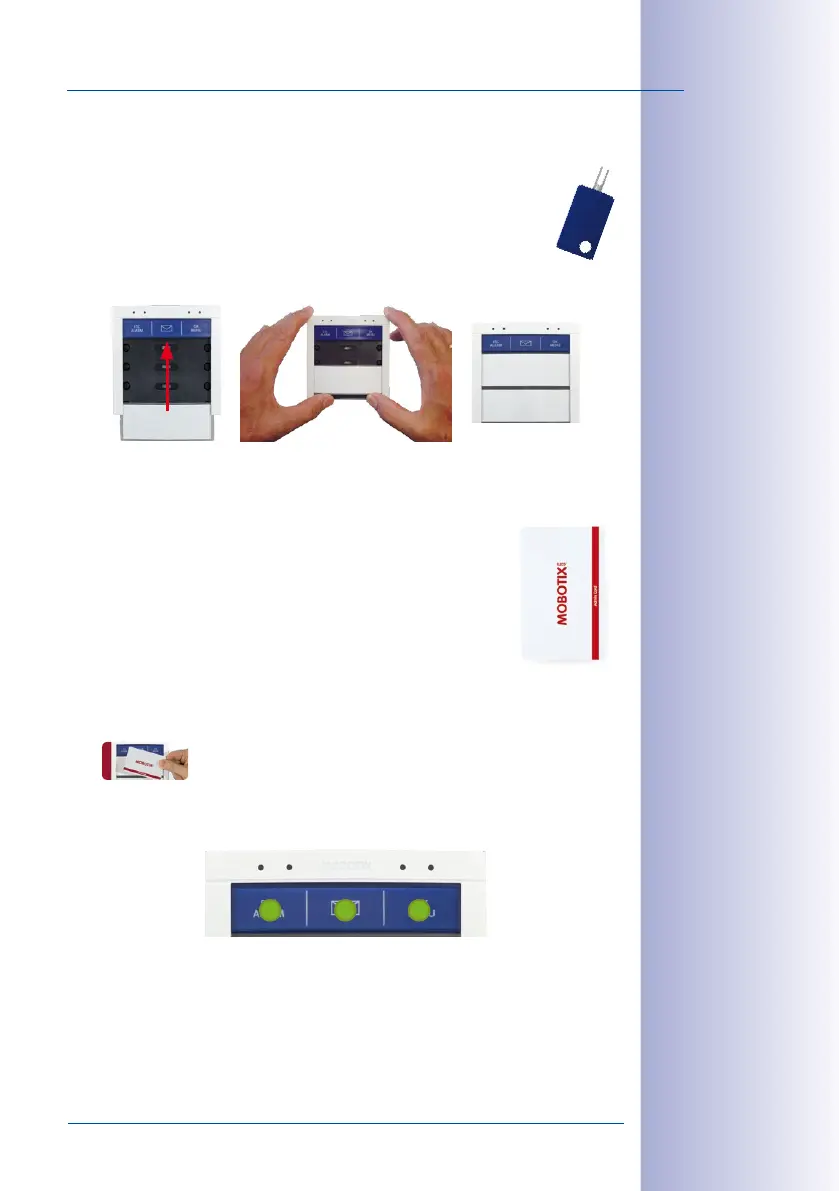
2.3.3 Inserting the Function/Bell Buttons
In order to insert the function or bell buttons, you need to remove the BellRFID
module from the frame of the door station (if you have not already done so).
Use the blue MOBOTIX key for unlocking the module.
Insert the function and bell buttons in the proper order by inserting the ele
-
ments from the bottom (e.g., the blue function button first). In order to avoid dam-
aging the buttons, press the elements into the module using two thumbs as shown.
Click the BellRFID module with the buttons into the IP Video Door Station as described in step2.
2.3.4 Training the Admin Card
Now that you have entered the Super PIN and inserted the buttons,
you need to train the Admin card. This card is used as the “master key”
for authentication purposes and is required for training and deleting
user cards, for example. For every-day use, however (opening doors,
mailbox features), you only need the blue user cards. Note that you
should always keep the admin card together with the Product Pass
of the IP Video Door Station in a safe place.
Hold the admin card in front of the BellRFID module for 5seconds until the sound stops.
The LEDs light up in a sequence to confirm that the card has been trained.
All three LEDs at the top are now green to show that the initial operation has been com
-
pleted successfully. The button lock is now removed.
Continue by training the user cards (next section) or finish setting up the door station.
The Jones Family
The Jones Family
Dr. Jones, MD
The Jones Family