43/128
Step2: Set Up the BellRFID Access Module
© MOBOTIX AG • Security-Vision-Systems • Made in Germany
www.mobotix.com • sales@mobotix.com
Note
If you entered dierent Super PINs or more than 60 seconds passed between entering
the PIN and confirming, the module emits a warning sound and returns to the state
after finishing the auto configuration. In such a case, you need to repeat this step.
Remove the keypad insert and continue with the next step.
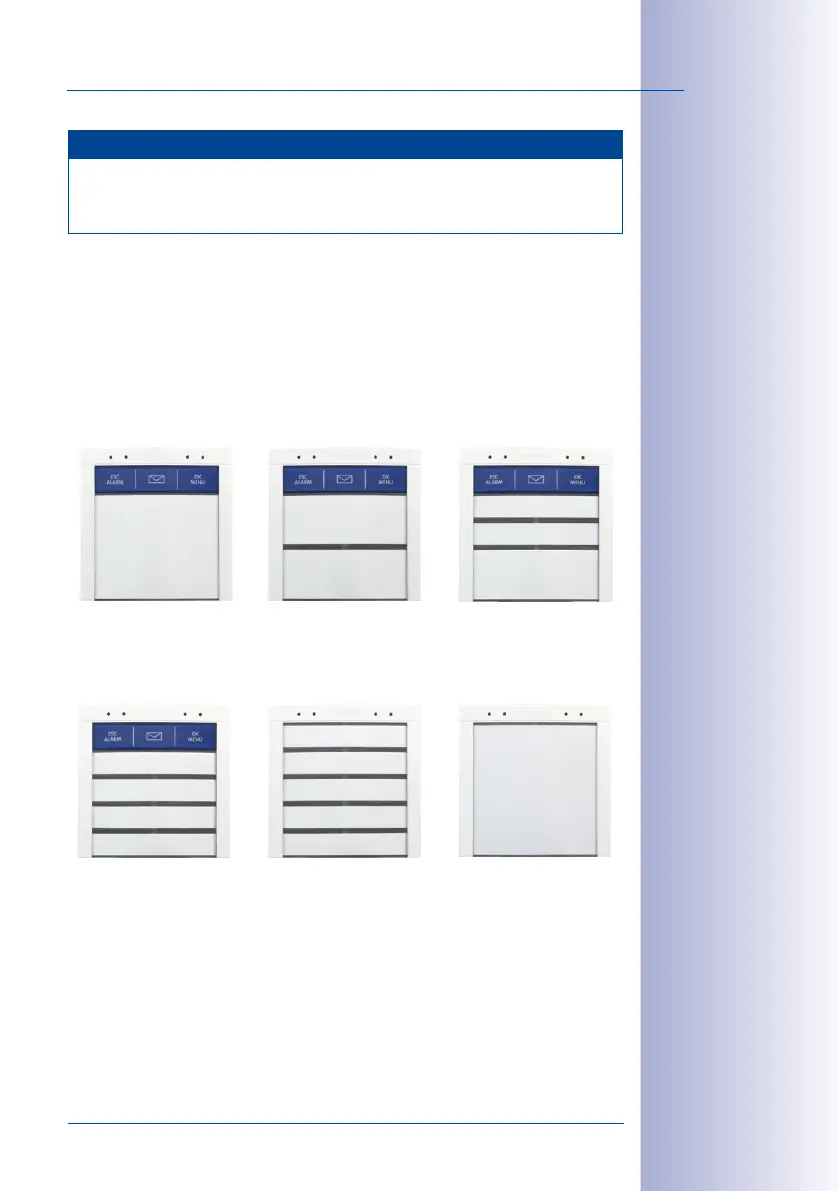
2.3.2 Setting the Bell Button Set to Be Installed
Each button set contains pre-cut name plates made of UV-resistant paper. If required, you
can replace the button sets later on– in the same base module! In order to configure the
system using BellRFID, the bell buttons are replaced by a keypad insert, which is delivered
with the base module.
Depending on the bell button set, you need to select one of the six possible button layouts.
You can select the applicable bell button set by pressing any one of the button con
-
tacts in the center. The module shows the current bell button set by flashing the LEDs in
a specific manner (see table below). The configuration starts with patterna; pressing any
button switches to the next pattern in ascending order. After the last pattern, the module
returns to patterna.
MX-Bell1-Button-F1
Large bell button
with function button
The Jones
Family
MX-Bell1-Button-F2
2 medium-size bell buttons
with function button
The Jones Family
Dr. Jones, MD
MX-Bell1-Button-F3
1 large, 2 small bell buttons
with function button
Cindy Jones
Thomas Jones
Dr. Jones, MD
The Jones
Family
MX-Bell1-Button-XL1
XL bell button
(no function button)
MX-Bell1-Button-F4
4 small bell buttons
with function button
Cindy Jones
Thomas Jones
The Jones Family
Dr. Jones, MD
MX-Bell1-Button-05
5 small bell buttons
(no function button)
Caroline Jones
Cindy Jones
Thomas Jones
The Jones Family
Dr. Jones, MD