Service ManualY100250-4 9-5
9.2.3 MECHANICAL ASSEMBLY DISASSEMBLY/REASSEMBLY
- Remove the printer case (section 9.2.1) and console (section 9.2.2).
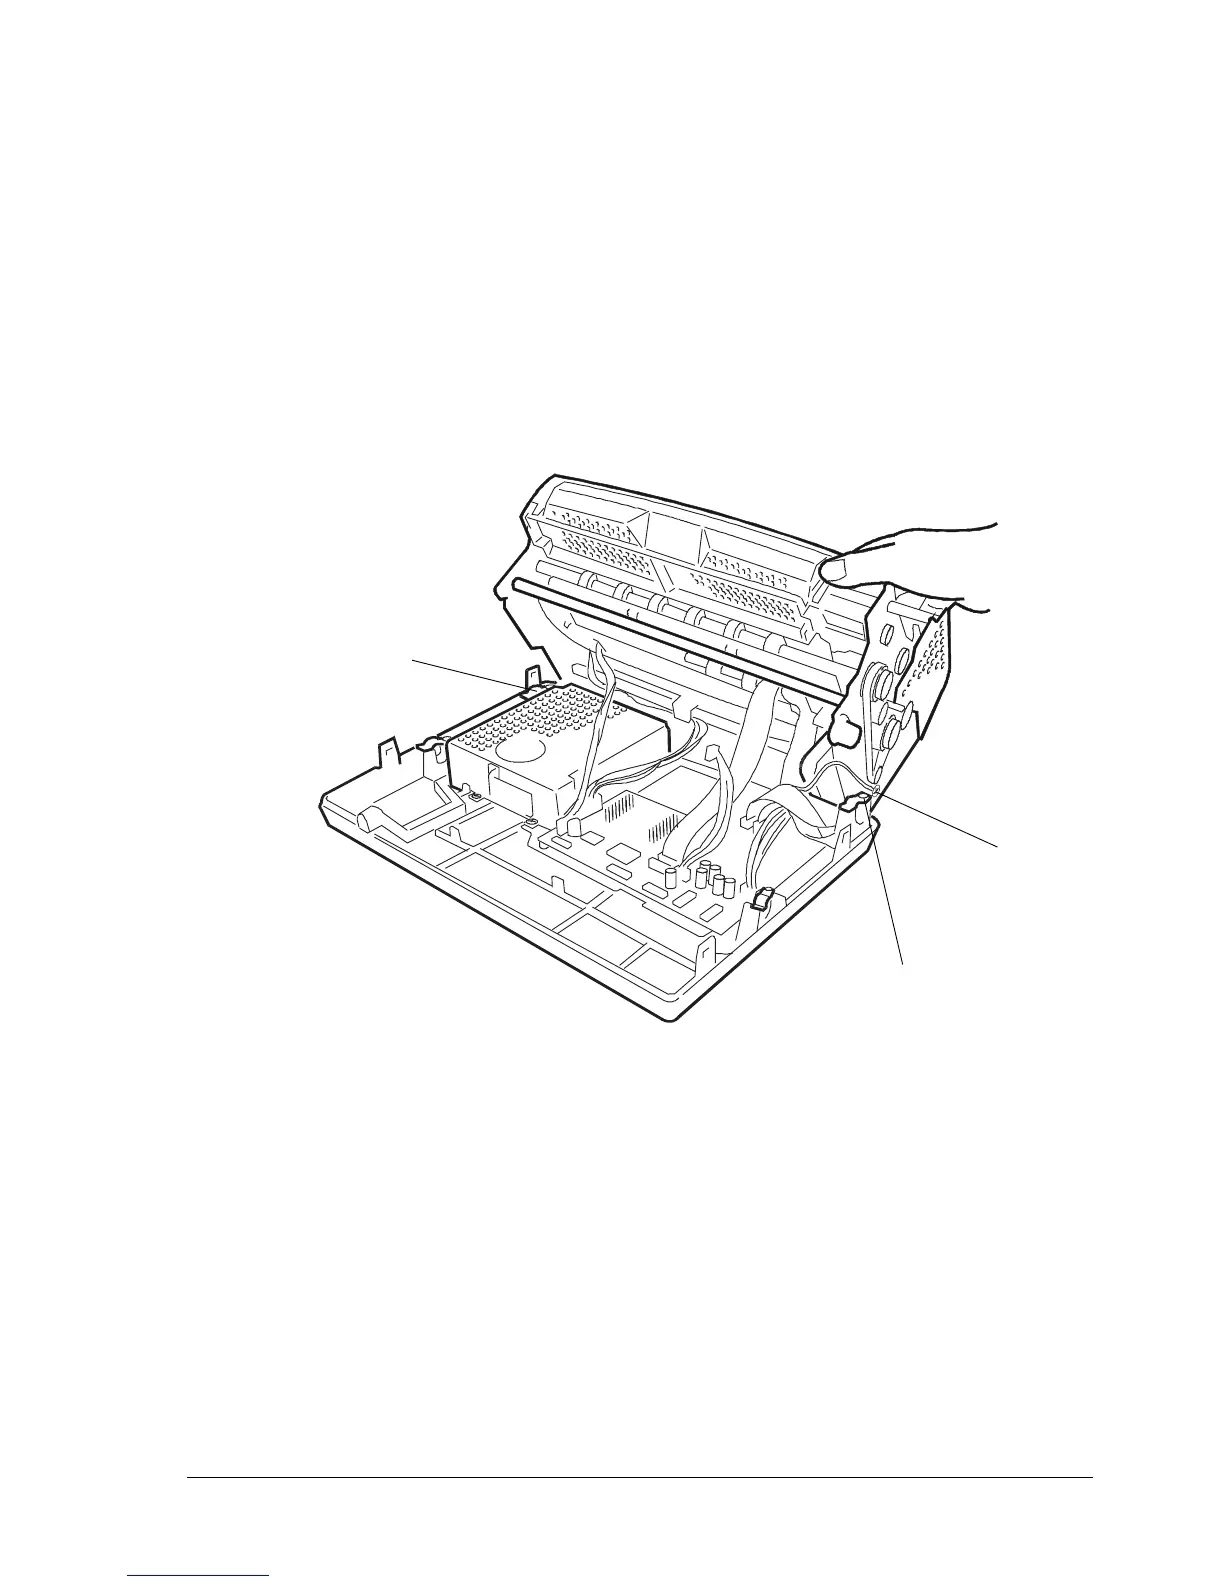
- Lift the front part of the mechanical assembly off the base of the printer, partly rotating it until you are
able to reach the connectors on the main board.
- Unplug all the cables connecting the mechanical assembly to the main board, with the exception of
the main board-to-power supply unit connection cable.
- Loosen screws (1) of the plates that secure the assembly's rear rubber stoppers so that the entire
mechanical assembly is released.
- Remove screw (2) that secures the ground wires.
- Lift the entire mechanical assembly from the base of the printer.
Fig. 9-3
2
1
1